Custom Forms and Creative Briefs
Both Custom Forms and Creative Briefs are pre-formatted and delimited documents that can be used in any job and are used as schema to complete relevant information for the project you need to perform. The first step is to create templates to be used in any project. This section is available under Jobs > Setup.
Creative Briefs
Now let's review how you can maintain the creative information about a Job. As you know, in the initial planning stage of the Job, you may lay out the objectives of the Job -what are we planning to do with this Job, why are we planning to do this Job, who is the target audience, what do we want to 'sell' them, why do we want to sell them, etc.
These questions are specific to your company. The culmination of the question and answer set is called a creative brief or creative work plan. You can build a template of questions for different scenarios, so they can later be used in different projects.
Under Jobs > Setup > Creative Brief you can add new templates and review or make changes to existing ones.
To add a new template, click on the plus icon on the top right of this window. You will need to enter a code and title, select the number of lines you need (once created, you can always add more lines) and you can start typing your questions.
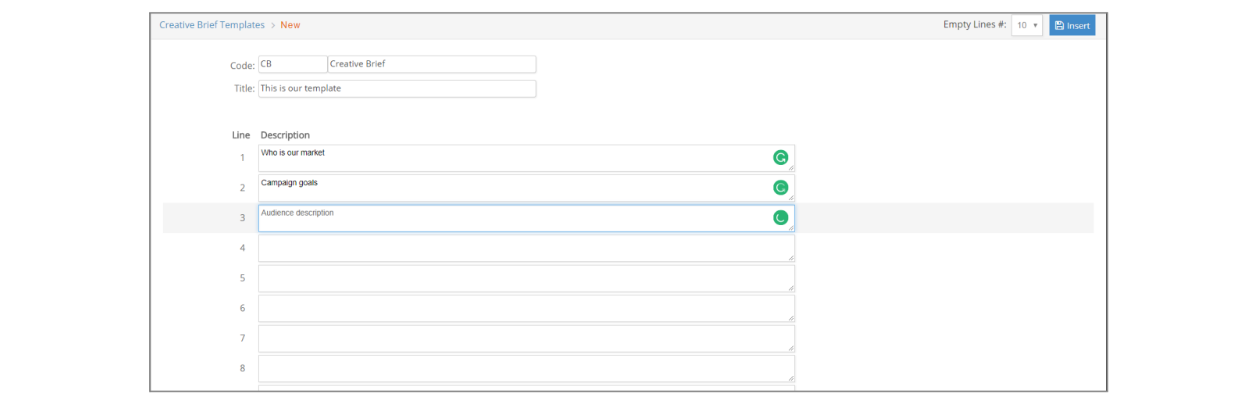
Click insert when done.
When reviewing your existing templates, use the add icon ( ) to add lines, delete icon (
 ) to delete lines or red ‘x’ icon (
 ) to totally delete the template.
Custom Forms
Custom Forms are specifications and forms documents that can be created as templates, to later incorporate them in your specific jobs. Possible uses for custom Specification Templates include print ad specs, collateral print specs, media traffic instructions, change in order, estimate footers, etc.
To review existing custom forms or create a new one, go to Jobs > Setup > Custom Jobs Form.
To add a new custom form, select a type from the ‘add New...’ box on the top right of this window. You will need to enter a title before you can start building your form.
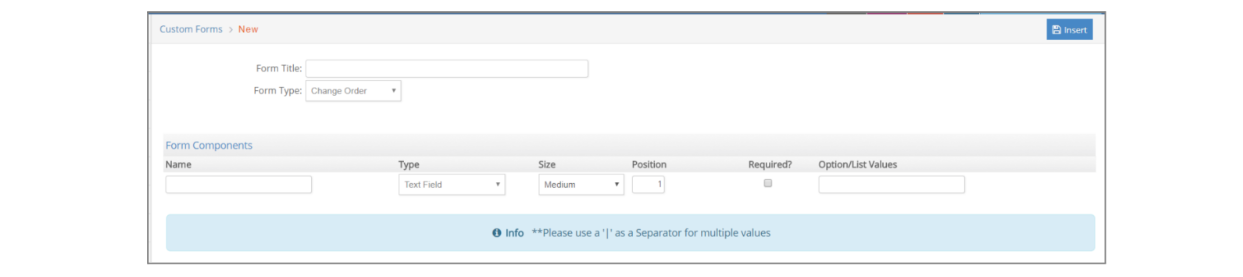
Each form is made of different components. You can add as many components as needed in your form from all these options:
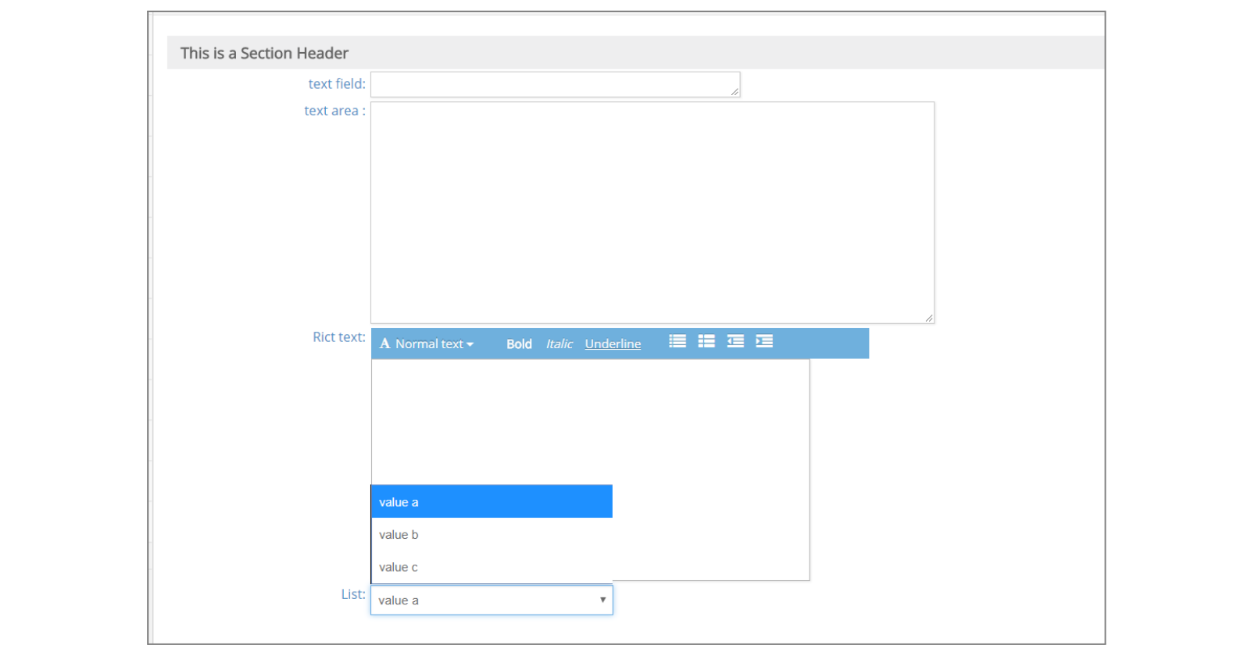
- Check Box: This will create a checkbox type of field.
- Text Field: Text field to type
- Text Area: Text field to type. It is essentially bigger than the Text field
- Section Header: A title
- Radio: If you wish to provide multiple options from where to choose one.
- List: if you with to provide a drop-down list of options
- Date: date Field
- Line: Draws a physical line
- Empty Line: it creates an empty space between sections
- Rich Text: Rich text field.
- URL: add a link to a url.
Every section must have a title (name), a type, a size, a position (order in which the section will appear in the form). You can also determine if a section is required or not, and provide a list of values (for Radio Buttons, List and Check box types).
You can add as many new sections as needed by clicking on the Plus green icon and Preview your form at any time, clicking on the ‘Preview’ button.
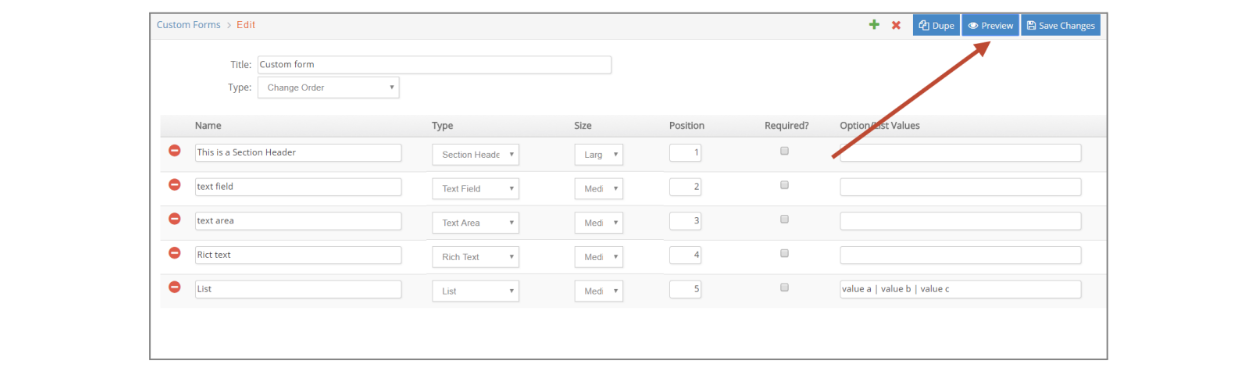
Click Insert when done.
When reviewing your existing templates, use the add icon ( ) to add lines, delete icon (
 ) to delete lines or red ‘x’ icon (
 ) to totally delete the template.
Tips
Email Account Executive and Project Director on Job Creation
If you would like an email sent to the Account Executive and Project Director when a Job is opened, be sure to select the Account Executive and Project Director at the time you start the Job.
The following setup is required in order for the system to automatically send these emails:
- Go to G/L > Setup > Company and make sure the Email on Job open box is checked for the company.
- Go to Setup > Admin > Email/Delinquent Time and confirm you have entered an SMTP Server and Authentication Type.
- Make sure employee email addresses are entered in the Setup > Employee window.