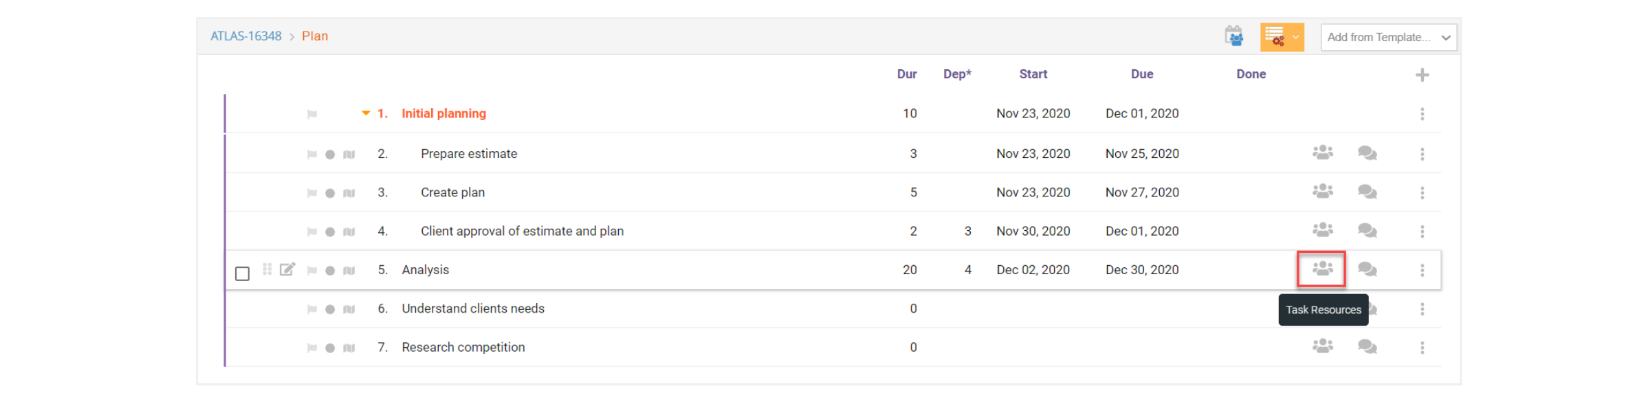
How to add and assign resources and items to a task
- Click on the “Task Resources” icon for the task you want to assign resources to:
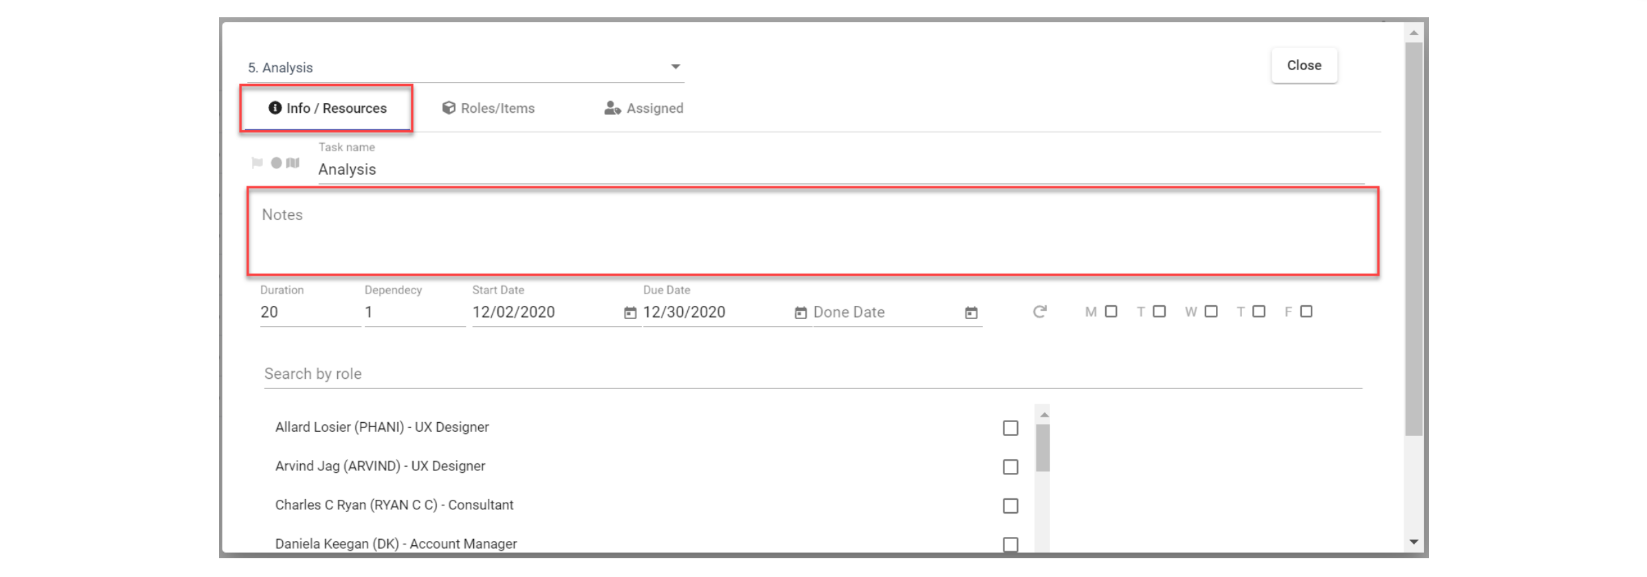
- The resources window will display. This window has three different tabs: Info/Resources, Roles/Items, and Assigned. You can work in any order within this window to assign roles and items and book hours for people working on the task. You can also review what has been pre-filled from a template, such as roles, items, and individuals assigned.
Below we will see how each tab works.

- In the Info/Resources tab you can select which individuals you want to assign to this task and add any general information about the task in the Notes section.
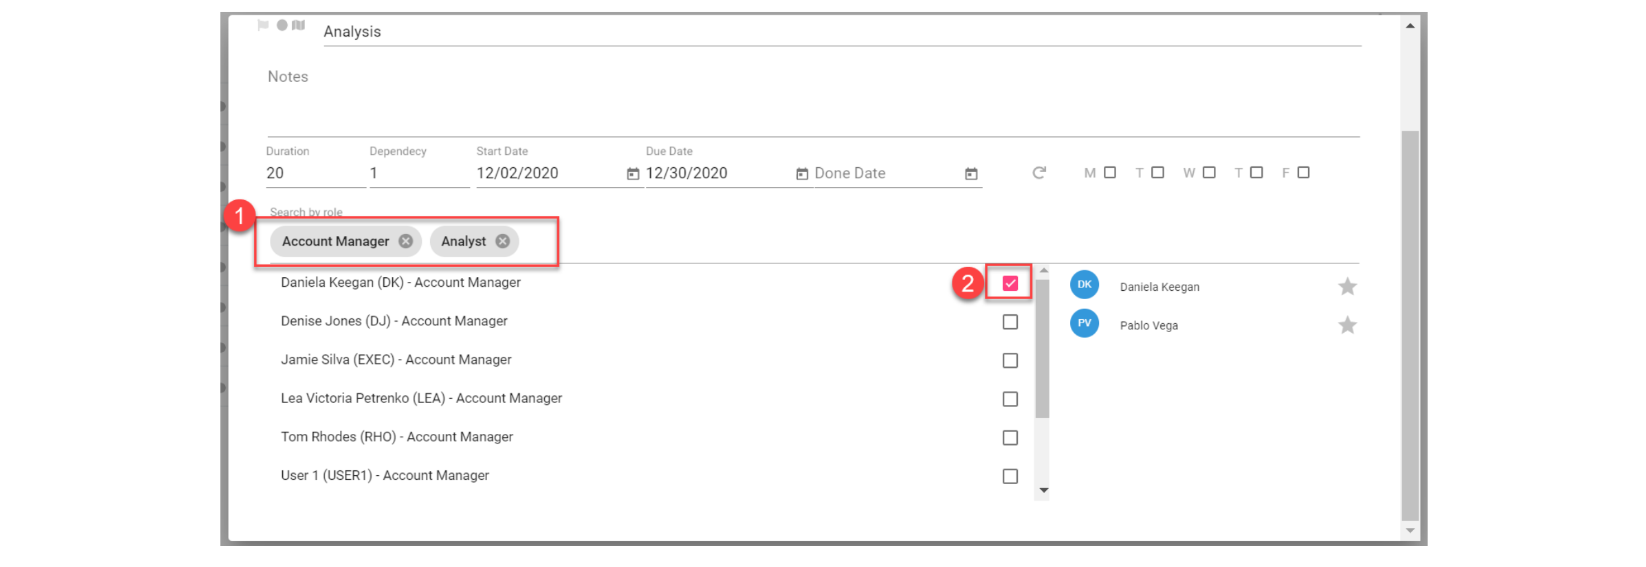
- To assign people to the task you can filter first by role and then check the box next to the name you want to assign to the task. The names you select will appear on the right hand side of the window:
- If you have a recurring task, you can specify which day or days of the week it will take place. In this case we are specifying this task will only be done on Mondays. This information will also flow into the Assigned tab to help you book the hours for individuals:

- After assigning people you can go to the Roles/Items tab to allocate hours per role and item. First activate the checkbox of the roles and items that should be used for the task:
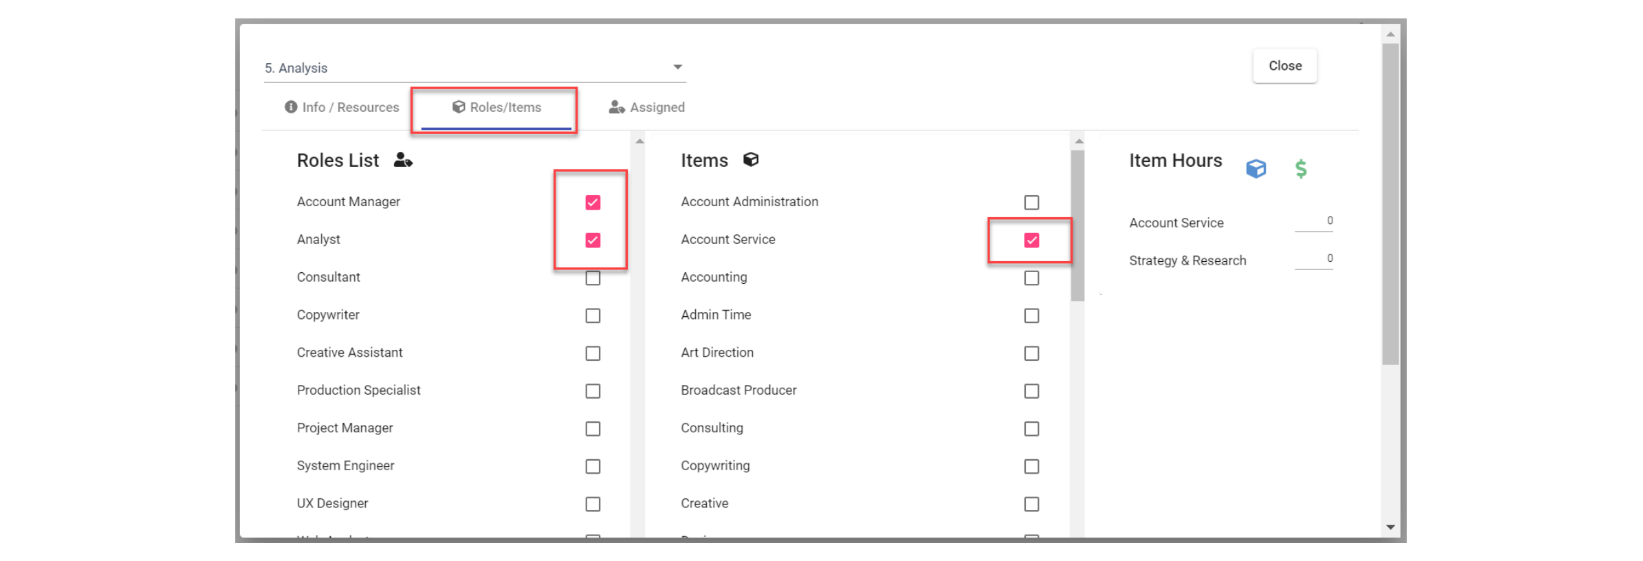
- On the right hand side of the window the items selected will be displayed. Here you can key in the number of hours available for each item.

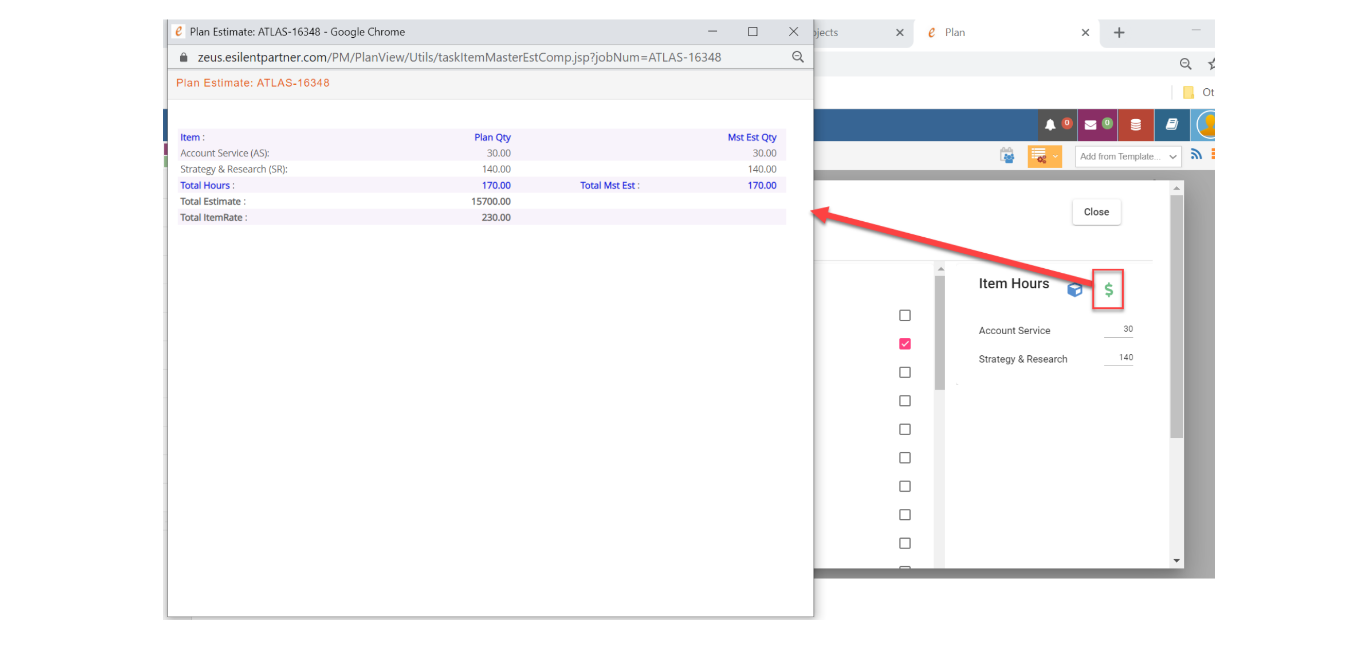
- If you have a master estimate for the job, you can compare it to the hours and cost being applied in the plan, simply click on the “Task Item Estimate” icon "$" :
- Click on the “Task Item Allocation” icon to allocate the time set for the items between the individuals assigned to the task:
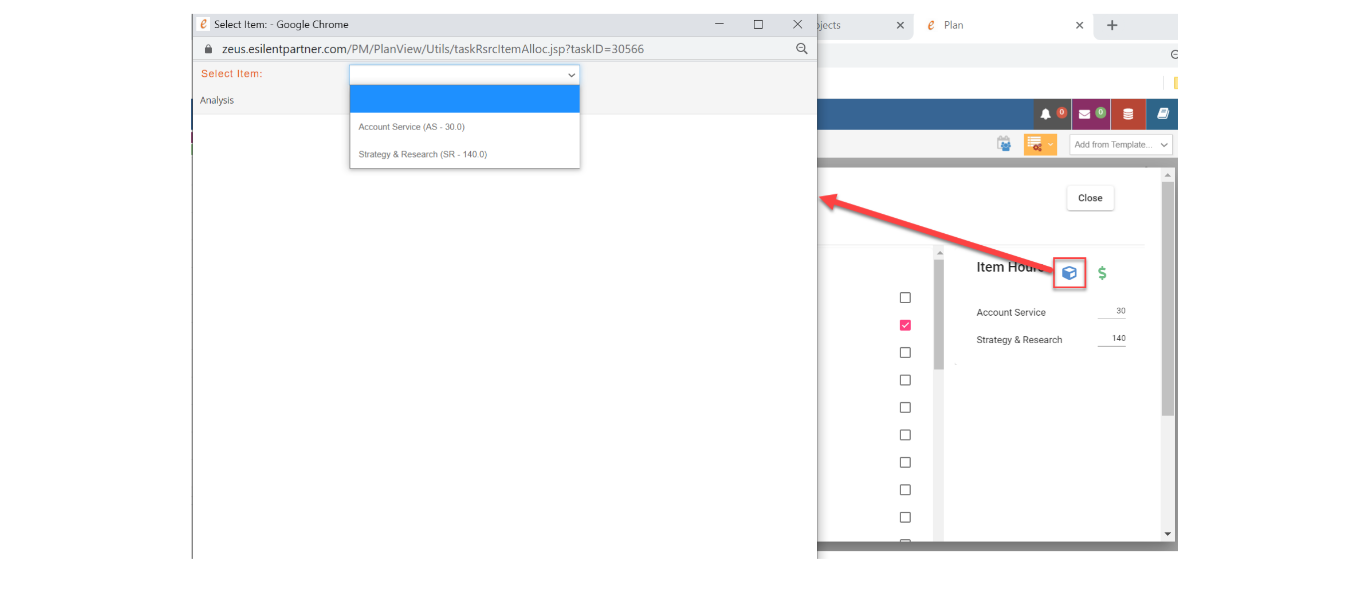
- Select the item from the drop-down list and assign the number of hours corresponding to each individual for that item. Click on Save and then follow the same process for all the items on the task. The hours allocated in this window will automatically load the planned hours in the “Assigned” tab:

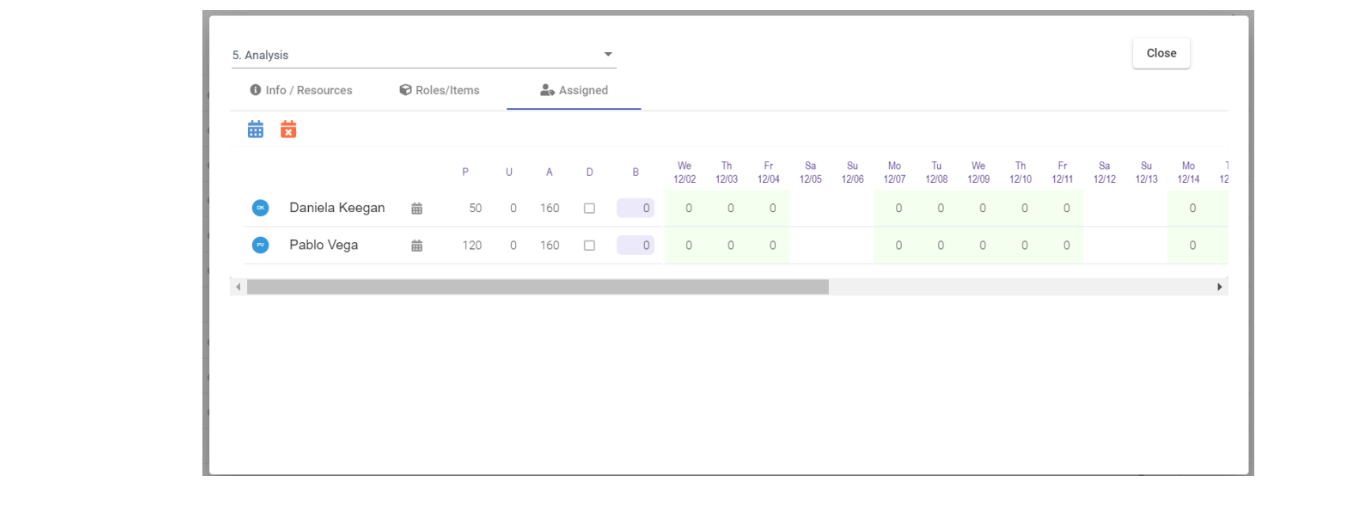
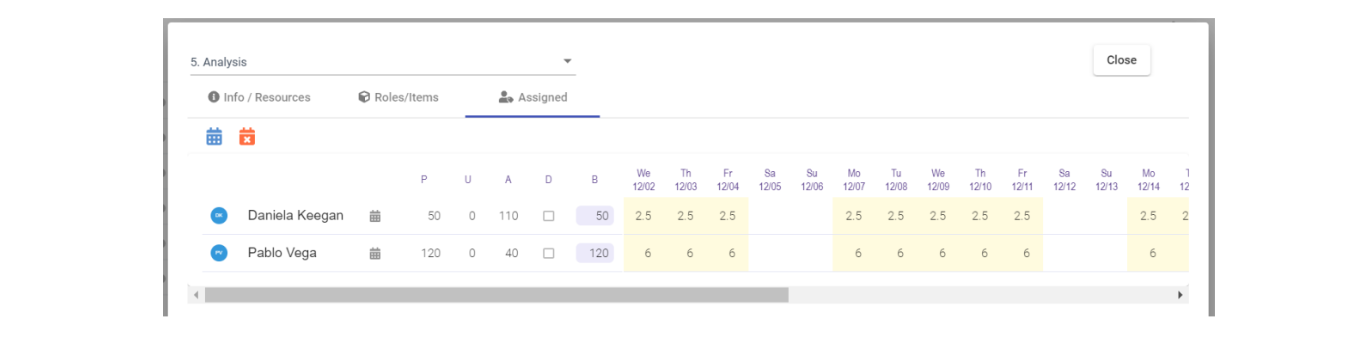
- Once you have hours allocated, you can go to the “Assigned” tab to book the hours and distribute them along the duration of the task. Each column after the name of the resource will tell you:
- The amount of hours planned (P) for that resource on that task. If you allocated hours per item in the Roles/Items tab these will show automatically, if not you can manually enter them.
- The hours used (U) up to now. These come from the time entered by people assigned to the task.
- The hours available (A) for the resource, depending on the duration of the task and the number of hours they work per day.
- The hours booked (B).
- You can mark the checkbox under the D column if the task is done for that resource.
You can also quickly add resources in this window with the ‘Add resources’ dropdown.

- You can see the booked hours per day for the duration of the task for all other employees by clicking on the blue calendar icon “Resource Availability”:
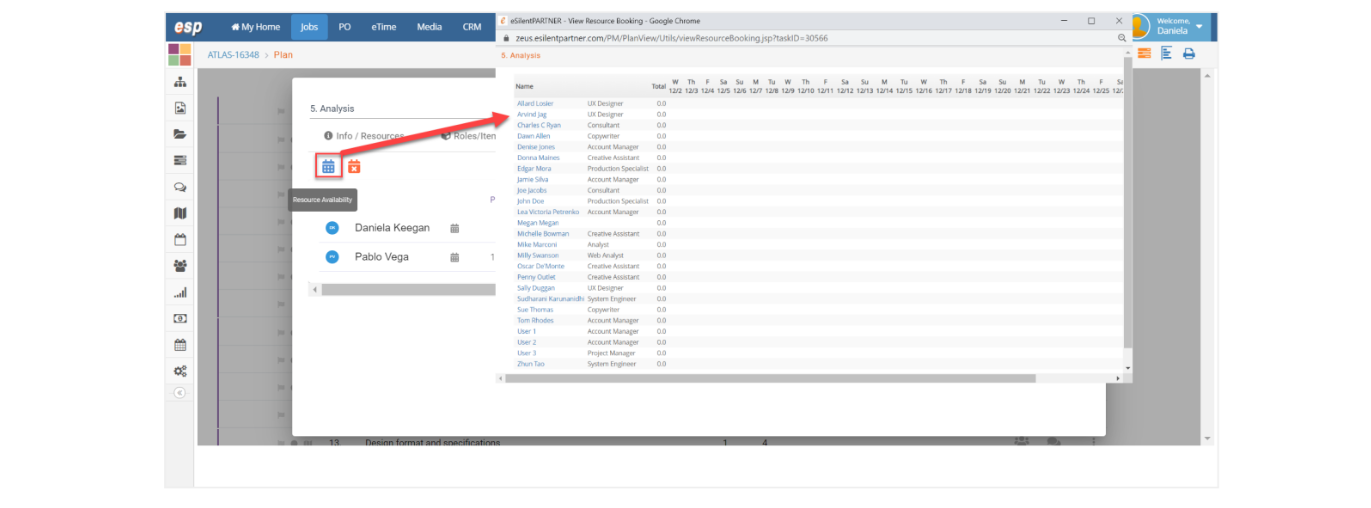
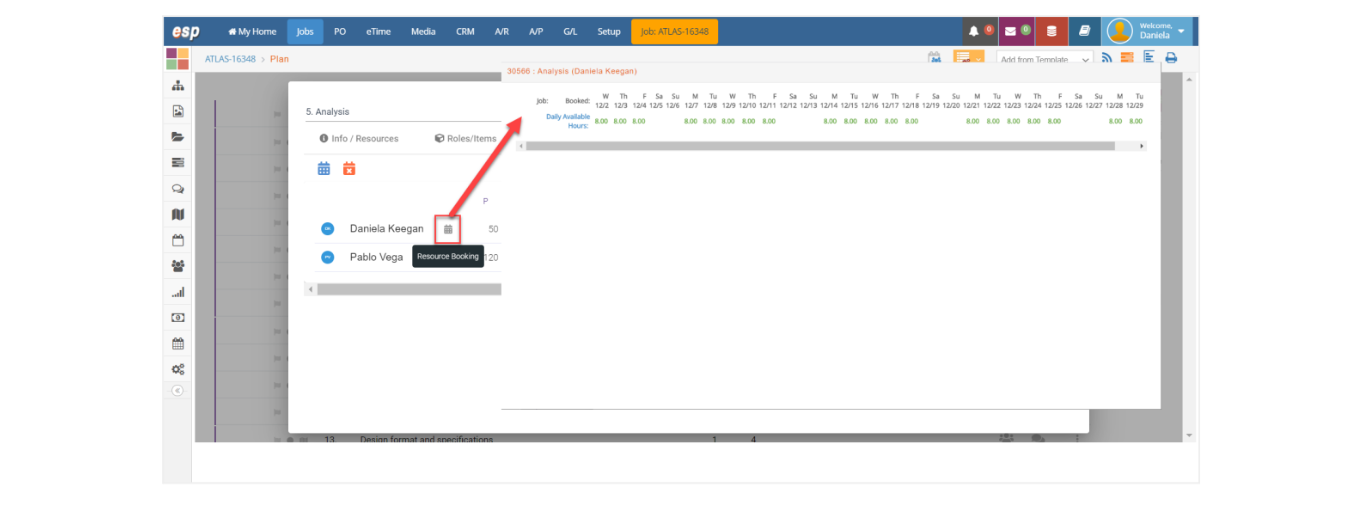
- You can also see the availability per day for the duration of the task for each individual assigned by clicking on the gray calendar icon “Resource Booking” next to the name:
- To book the resources manually, enter the number of hours you want to book them for under the B column. When you tab out, the booked hours entered will be evenly distributed across the duration of the task:
💡
See “Book resources to the entire plan” if you want to book the resources automatically for multiple tasks.
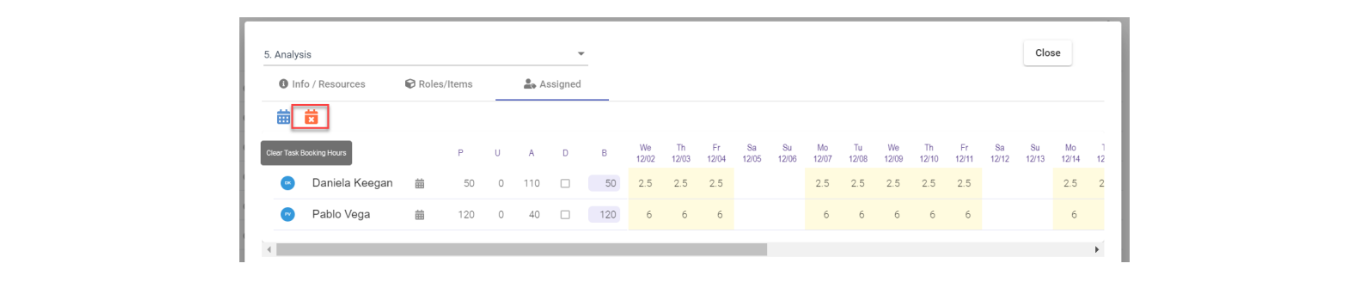
- If you want to remove all the hours booked, click on the orange calendar icon “Clear Task Booking Hours”:
- The system will ask if you are sure you want to clear the booked hours for all individuals. Click accordingly:
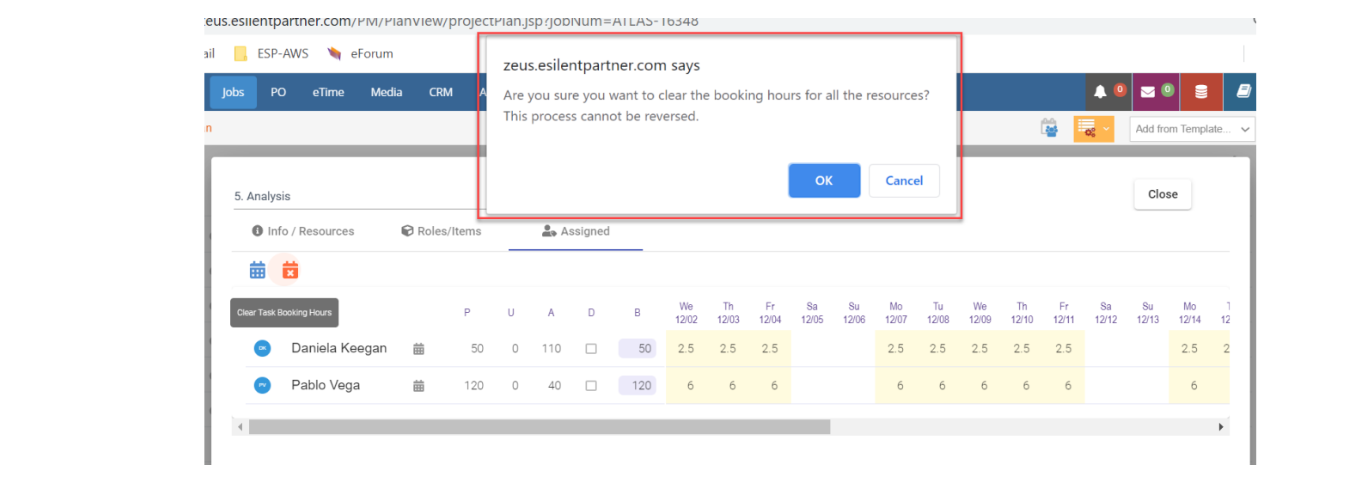
- The hours booked previously are now removed: