Once the bank account setup is complete, users can proceed with making payments via AvidXchange.
Step 1: Selecting Vendor Invoices
Navigate to AP > COMPUTER CHECKS. Select the vendor invoices that need to be paid. You can check our AP GUIDE for more information on how to use this window.
Enter the payment amounts. Choose FastPay - AvidXchange as the payment type.
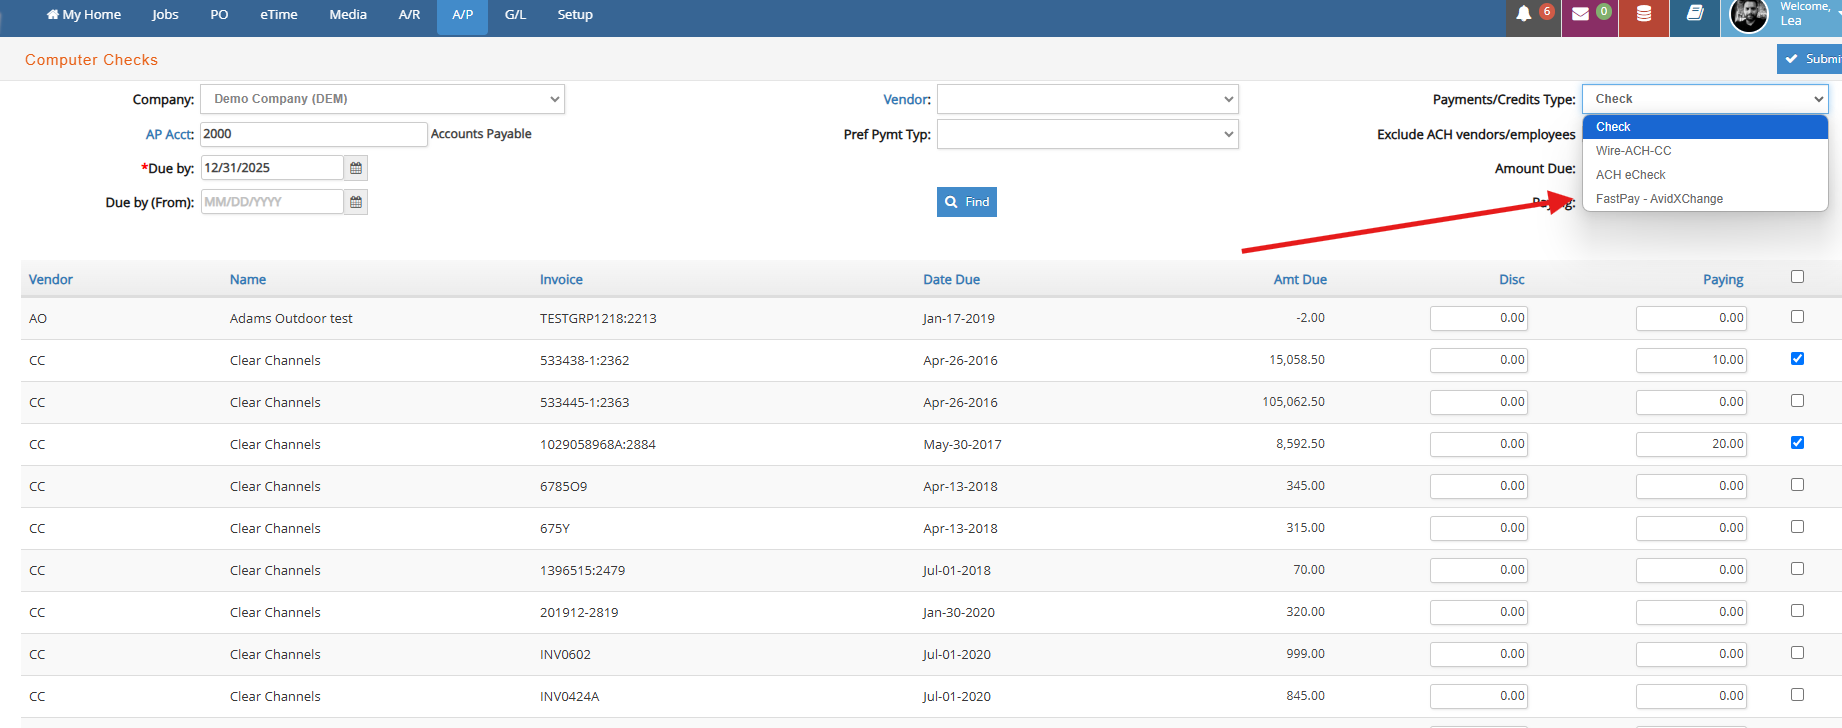
Click Submit (top right corner button).
Step 2: Choosing Bank Account & Submitting Payment
In the next window, select the bank account linked to FastPay. Enter the payment date.
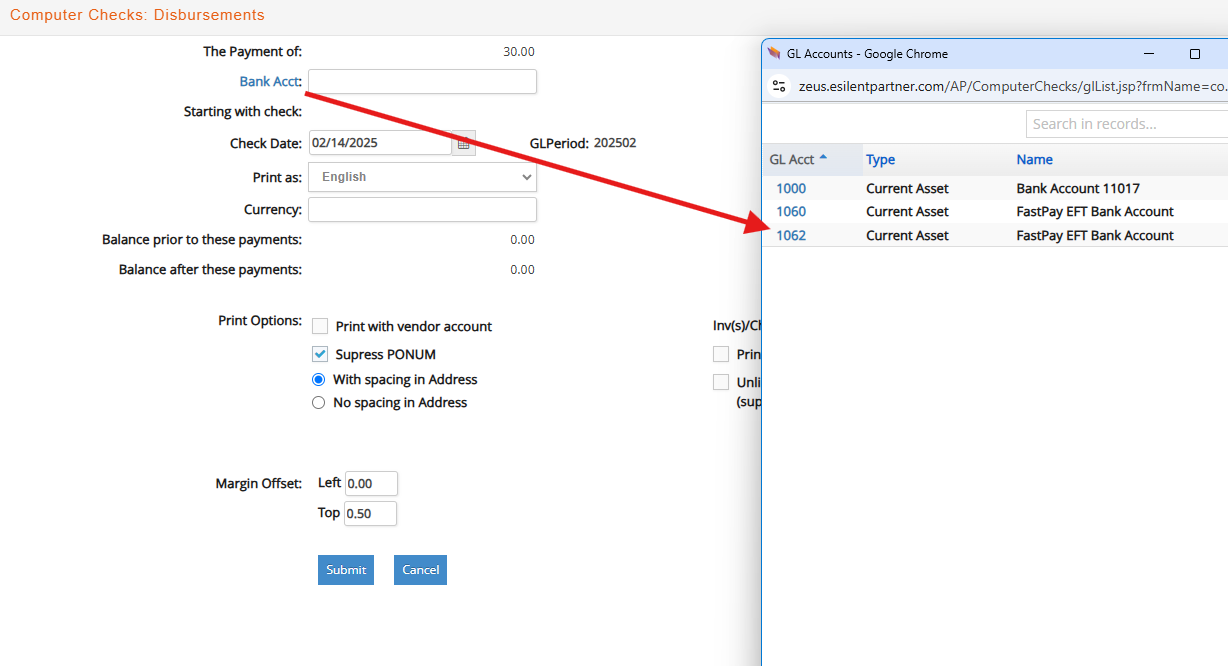
Click Submit.
A physical check transcript will print for review.
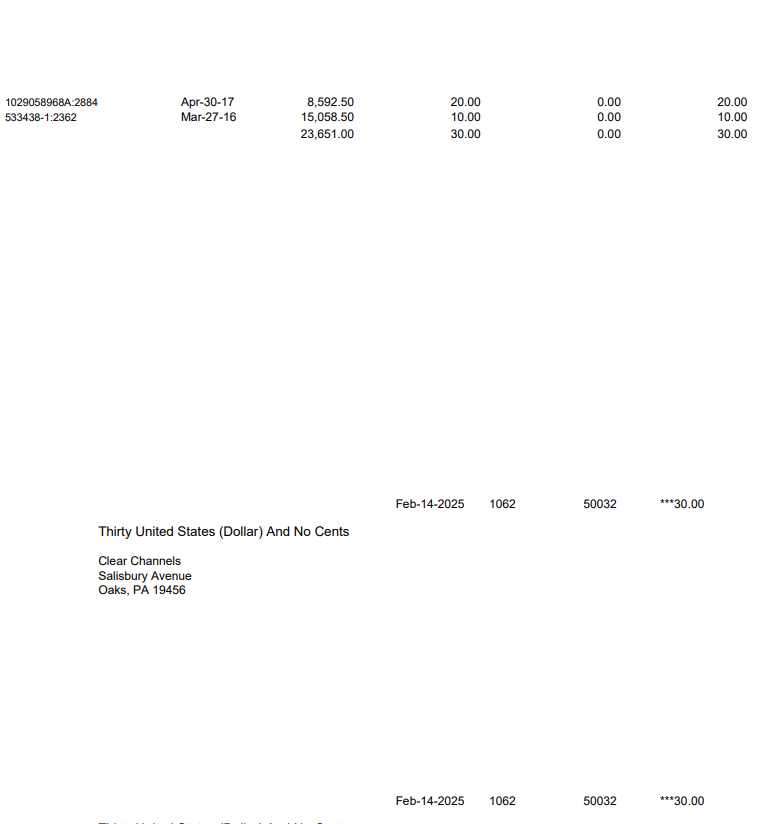
Step 3: Reviewing and Finalizing Payment
Users can now decide on the next action:
- Cancel: Payment process is cancelled. No payment data to be processed will be sent to FastPay and invoices will be left with original outstanding balance.
- Re-print: This option will reprint the check transcript.
- Post: The payment is posted to the General Ledger (GL) and a journal entry is created, your invoices are marked as paid in e·silentpartner, and a file with the payment data is generated and automatically sent to FastPay, from which the payment will be initiated.
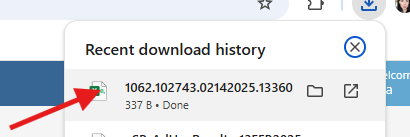
Step 4: Confirmation & Reports
Additionally, a CSV file containing the payment data will be automatically downloaded to the user's computer.

Upon completion, a success message will appear on the screen.
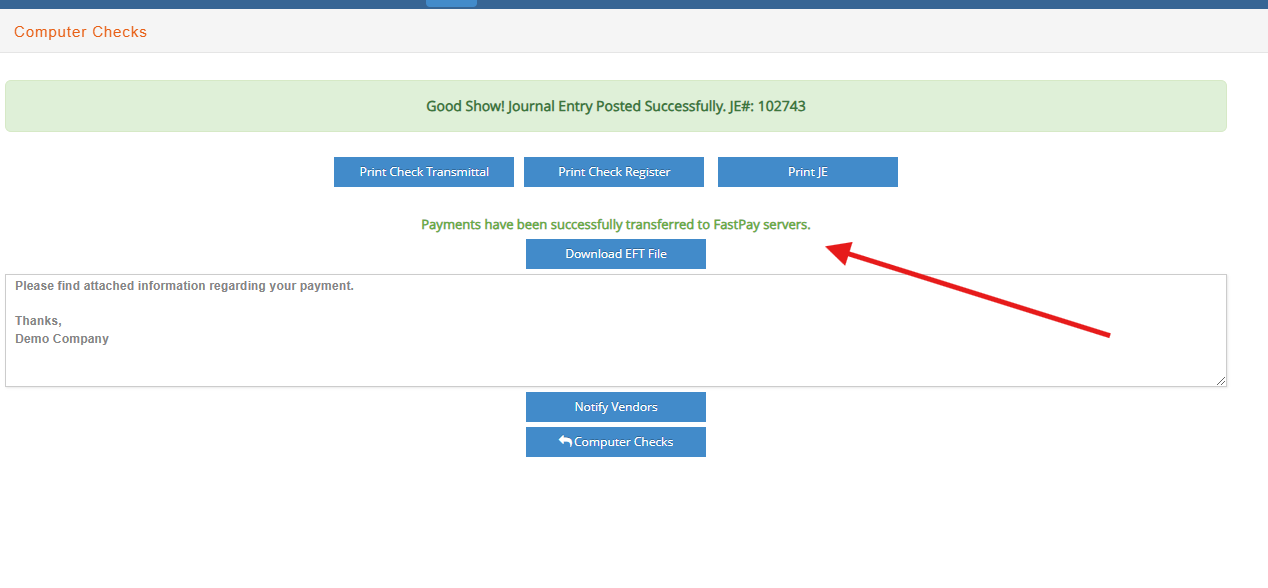
Users can, print available reports within e·silentpartner and optionally send a payment notification to vendors.