This section provides you with a brief overview of how to perform basic project management functions using e·silentpartner.
Opening a New Project
From the Jobs menu, select the Orange plus sign ( ) next to Jobs. You will be taken to the window as shown below.

From this Job Start Entry/Review window, enter the required fields, including Company, Client, Contact, Job Title, Status, and Office. Also select ‘Job Type’ from the Type field drop down list.
To speed job setup, esilentpartner includes templates, by Job Type, including Creative Brief, Estimate, Specification Sheets, and Project Plan/Schedules. Next, click the blue insert button ( ). Congratulations! You now have a job in the system!
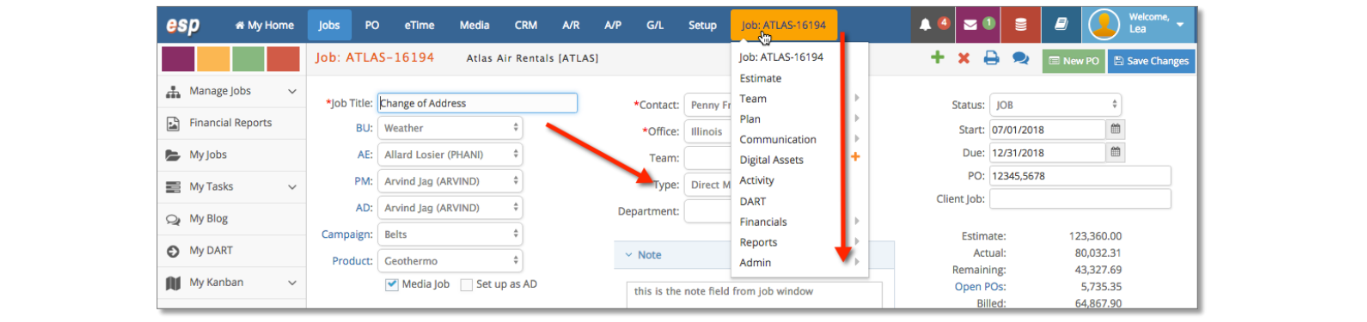
Once the Project is inserted and the Job # is automatically assigned, an Orange button will appear in the top menu. Roll over the orange button and a drop-down list will display various project-related functions.
Adding a Team
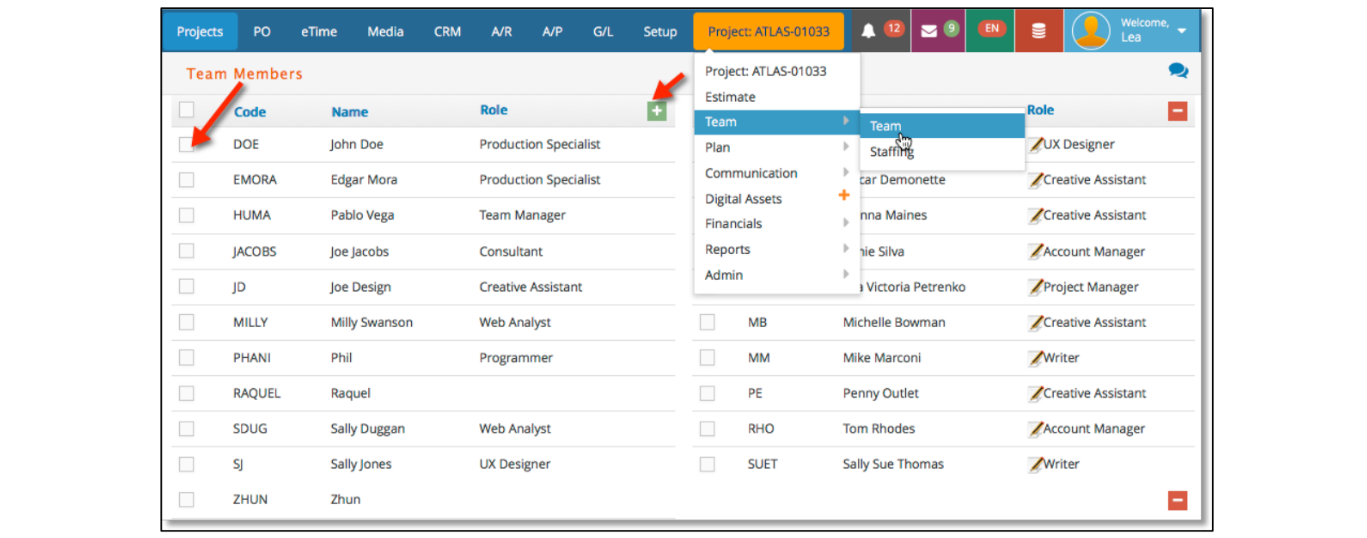
- Select the Team drop-down from the orange project button drop-down menu
- Select a team member (or multiple members) by selecting the check box next to their name
- Click on the Green
 button
Developing a Creative Brief
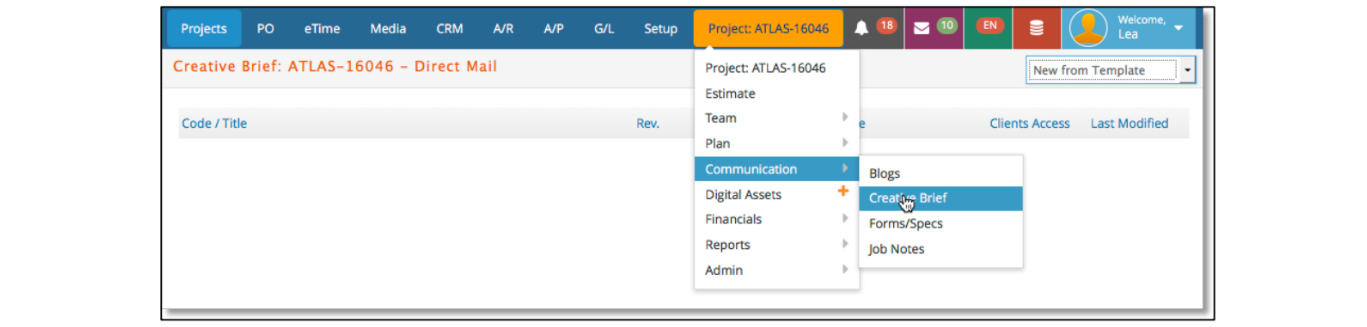
Select Communications > Creative Brief from the Orange project button drop- own menu.

Select your ‘Job Type’ from the ‘New from Template’ drop-down menu.
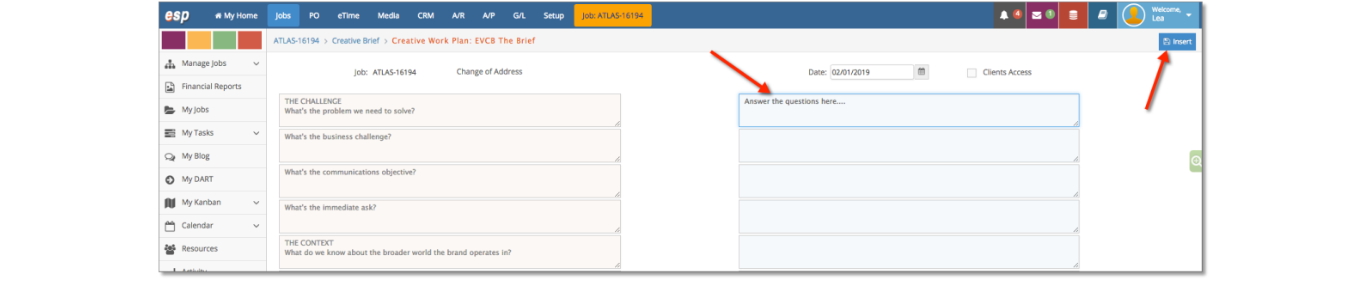
Fill out your answers (in the right column) to the pre-populated questions (in the left column), then click the blue insert button ( ).
).
Once completed, you can give access to clients via their client portal, print and/or email the brief as a .pdf, or add a revised version.
Adding an Estimate
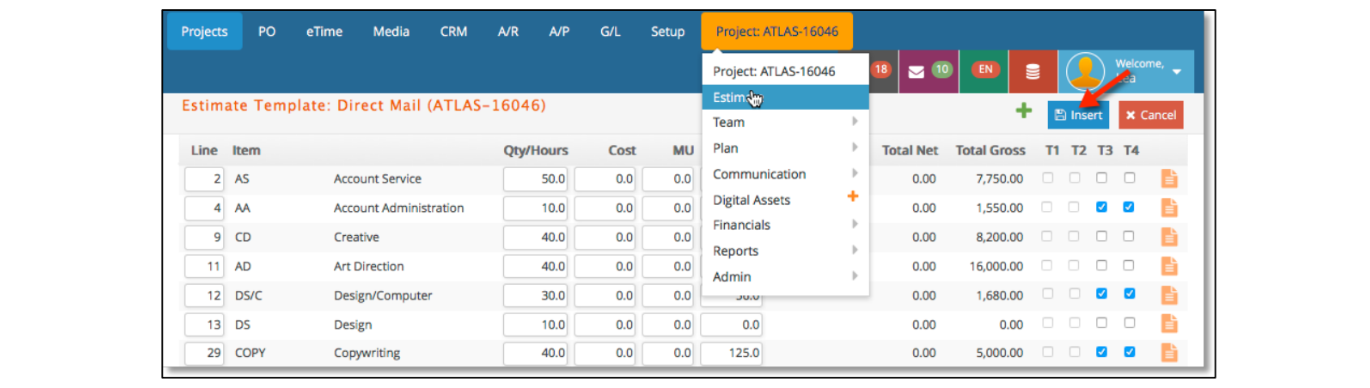
Since an estimate template has already been set up for your Job Type, simply select Estimate from the Orange project button drop-down menu and esilentpartner will load the base template. Next, click the Blue insert button ( ).
).
Congratulations! You now have an estimate in the system!
You can modify the template to the specifics of the job by adding hours, entering line notes, deleting lines, adjusting taxable items, or tailoring the specific outside expenses and mark-ups. For review and approval, the final estimate can be emailed or made available to the client at their client portal. e·silentpartner tracks the approved estimate vs. actual costs in real time.
Scheduling the Work and Assigning Resources
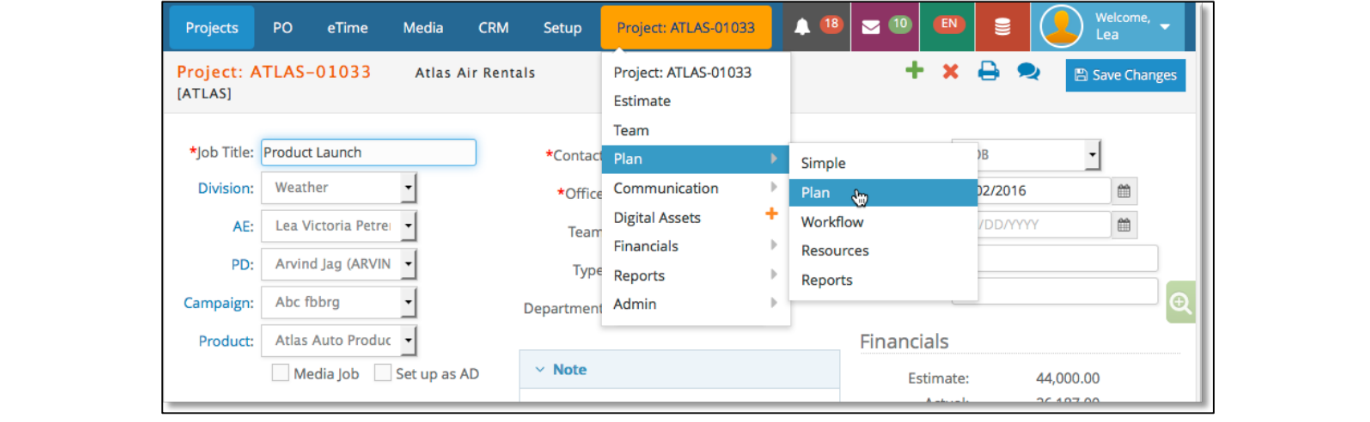
e·silentpartner allows you to create a schedule and resource planning templates by job type. This plan defines tasks, timeframes, and assigns specific resources and hours. To add a project plan, simply select Plan > Simple from the Orange project button drop-down menu and e·silentpartner will load the base plan template with a graphical Gantt chart.
You can modify the plan template by:
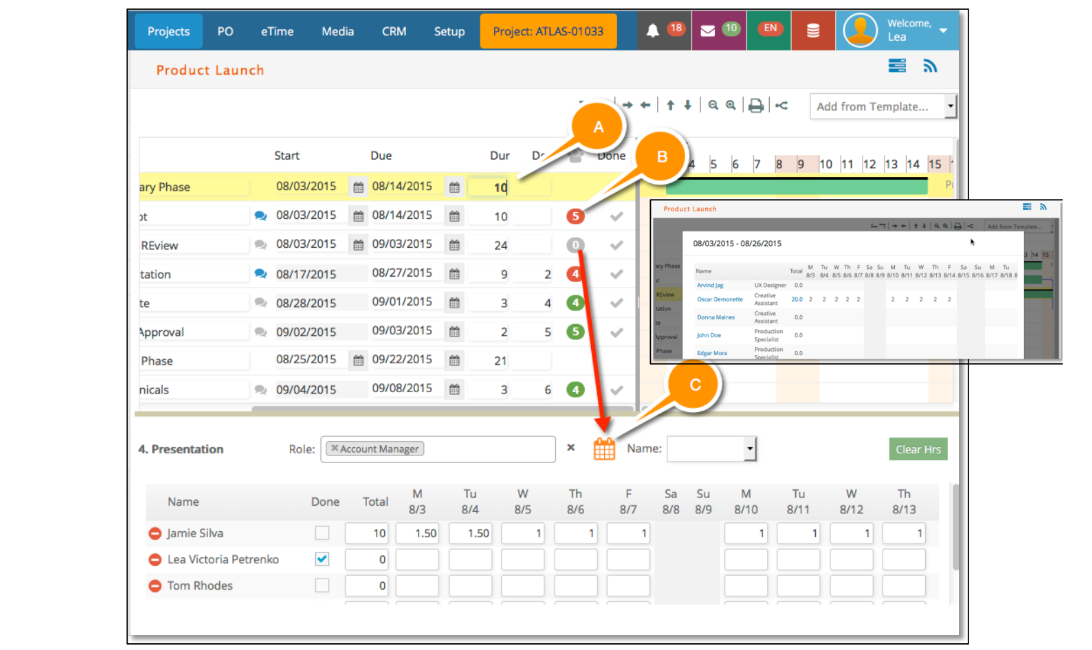
- Changing the duration (Dur) of a step. When you do, the Gantt bar chart will
automatically update to reflect the new duration. - View assigned resources. A Red oval indicates that people and time have been assigned to a task. A Green oval indicates that resources have been assigned, but they are missing time.
- Adding resources to a step. A Gray oval indicates that there are no resources or time assigned to the step. First, highlight the row. Then click on the Orange calendar icon. This will pull up list of available resources for this step. Select a resource by clicking on the person’s name (blue link). Add the total hours in the window pane below the plan and tab out. By default, e·silentpartner allocates the total hours across the time frame worked. You can adjust the time manually to suit the required task.
After resources are assigned, individual users can login and view their task assignments by clicking on the My Tasks link on e·silentpartner’s side menu. For project managers, a complete view of all assigned resources can be seen in the Resources link on the side menu.
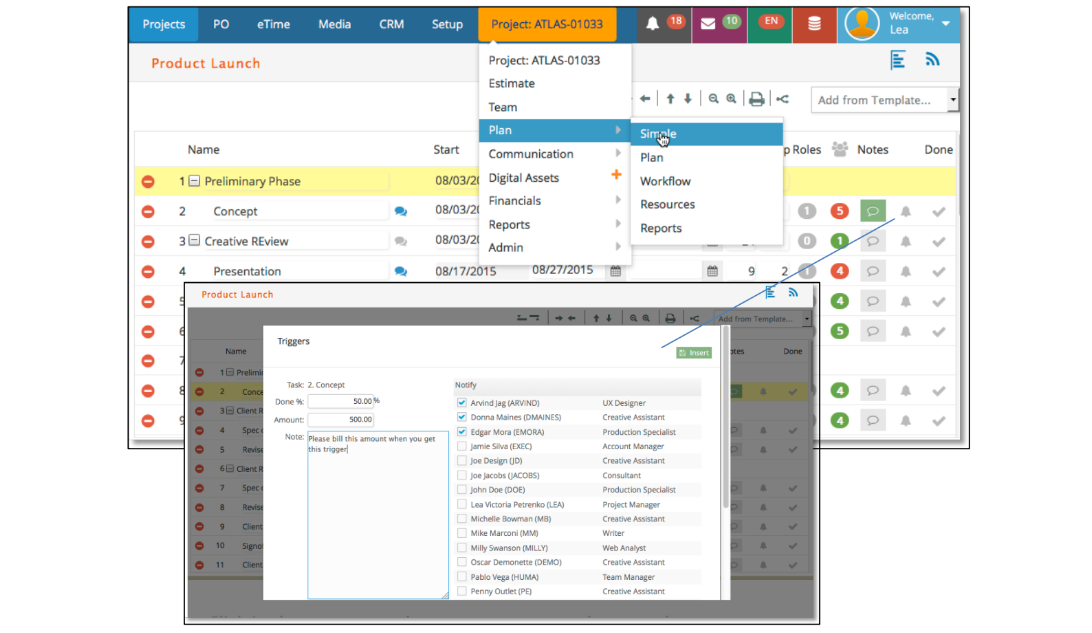
esilentpartner also provides a simple view of the same project plan.
To view the simple project plan, select Plan > Simple from the Orange project button drop- down menu.
To automatically alert you, or several team members, when a certain milestone has been met, you can add a trigger.
To do so:
- click on the Gray Bell icon
- Fill out the pop up window information and click the Green insert button. The bell icon will turn Orange to let you know that there is an automatic trigger on the step.
You can mark a step complete, simply checking the checkmark icon in the ‘Done’ column.
Collaborating on a Project
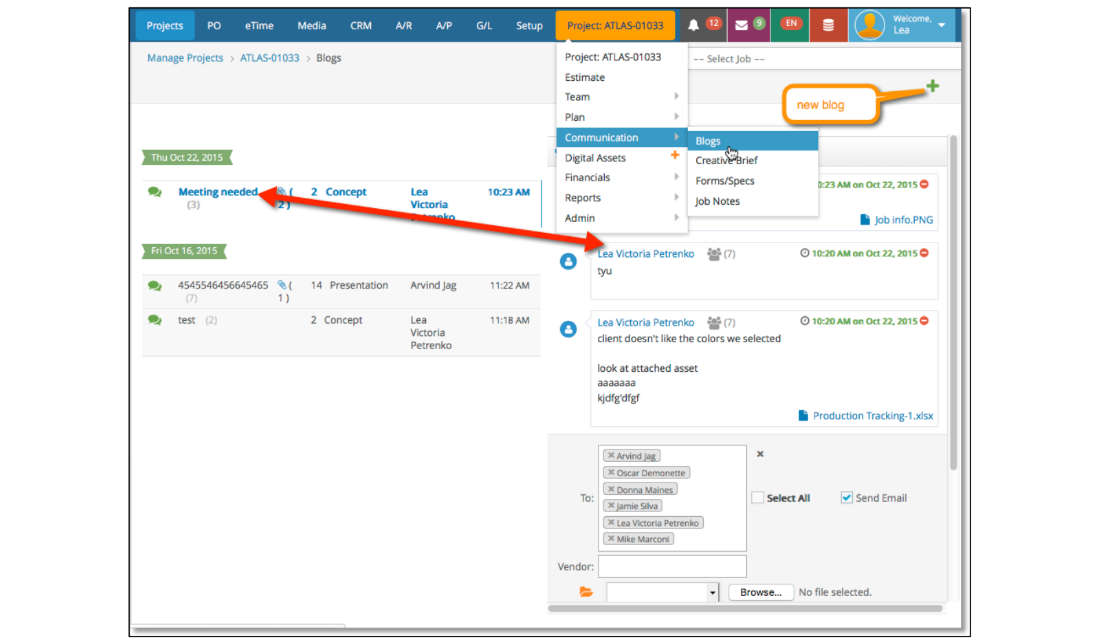
There are several ways to initiate a blog in order to communicate with team members and share files throughout the project lifecycle.
To view current blogs on a project, simply select Communications > Blogs from the Orange project button drop-down menu and e·silentpartner will take you to the blogs window.
To view a thread, click on the topic header and e·silentpartner will display the entire thread in
To start a new blog, click the Green  button in the top right of the window.
Enter Time
e·silentpartner makes time entry easy and convenient, throughout the application, by providing more than three ways to enter your time.
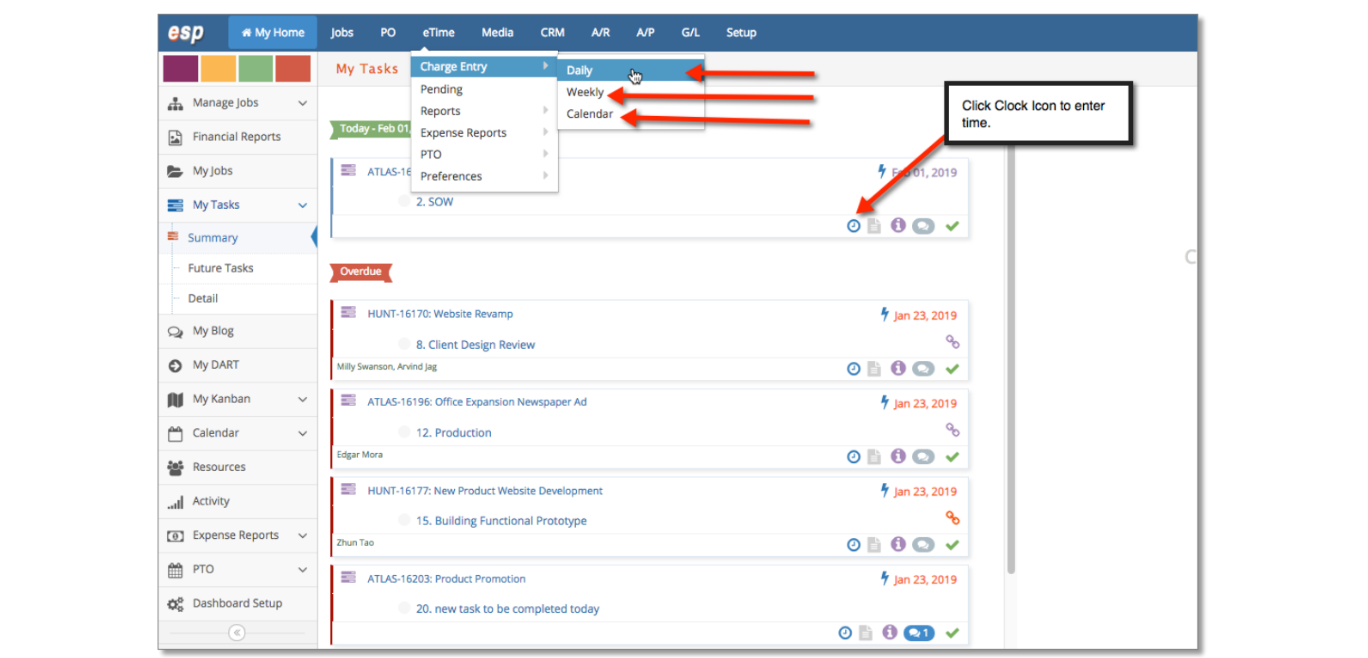
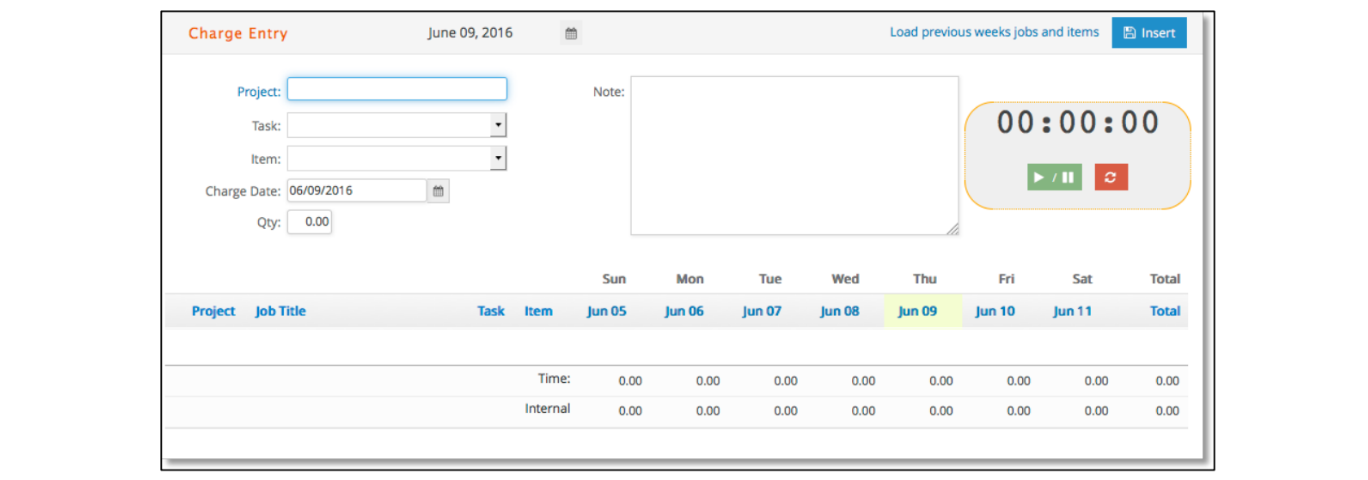
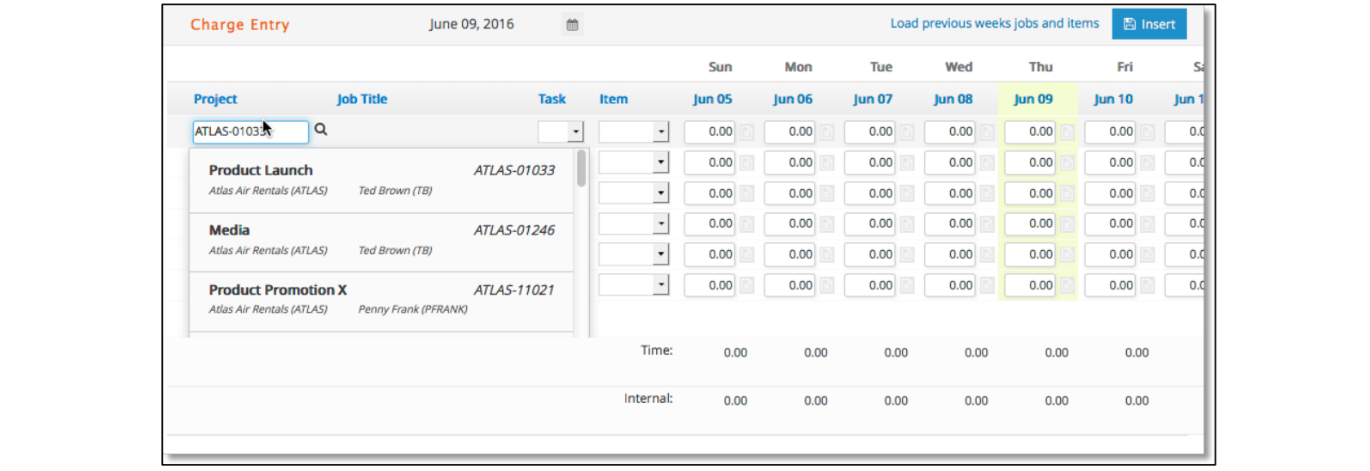
- Daily – From the top menu, select eTime > Charge Entry > Daily
- Weekly – From the top menu, Select eTime > Charge Entry > Weekly
- Calendar – Select eTime > Charge Entry > Calendar (This drag and drop feature allows you to plan out your day and enter your time simultaneously.
- From any clock icon throughout esilentpartner – Click on the Blue clock icon and a time entry window will pop up. Fill out the fields and click the Blue insert button (
 ).
).
Boom...you’re done!
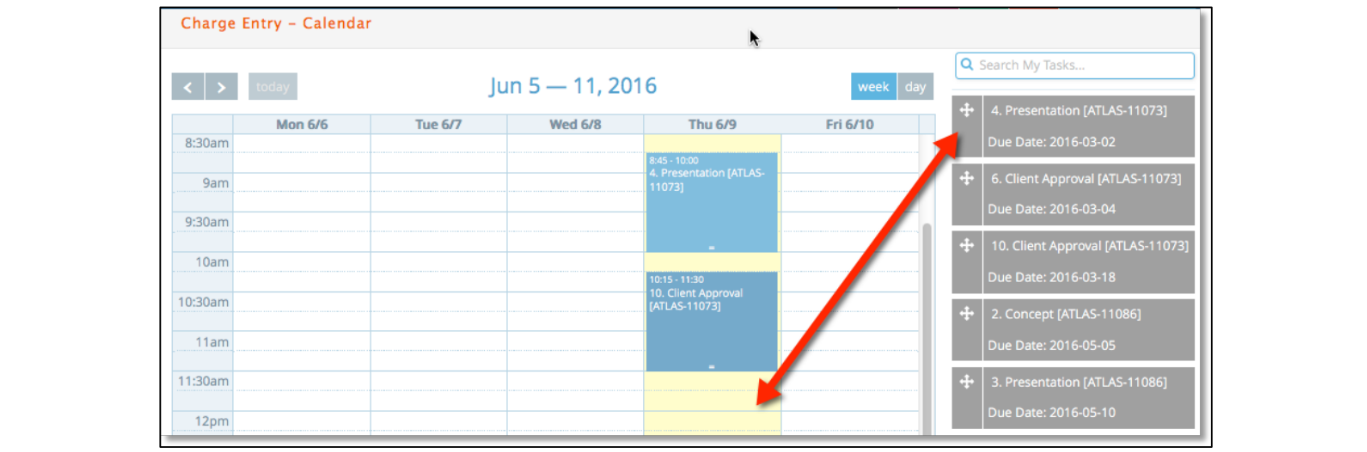
Drag and drop your task onto a weekly or daily calendar. Double click on the color box to enter a time item and note.
Some other great time entry features:
- You can require users to enter specific notes relating to a task.
- Delinquent time entry emails can be sent to the user and their supervisor.
- You can require users to enter their required time from the previous day in order to gain access to the application.
- While you work, you can use our convenient stopwatch feature to track the exact time for a task.