Once the media plan header is created, the user is now able to begin adding lines to the media plan. Each grouping of lines created is for a specific media item, vendor, and outlet. To begin click the  icon at the toolbar.

From the next window begin entering required information; Media Type, Vendor and Outlet. All other fields such as Market, Ad, Day Part, etc. are optional. If selected, these will be part of all the detail lines inserted for the specific Vendor and Outlet grouping.
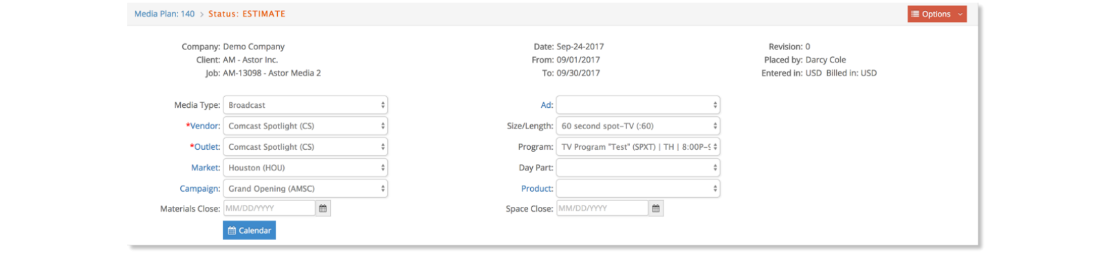
To continue, click the Calendar button, , to view a pop-up calendar and select the appropriate placement dates. Multiple dates may be selected at the same time as shown in the graphic below.

Once the appropriate placement dates are selected, click the x on the pop-up calendar or anywhere outside the calendar to view. Upon doing so, the user will be presented with the Rate entry window. From this window, you may enter the Gross rates, quantity and if necessary surcharge information. There are three types of rates: Monday thru Friday rate, Saturday rate and Sunday rate. Qty (quantity) is the number of spots to be inserted. Surcharges may be defined for all lines created, at a flat rate or as a percentage.
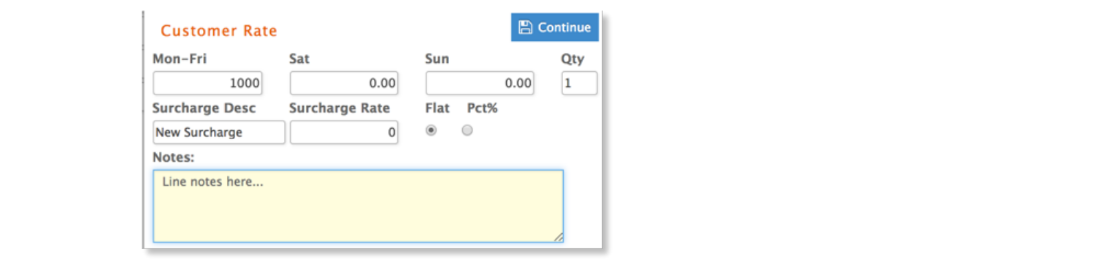
Click Continue to create lines and then review and edit lines to be inserted.
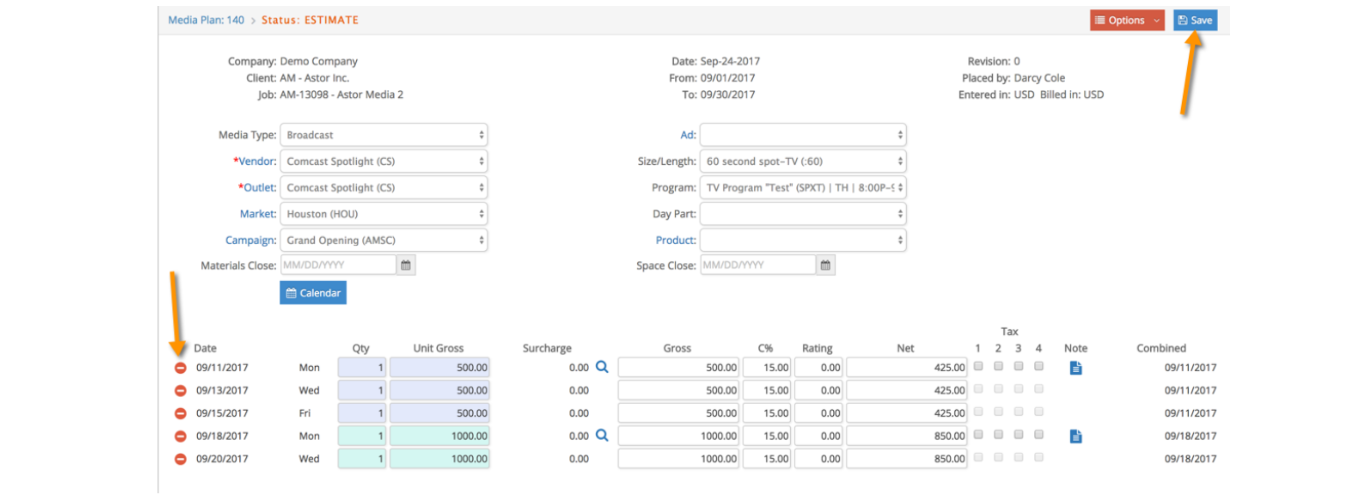
- Lines created will share the same entry criteria. Quantity, unit gross value, surcharge, commission percentage, rating and tax information can be modified if needed before inserting lines.
- For agencies that use broadcast calendar such as US agencies, broadcast lines will be combined as weekly beginning Monday when created.

Surcharges are automatically applied by eSilentPARTNER. However, the user may override the surcharge amounts or click the  icon to edit or add a surcharge. More specifics regarding surcharge entry will be reviewed later in this user guide.
To delete any unwanted lines, click the  icon. When ready, click the Save icon to insert the lines into the database and media plan.
Lines inserted into a Media Plan will be summarized by Media Item, Outlet, Campaign and Product in the Media Plan window as shown here.

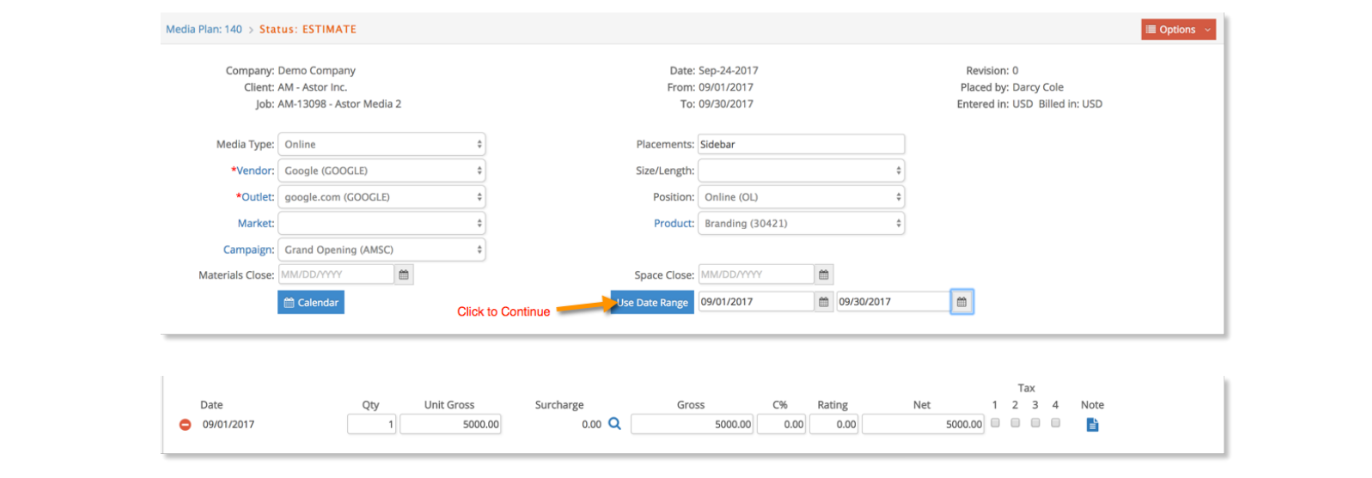
For Insertion and Online media types, you can enter a date range and click the 'Use Date Range' option to insert a line instead with a From and To date range. Then simply key a Qty, Unit Gross, Taxes and Note before clicking Save.
Continue adding additional lines (media type, vendor, outlet groupings) to the media plan by click the  icon on the toolbar and repeating the steps described above. In doing so, the user may create a detailed media plan with multiple Types, Outlets, Gross and Net amounts, etc. A sample more detailed media plan is shown here:

From within a media plan, you may use the Options button to navigate between Media Plan Header and Media Plan lines and to also Dupe (duplicate) a media plan.
