To create a new media order, click the orange plus sign next to the desired media order. You will need to have security rights to add or edit Media.

Add Media Order Header
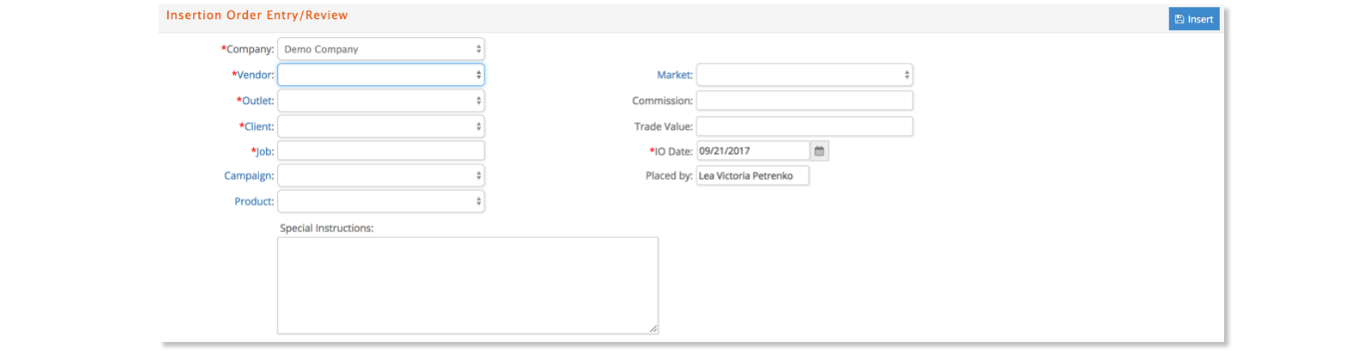
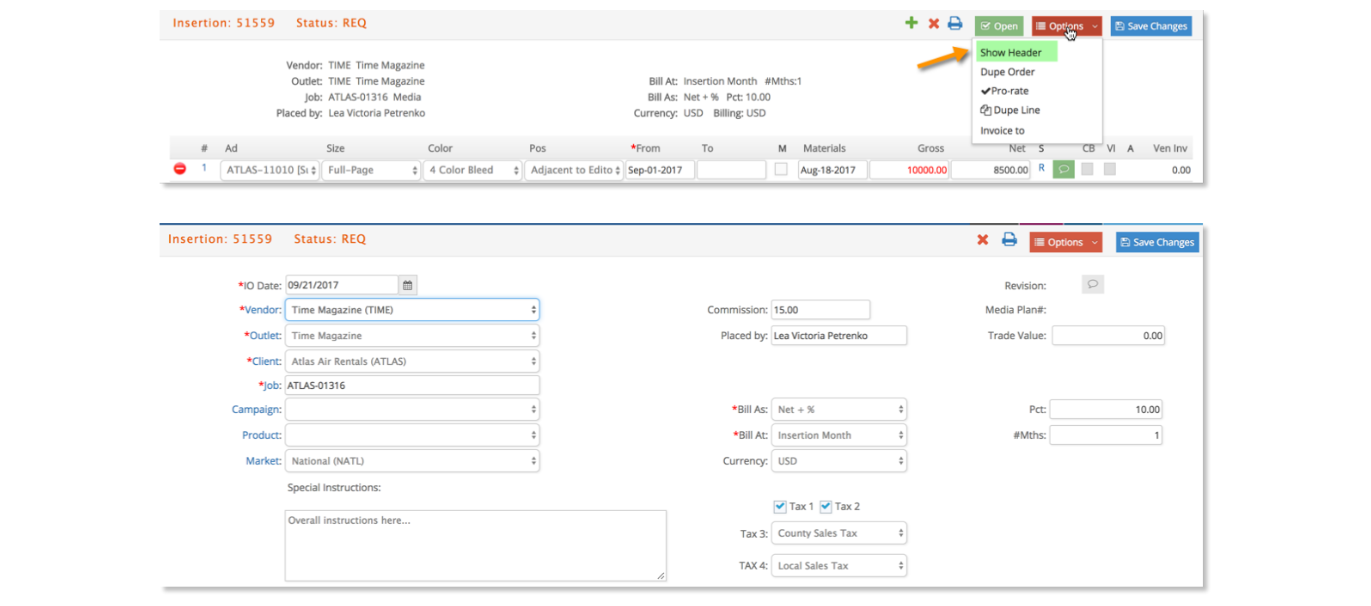
The first step in creating an order is to create the media order header. The header is where you will add details such as company, vendor, outlet, client, job, etc. In all cases, selection of the vendor is the first selection. Required fields are noted by a red asterisk next to the field label. All other fields are optional.
In creating the remainder of the header, some fields automatically default and may then be changed, such as commission and special.
A view of each order header window is shown in the following graphics:
Insertion Order Header
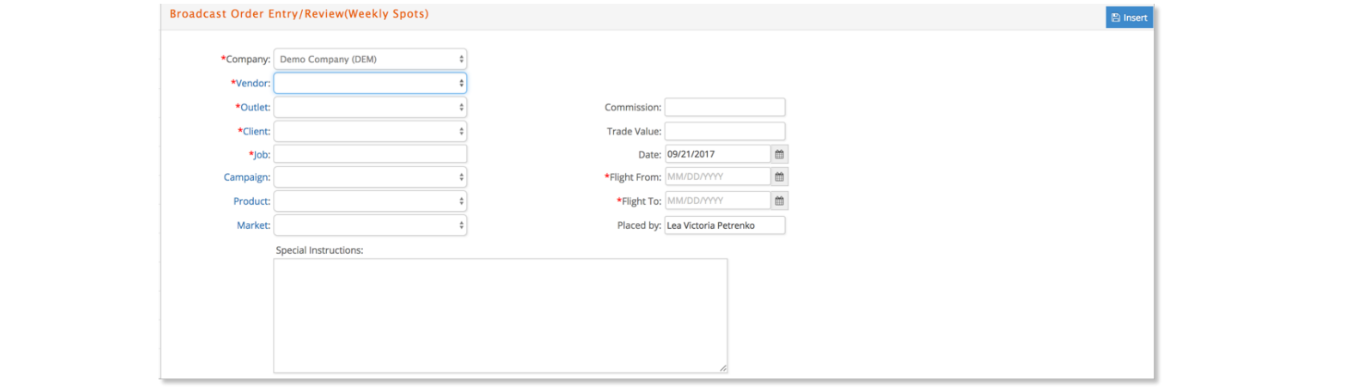
Broadcast Order Header
Online Order Header
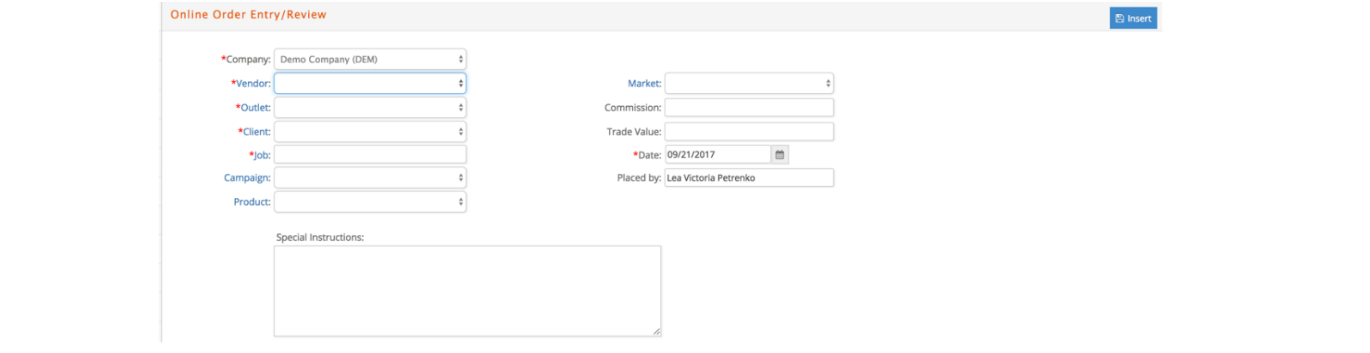
To create each header, select or fill in information for each field using either the drop-down list or clicking on the blue field label where a ‘helper’ pop-up will display. Please note, you must always start by selecting the Company and Vendor. Once ready, enter the record into the database by clicking the Insert button.
Once the header is inserted into the database, it is recommended you review the information on the header window to ensure it is correct. If not, you can make modifications under the Options menu in the Show Header window.

Add Media Order Details
Once the header is created, you will be directed to the order detail window where you begin to enter information regarding each specific line on the media order before clicking Save Changes.
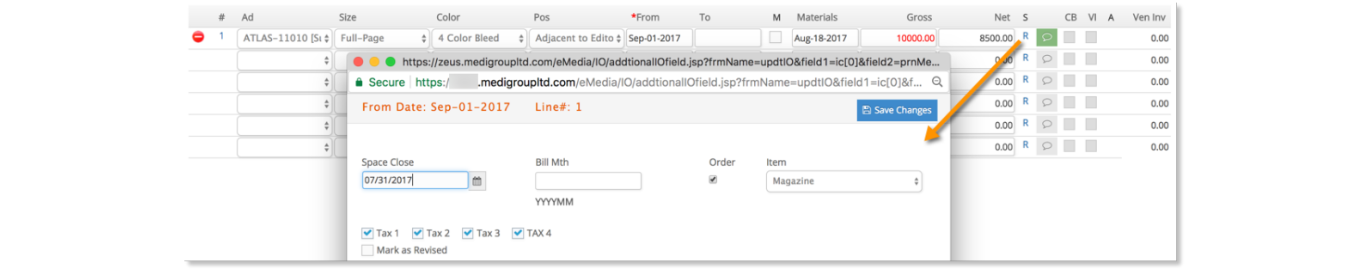
An example for Insertion is shown here:

Particular attention should be made to the Bill As and Bill At parameters shown in the top header section of the order window once the first set of lines are saved. If these parameters were previously defined under the Media Admin – Client Billing window, they will be automatically defaulted to the order but may be changed if needed.
An overview of the Bill As parameters are:
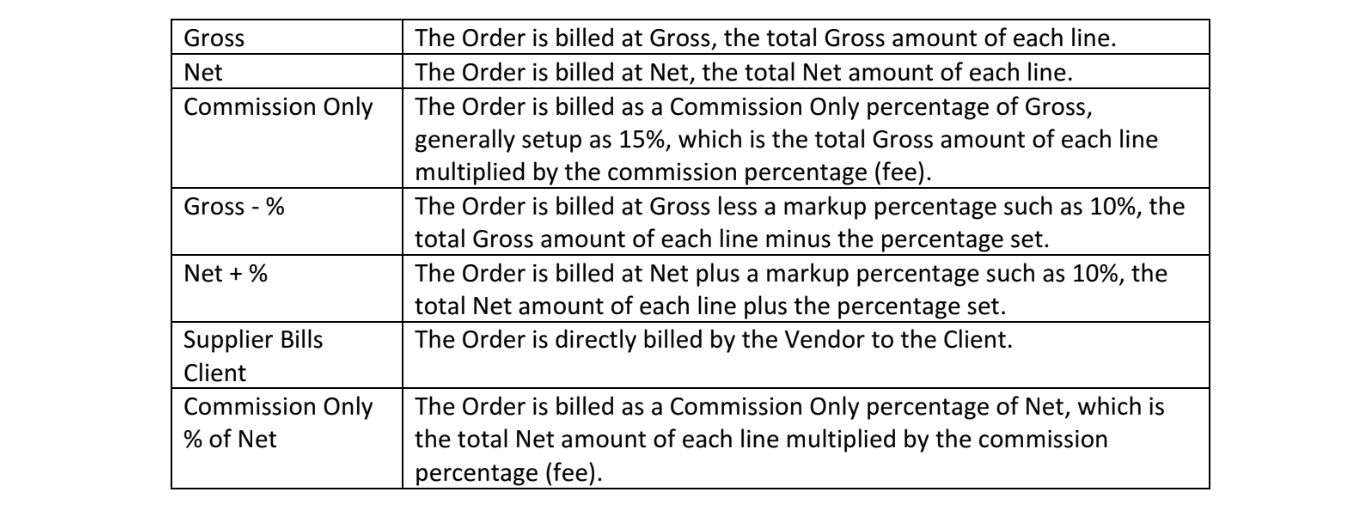
If the billing instruction to the supplier is to bill the client directly or as commission only – then e·silentpartner will not update the vendor commitment to the job. However, this order will still remain as part of your database as a placement. Please review the Media Admin User Guide for more information on setting up Client Billing parameters.
While the order is in an early 'REQ' status, navigate to the Options dropdown and select Show Header to change aspects of the order such as Vendor, Outlet, Job, Billing Parameters, etc.
Aspects of each order type are explained next:
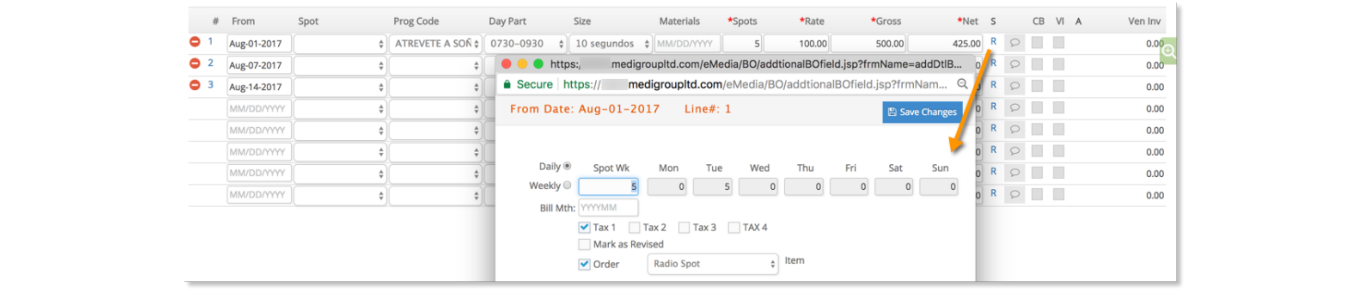
- All Order Details: Placement information is required, such as the from date for each line, spots per week or quantity, Gross/Net amounts. The net for each line will calculate based on commission % in header, typically set at 15%.
- Insertion Order Details: Optionally specify Ad, Size, Color, Position, To date and Materials close date.
- Broadcast Order Details: Optionally specify the From date, Spot, Program code, Day Part, Size, Materials close date program.
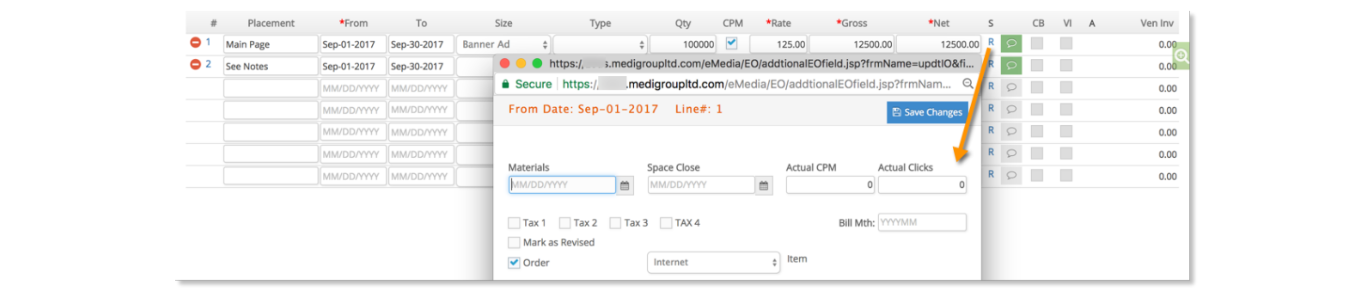
- Online Order Details: Optionally include Placement, To date, Size, Type, Quantity, CPM (cost per 1,000).
For each detail line there will also be an icon,  , where you are able to enter any notes for the specific order detail line. Click on the icon and a text pop-up will display. For any line that has a note the icon will display in green,
  .
.
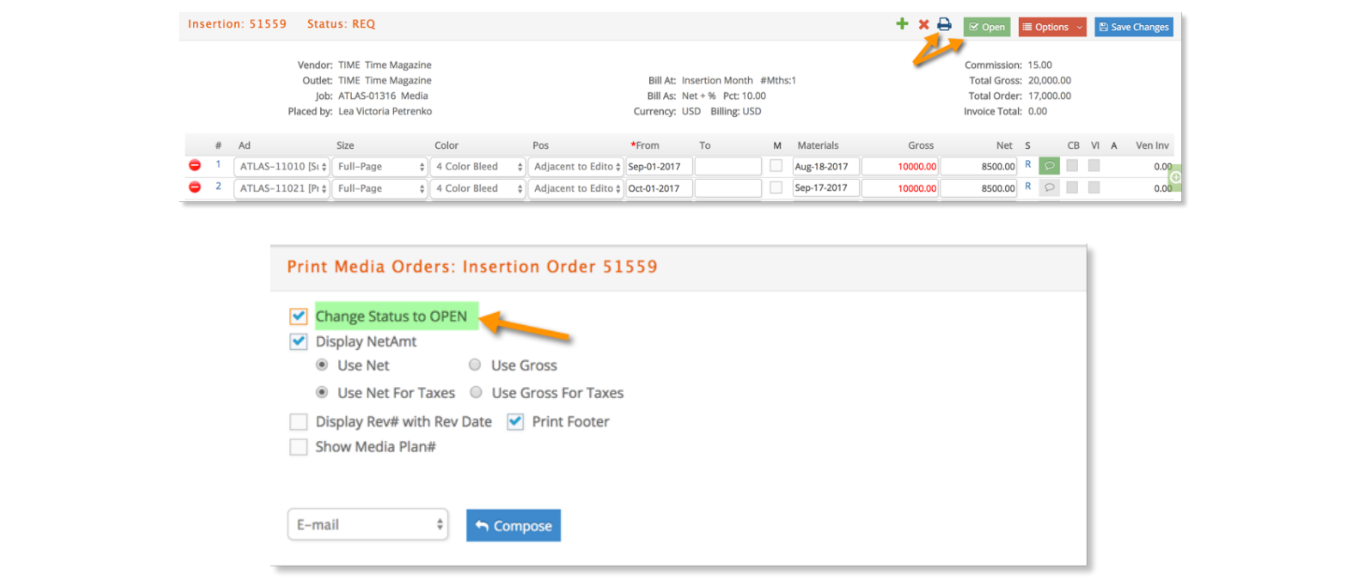
As each line is entered on an order, after saving changes the summary information on the order is updated. In the example below, two lines have been entered for a Total Gross amount of $20,000 and a Total Net amount of $17,000. The Gross amount is displayed in red font as a visual reminder that the lines are still in an REQ status and have not been approved.

You may also note within each order detail window there is a column with the heading ‘S.’ This is the Status of each line. For each line, the status can be ‘R’ meaning REQ, ‘O’ meaning OPEN, and ‘D’ meaning DONE as described earlier. On each line you will also see CB for Client Billed and VI meaning Vendor Invoiced. When either or both are checked, it means that the Client Billing has occurred for that line or the Vendor Invoice has occurred for the same line. More specifics will be outlined later in the document.
Print Media Orders
Overview
Once an order is created with the specific detail lines, it remains in a REQ status. The next typical stage of the workflow is to print the Media Order either as an REQ order that has not yet been sent to the Vendor or as an OPEN order ready to be sent to the Vendor.
Clicking the green icon  will change the order to open without requiring you to print it first.
To print an order, click on the printer icon,  , where a pop-up window will display a window such as this:
By default, orders are printed as a .pdf document. If printing to a .pdf, the document will open in a new tab within the browser and you may then download and save the pdf file to send using an email application.
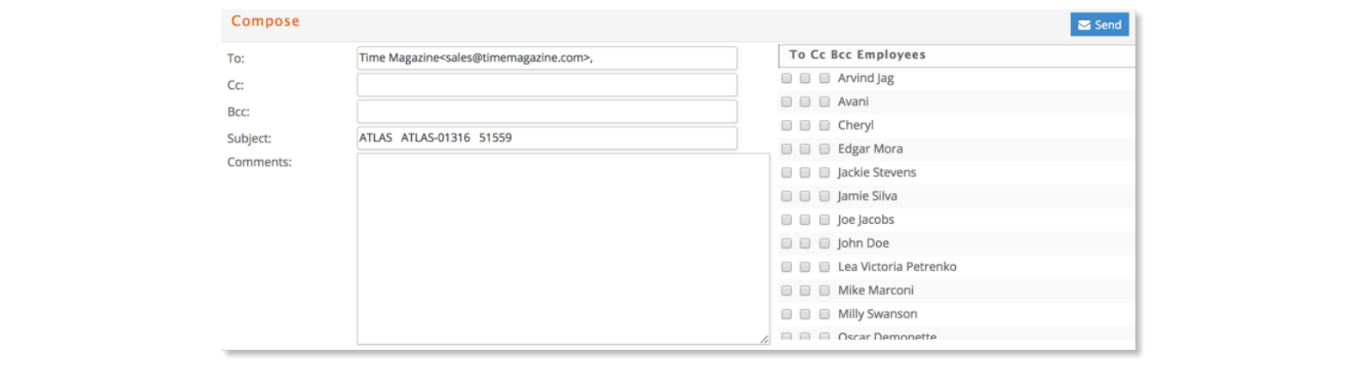
Should it be necessary, the user may also choose to email the order directly from within e·silentpartner. To do so, select Email from the drop-down list which will then open a compose email window, as shown below. Here you will enter the email information such as To, cc, bcc, subject line, and text. Upon sending, the email is sent with the order as a pdf attachment. Initially, you may want to test this by sending yourself an email to be familiar with the entire process.
Optionally, batch print and approve media orders from Media – Reports – Batch Print Media Orders. Batch printing is explained further in the Media Reports documentation.
Printing Options
Using the graphic below, the various options in the printing window will be explained in more detail.

To change a media order from REQ to OPEN, select the ‘Change Status to OPEN’ checkbox. Once the order is printed, all lines on the order will change from ‘R’ to ‘O’ as shown here:

Also, the Gross amount has now changed from red font to green font as a visual indicator showing a line is OPEN and the order status has changed from REQ (R) to OPEN (O). The ‘Change Status to OPEN’ checkbox will not be visible in the printing window once the order is approved (status is OPEN).
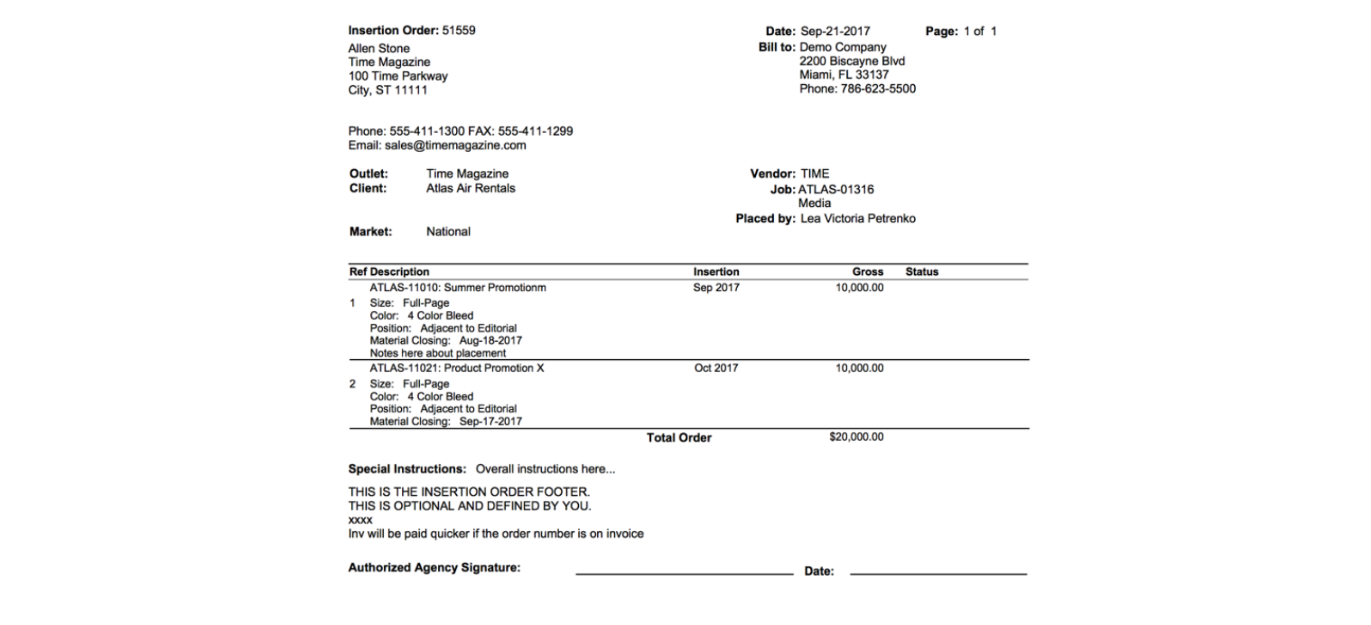
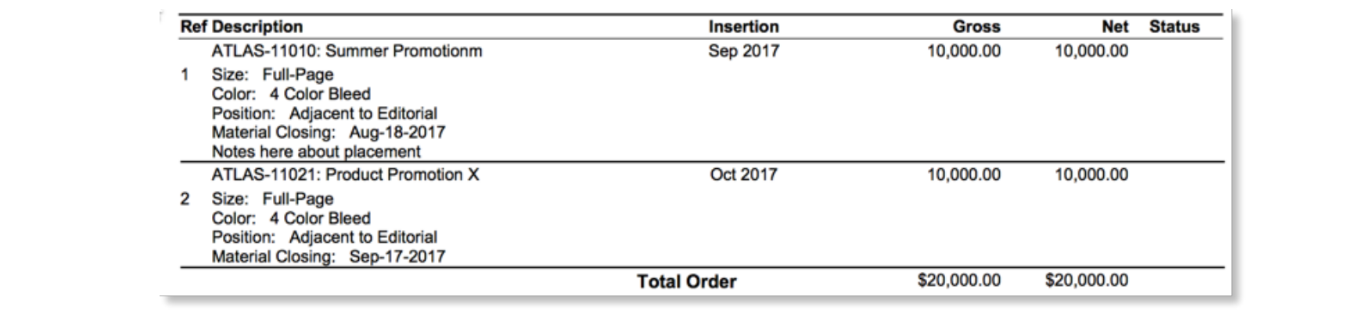
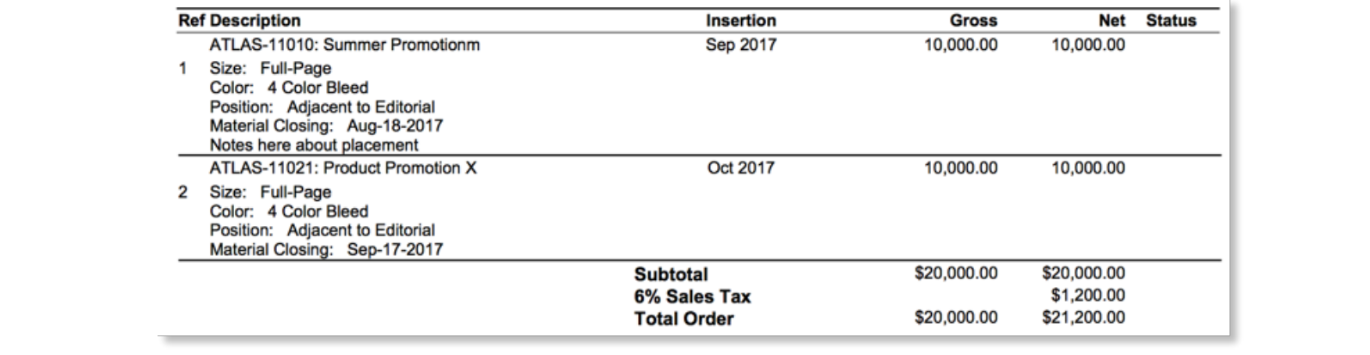
If the ‘Display NetAct’ checkbox is not checked, the order will print using the Gross amount as shown in the sample below.

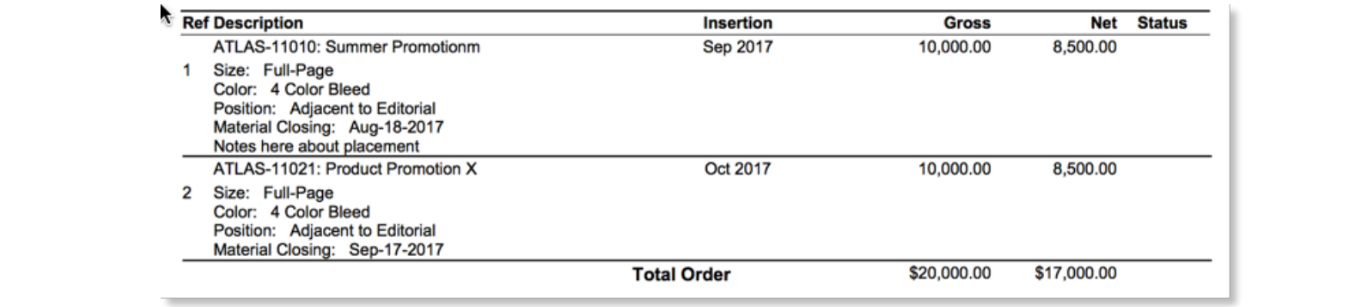
If the ‘Display NetAmt’ checkbox is checked, in addition to the Gross Amount printing on the report, the user will have the option to generate the printed order using a combination of the radio buttons; Use Net or Use Gross and Use Net for Taxes and Use Gross for Taxes as shown in the graphic below.

Examples when selecting Use Net or Use Gross radio button.
a) Result when selecting Use Net:
b) Result when selecting Use Gross:
Examples when selecting the Use Net for taxes or Use Gross for taxes radio button.
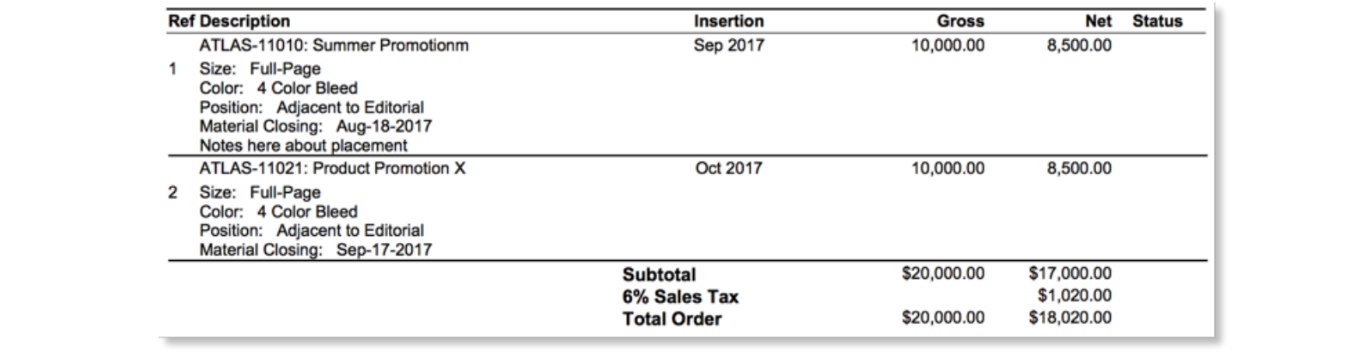
a) Result when selecting Use Net and Use Net for taxes:
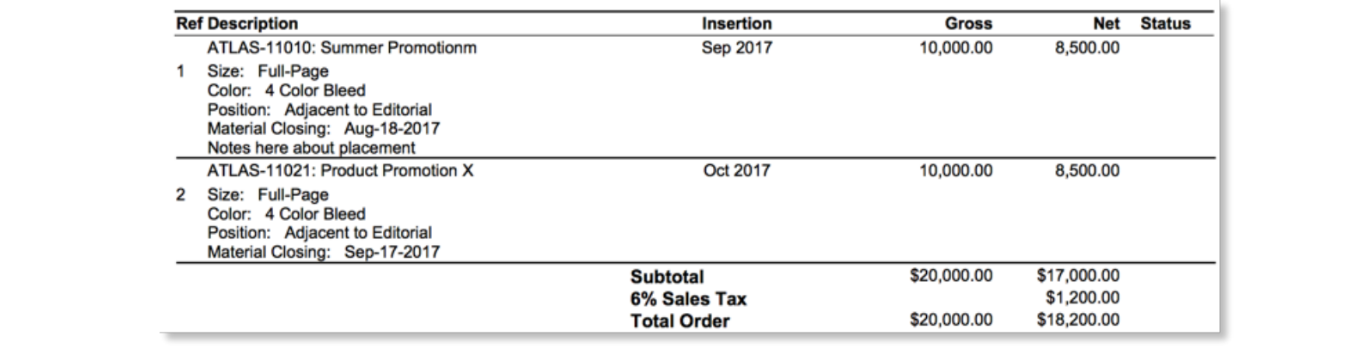
b) Result when selecting Use Net and Use Gross for taxes:
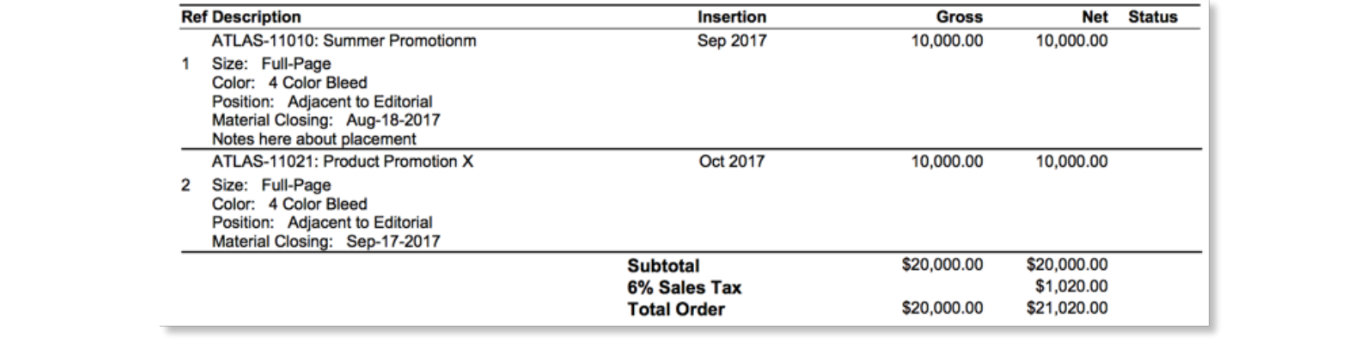
c) Result when selecting Use Gross and Use Net for taxes:
d) Result when selecting Use Gross and Use Gross for taxes:
There may be instances where you want to clearly show that a media order has been revised and the date it is revised. To do so, under the Options – Show Header window, select the comment icon near Revision as shown in the graphic below.
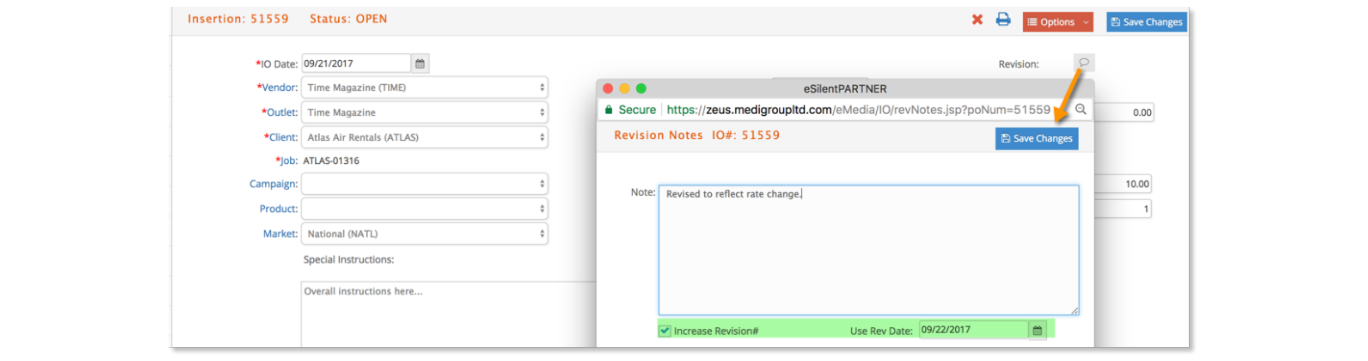
In doing so, a pop-up will display where you may elect to Increase the Revision # and add a revision date and then Save Changes.

When printing the order, if you select the ‘Display Rev# with Rev Date’ checkbox the generated order will show the revision number and date as shown here.

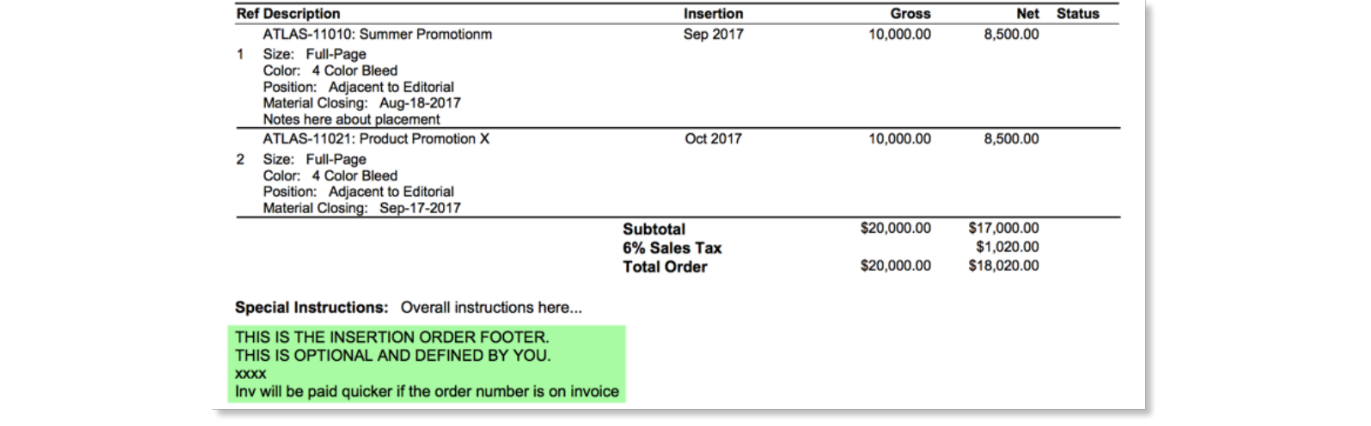
When selecting the ‘Print Footer’ checkbox, the order will print with the footer information as shown in this example order.
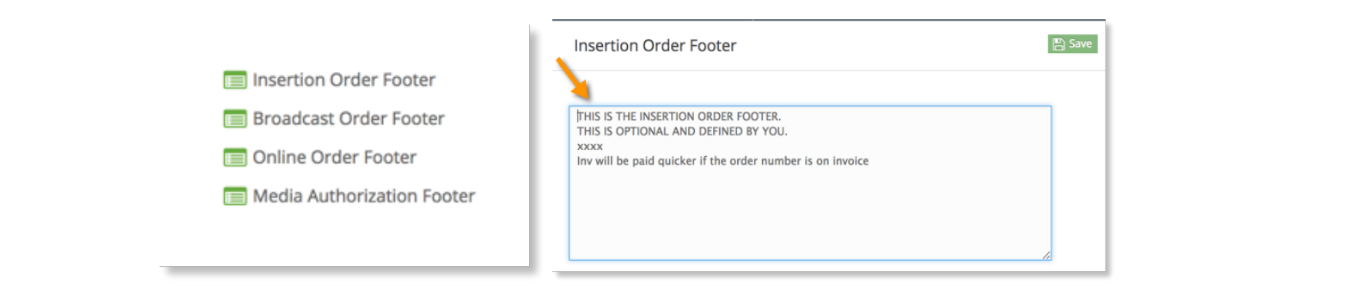
The media order footer information is company specific and may be tailored for each order type. The setup is found under Media – Admin – Preferences and a sample Insertion Order Footer is shown here:
Lastly, if selecting the ‘Show Media Plan#’ checkbox, the generated order will display the Media Plan number and is displayed on the order in the location shown here:
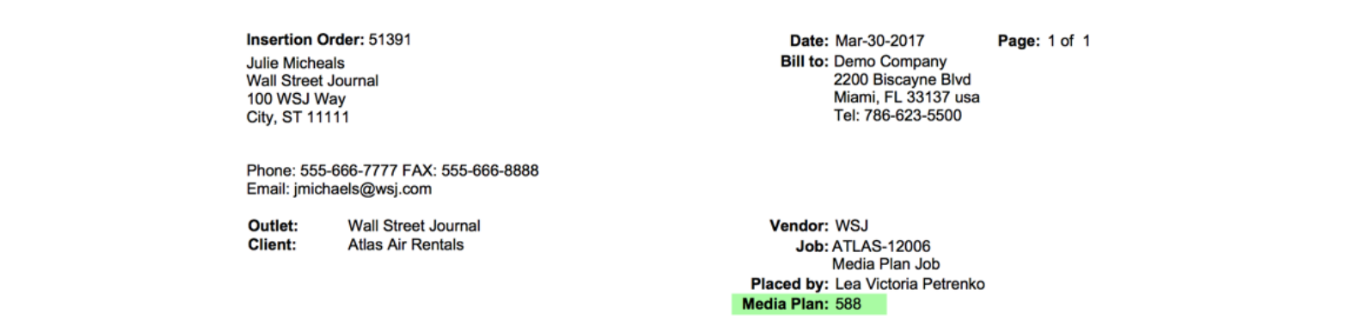
A plan number is only displayed if the order is tied to an existing Media plan.