Search
Outlets are assigned to Vendors and one Vendor may have many outlets. Additionally, each media order is assigned to both a Vendor and Outlet. More recently, setting up a vendor record for each outlet has been preferred since outlets are often sold to other companies. When this happens, the vendor name associated with the outlet can simply be changed.
To search for existing Outlets, click Outlet from the submenu. At the search window enter appropriate criteria like Vendor, Outlet, and Item and click Search. To find inactive Outlets, uncheck the Active checkbox.
If importing from Strata, the outlet code should be updated as the Vendor's Billing Code in Strata.

Adding Outlets
To add an Outlet, click the orange plus sign,  , next to Outlet on the submenu. In doing so, the user is presented with the New Outlet setup window.
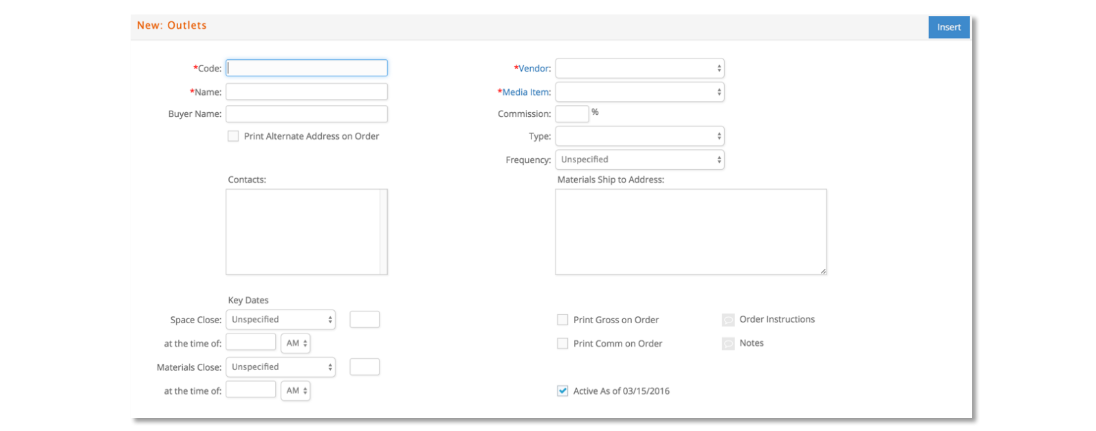
The mandatory (required) fields that must be completed are Code, Vendor, Name, Media Item, and Type. All other fields in this window are optional.
However, it is recommended to enter a Commission % (percentage) as this value will be used as the default when media orders are manually added or edited in e·silentpartner for the specified outlet, i.e., 15%.
The user also has the option to set other defaults such as ‘Print Gross on Order,’ ‘Print Commission on Order’ or to assign default Order instructions, Notes, or Materials Ship to Address.
When completed, click on the Insert button to enter the Outlet into the database.
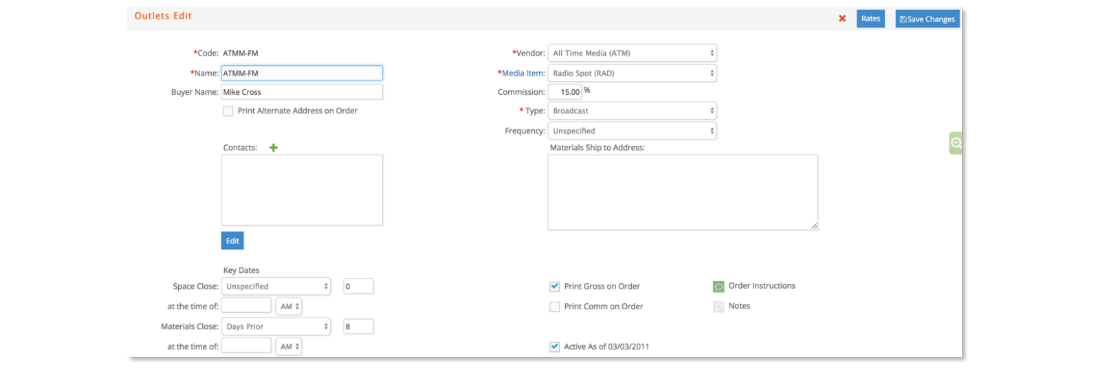
Once the outlet is created, the user may return to the Outlet at any point and make necessary edits and upon doing so, click the Save Changes button.
Rates
If the rates are known it is also recommended to setup the rates as these will auto populate during the creation of order lines. To begin, click on the rates button, , and the user will be presented with a pop-up window to enter the rate information.
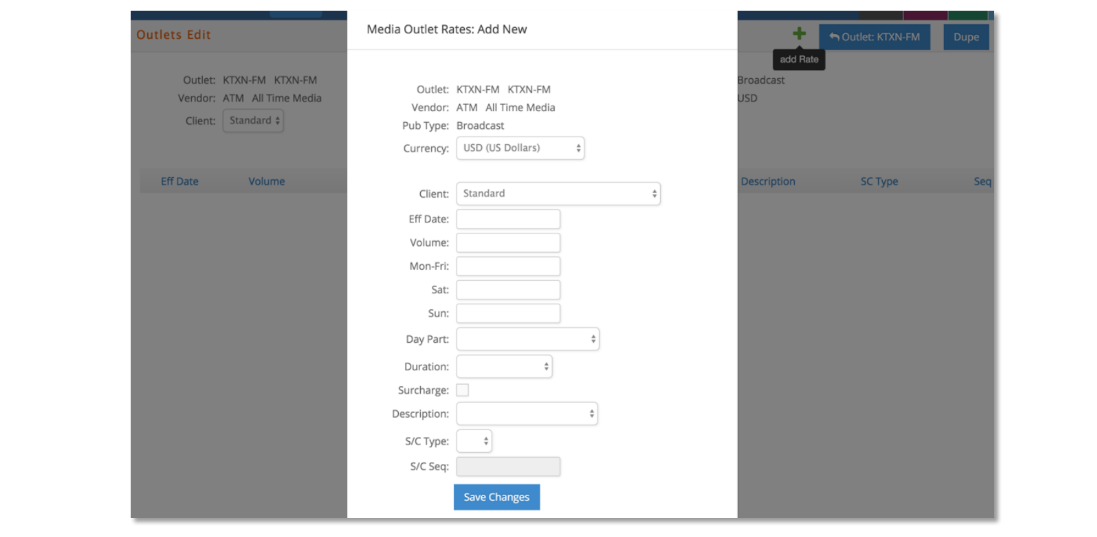
Once the necessary information is entered, click Save Changes.
Upon doing so the rate line will be entered into the database and displayed at the Outlet Edit window as shown here.
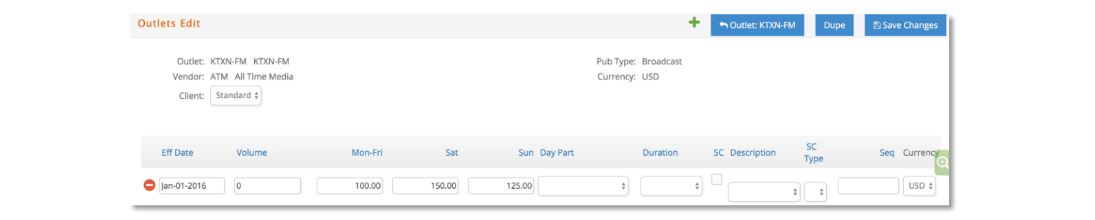
Should any information need to be changed, the user may make the edits and then click Save Changes.