Billing
The following is a review of the billing options available when selecting Job # > Financials > Bill: Bill, Est Bill, Adv Bill, Adv Bill - Finalize
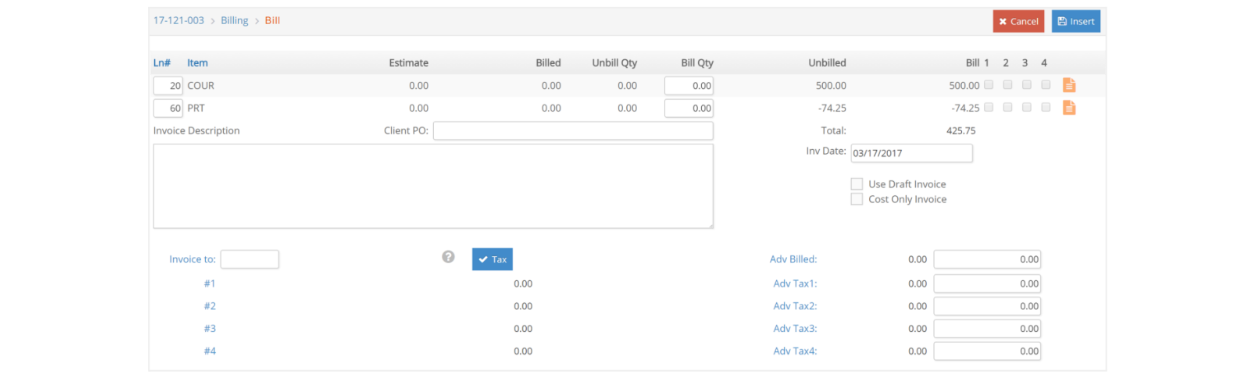
Bill - Billing based on actual charges
After actual charges have been applied to a Job, you can bill those charges, apply them against an Advance bill, or if you have Estimate billed, you can recognize the cost side of the transaction with a cost only invoice.
Under Job # > Financials > Bill, select ‘Bill’ and click Continue. You will be presented with a window populated with the charges that represent all the charges in the charges window with a status of Bill – the equivalent of the Unbilled field on the Job Summary.
You can add comments about each line item that will be printed on the detail invoice. Simply click the notepad icon to add the comments and save changes. When you are done, click Insert to create the invoice.
If an advance bill was previously created and there is an advance billed balance on the Job, the charges are automatically applied to the advance unless you clear the advance applied amount(s) when you are creating the invoice.
Est Bill - Billing Estimate

Under Job # > Financials > Billing select Est Bill from the drop-down list to Estimate a bill for a Job. Estimate billing is very similar to Advance billing, except that when invoices are posted, revenue is recognized by the posting – the AR account is debited and the Revenue accounts for the items are credited. To recognize the cost of sales/direct expense side of the transaction you must do a Cost Only invoice which will be discussed in the next section.
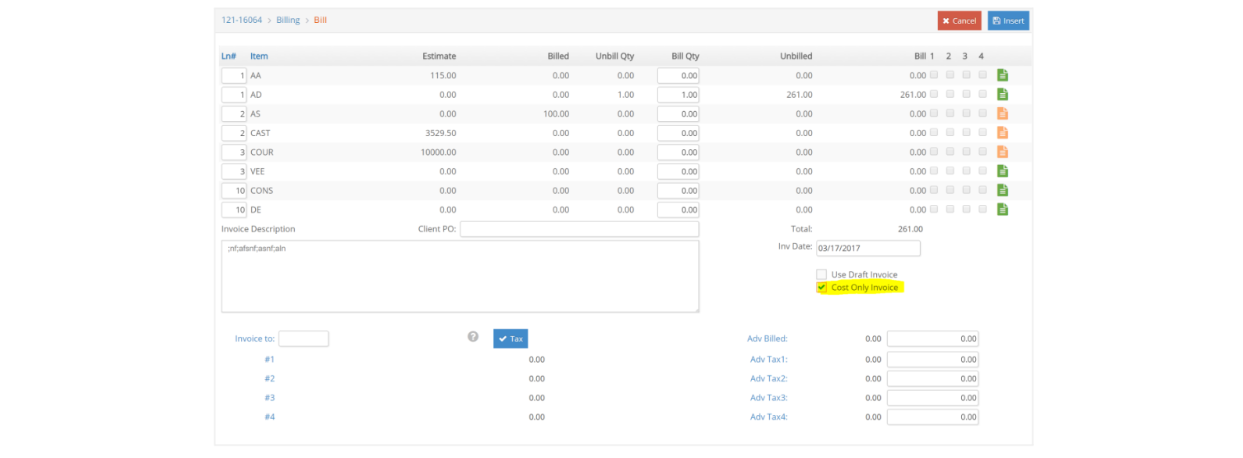
Creating a Cost Only Invoice
Cost only invoices are zero-dollar client invoices where the sole purpose is to recognize the cost of sales/direct expenses associated with a previously created estimate invoice, covered in the previous section.
Make sure any charges, for which you wish to recognize the cost, have a status of BILL in the charges window. If there’s any other charges on the Job which you do not wish to recognize the cost yet, make sure to change their status to HOLD.
From the Job # > Financials > Bill, select Bill and Continue. Make sure the ‘Cost Only’ check box is checked, change the date if desired and click Insert to create the invoice.
Creating a Cost Only Invoice across Jobs
Regardless of the Estimate status (Approved/Not Approved) you can create Cost Only invoices from accumulated charges.
Go to Jobs > Billing > Bill Charges.
Under Billing Options drop down, select ‘No AR - Cost Only Invoices’, select (yellow highlight) the Unbilled Job/charges you want to bill, then click Submit.
Adv Bill - Advance Bill
Advance billing is simply as stated – you are billing a client in advance of any work being performed – in other words it is a deposit on future work. Accordingly, advance billings are not posted to income in general ledger. Rather, they are treated as a liability because they are not based on actual services rendered. This liability is then relieved when you subsequently bill the client for actual charges incurred (with Financials > Bill > Bill) and the advance is subtracted from the balance due on the client's invoice. Let's review how this works.
Advance Billing – Based on a Percentage of the Estimate
Under Job # > Financials > Bill select Advance Bill from the Bill Type drop-down list. If you wish to bill based on a percentage of the master estimate, enter the percent in the ‘Enter a Percentage’ field.
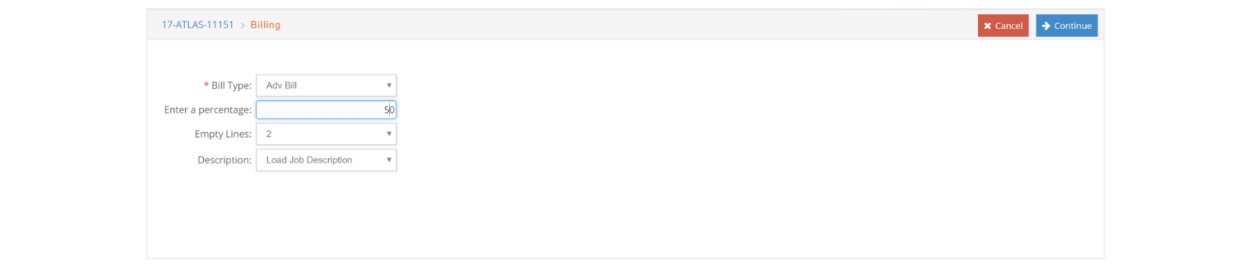
Click Continue and the billing window then will auto populate with the dollar amount equivalent to the percentage you entered for each of the items on the estimate.
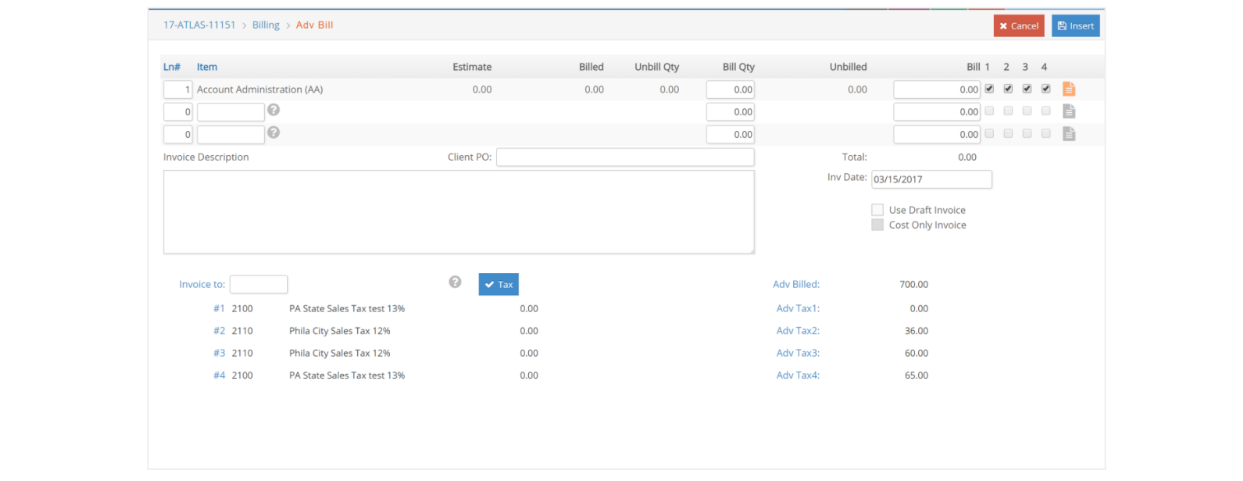
Using this window, you can specify what should appear on the invoice. You can enter an invoice description, line notes, change the invoice date or taxes if desired and click Insert.
Advance Billing – Not Based on a Percentage of the Estimate
If you do not want to bill based on a percentage of the estimate, do not enter a percentage in the Enter a Percentage field and you can enter the amounts for any of the lines that you would like to bill. Enter a bill quantity, amount, line notes if desired, change the date if desired, and confirm the taxing of the invoice. Click Insert when you are done.
When the invoice is posted, accounts receivable is debited and the liability account for advance billings is credited.
If you want to cancel the process at any time before clicking Insert, simply select another menu option to go to another window.