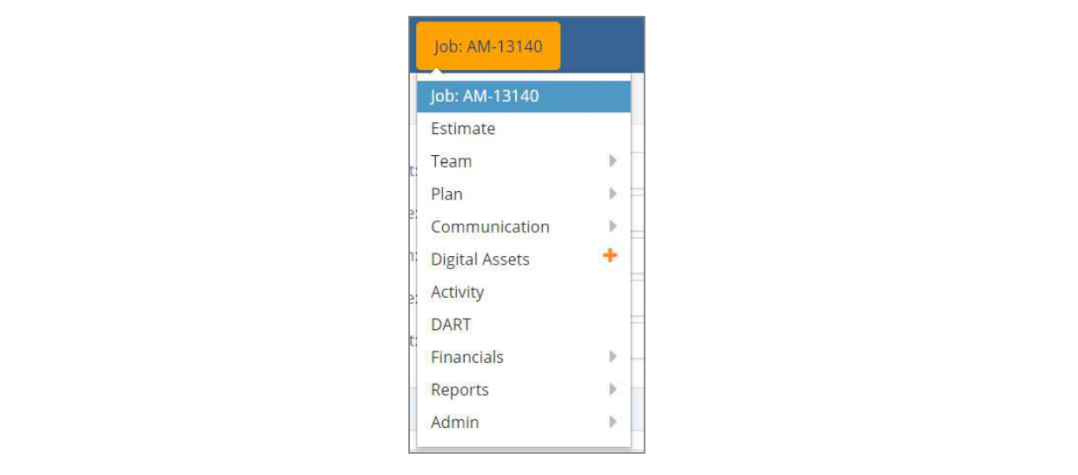
To create a new Job, select Jobs from the navigation bar, and then under the sub menu select the Orange  icon, where you will be presented with the Job Start Entry/Review window.
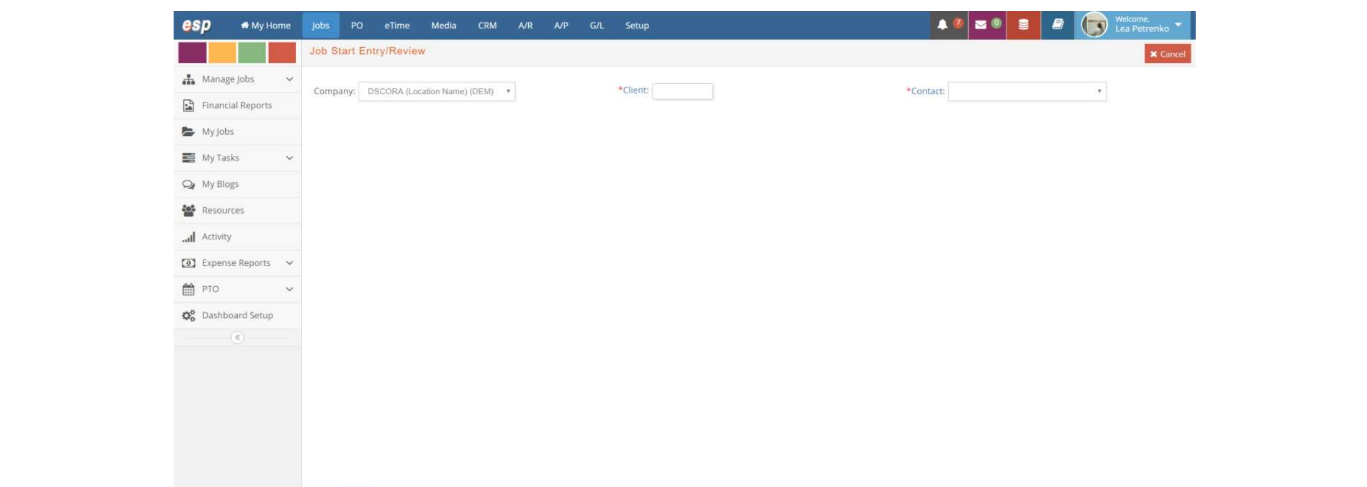
From this initial window, you can enter the initial information for Job at a minimum using the required fields denoted with a red asterisk  .
.
An overview of the fields in the Job Start Entry/Review window follows.
-
Company: The company in your e-silentpartner database for which this specific Job will be created.
-
Client: The Client (company) for whom this estimate was made or the work is being performed. This is the first required field for entering a Job. Client setup is described in the Jobs Blogs Communication user guide.
-
Contact: The individual within the client organization who commissioned the quote or Job or is the primary point of contact for the Job.
Once these three mandatory fields have been populated, the window will refresh to bring the rest of the fields that will complete your Job setup.
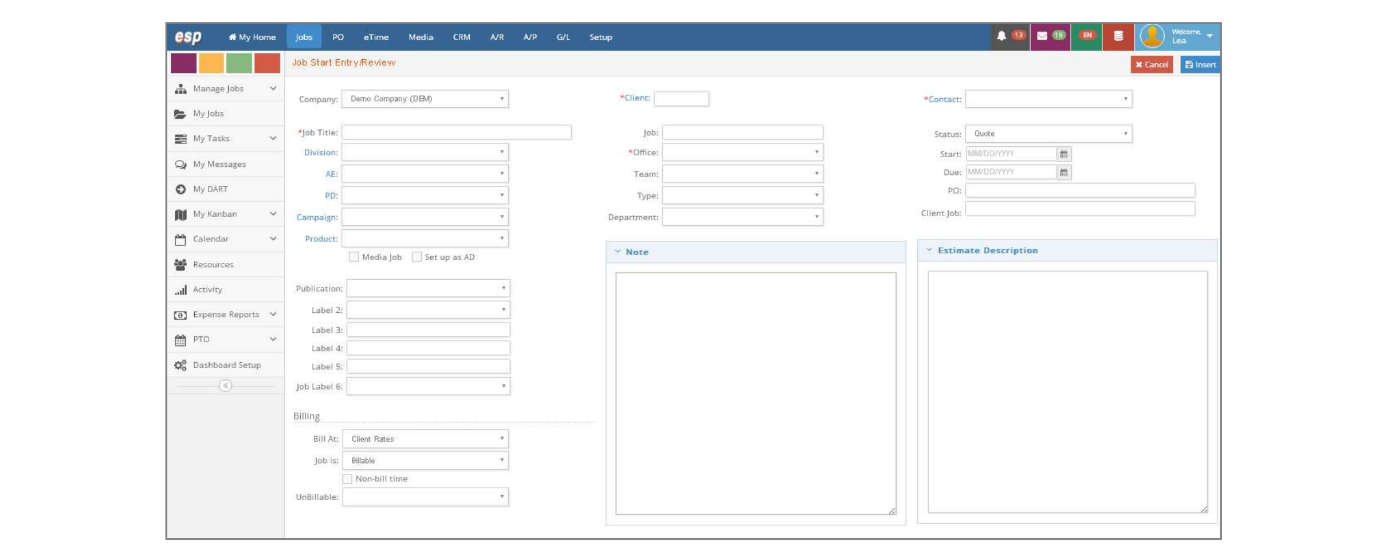
From this window, you can enter the initial information for Job, at a minimum, using the required fields denoted with a red asterisk. Many other fields in this window are optional and may be entered initially or later as desired or needed.
An overview of the fields in the Job Start Entry/Review window follows.
-
Job Title. The short title/description of the Job. Up to 35 alpha-numeric characters can be entered. The Job title is printed on the client estimate, client invoice, and most of the reports generated in the Jobs section. It is recommended that special characters such as & % # @ not be used in the Job
Title. -
Job. The unique number assigned by esilentpartner to this quote or Job. However, if you have a need to enter your own Job numbers, this is also an option. Review the section on Job number structures available and how to set them up under the Setup User Guide.
-
Status. An indication of the current state of this project. This field can be one of the following and generally means:
- Quote. This indicates that you developed an estimate/bid for a prospective project but have not yet been awarded or started the work. Recognizing that estimates are not needed for all types of work, this is optional and may be bypassed.
- Job. The job is approved and you are doing the work. This is the general status of any work that is in execution or underway and there are charges and other activities occurring.
- Done. The work is completed but not all charges have been added to the Job. You can still enter charges from vendor invoices or internal charges, but no additional time charges can be added to the Job.
- Filed. The work is completed. No more charges can be accepted against the Job. The Job cannot be filed if there are open POs against the Job. It is recommended to file the Job after it has been final billed.
-
Start Date. The actual or expected start date for the Job. This may be changed later if necessary.
-
Due Date. The expected or scheduled completion date of this Job. This may be changed later if necessary.
-
Division. A drop-down list of client specific Divisions that have been created in the client record.
-
Account Executive (AE). Your AE or Representative assigned to this client. It defaults to the AE value entered for the client record. You can override this field.
-
Project Director. Your Project Director or responsible for the administration and completion of this work.
-
Art. Your Art Director or person that could occupy a third position in the responsibility hierarchy of the Job.
-
Campaign. A field indicating that this Job is for a specific campaign. Campaign is client-specific and must be set up using the Jobs > Setup > Client > Campaigns window.
-
Product. A field indicating that this Job is for a client product. Product is client-specific and must be set up using the Jobs > Setup > Client > Products window.
-
Media Job. A check box indicating that this Job should be set up as a media Job. Jobs marked as media Jobs populate the Job list for media orders under the Media module. Select the checkbox if this is a media Job.
-
Set up as AD. A check box that indicates to automatically set up an ad/spot record with the same number and name as the Job. It is a time-saving feature so you don’t have to set up an ad/spot later. Select the checkbox if you want to use this feature.
-
Office. Your company’s office is assigned to this Job, if applicable. If you have offices set up (under GL > Setup > Office — described in more detail under that section of the documentation), an office must be designated.
-
Team. The team assigned to this Job. This field is optional and defaults to the team entered for the client in the Setup > Client section.
-
Type. The type of Job this is. Job types are set up with corresponding Job templates/codes in the Jobs > Setup > Type section of e-silentpartner.
-
Department. Your company’s department, if applicable.
-
PO. This is the client’s PO number, if required, associated with this Job. This number is printed on the client invoice.
-
Client Job. The Job number assigned by the client to this Job. If a client did not assign a number, you may assign your own. This number is printed on the client estimate, client invoice, and most of the reports generated in the Jobs section.
-
Job Label 1 through Job Label 6. Fields which you may define as desired. The names of the fields can be changed as well as the values that show up in each of the drop-down fields. This is further described in the Setup User Guide.
-
Bill At. Refers to how this Job should be priced and/or at what rate charges and time should be billed to the Job. Any one of five pricing scenarios can be used. The five options are Rate 1, 2, 3, Cost, or Client Rates.
The pricing scenario (Rate 1, 2, 3, Cost, or Client Rates) is used by e·silentpartner in two manners:
1. First, by automatically retrieving the appropriate rate when adding a new Job or adding an item to an existing Job.
2. Secondly, applying charges (vendor invoices, time records, internal charges) to the Job at the rate or markup percentage specified in the pricing schedule.
- Job is. The three options are Billable, Non-Billable, and Internal. These options indicate whether or not a Job is billable or non-billable. They also allow you to record internal projects and charge non-billable time against a Job when the Non-bill Time check box, described below is checked.
- Non-bill Time. Sometimes you may be able to bill the client for external charges only, but want to track the non-billable time spent on the Job. In this case, you would mark the Job as billable and check the Non-bill Time check box.
- Include on Billing Status. This field by default is checked. It is solely used when printing the Billing Status report. If this is checked the Job is included in that report. If it is not checked the Job is not included in that report.
- Unbillable. This field is required if a Job is set up as non-billable to indicate the reason. These codes are set up at Jobs > Setup > UnBillable Codes, described later in the chapter.
- Note. A text field where you can enter information about the Job.
- Estimate Description. A text field for entering the estimate description for the Job.
Each individual Job has its own navigation menu. We will review each section independently.