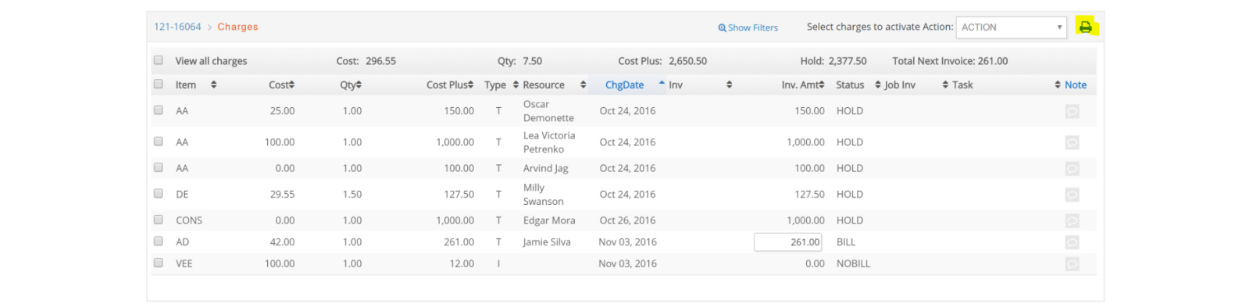
Under Job # > Financials click Charges. You’ll be presented with a window which shows unbilled charges entered against this Job. Click the ‘View all charges’ check box to get a window listing all charges.
This window displays all charges and their status entered for the Job. Use the Show Filters option to see options to filter this data.
Click the printer icon to retrieve a report of these charges.
Adding charges to a Job is performed from three areas:
Vendor invoices (X)
Timesheet entry (T)
Internal charges entry (I)
All charges are billed to the Job based on the billing parameters you set up for the Job. Remember, a Job can be billable, non-billable, or internal. Costs associated with non-billable Jobs are reflected in the client income statement and the staff utilization reports. Internal Jobs are for your company’s charge tracking and are treated as overhead. Examples of internal Jobs would be a Job to redo your company’s website and track the charges, or vacation tracking.
Status of Charges
BILL – billable charge.
NOBILL – non-billable charge.
PEND – entered through eTime and has not been approved through Jobs > Approve Charges yet.
VOUCHR – An A/P Vendor Invoice has been entered but not posted to GL yet.
DRAFT – Charge has been billed, but the client invoice has not been posted.
BILLED – Charge has been billed.
WO – Charge has been written off.
HOLD – Charge has been placed on hold.
In the Job Charges window, you can perform several actions on the charges.
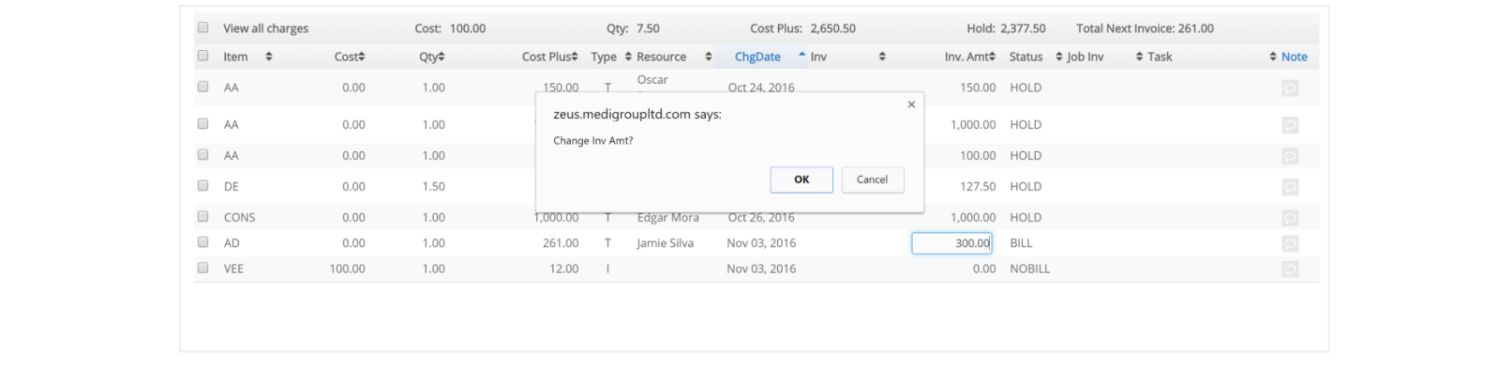
Change an amount to bill
Say the invoice amount on a charge is $11,700, but you want to change it to $12,000. Easy...highlight the Inv. Amt field for the charge, change the amount, and when you tab out of the field you are prompted to “Change Inv Amt?” Answer accordingly.
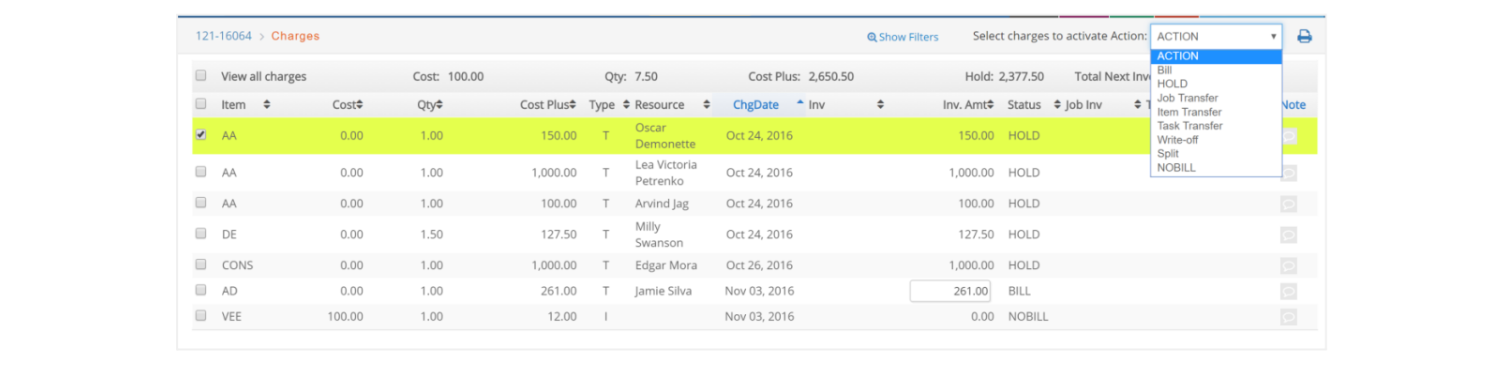
Change the status of a charge on HOLD to BILL
That’s easy too. Simply click the check box to the left of the charge, select BILL from the ACTION menu, and click OK in the charge posting window.
Put a charge on HOLD
Simply click the check box to the left of the charge. Select HOLD from the ACTION menu. Click OK.
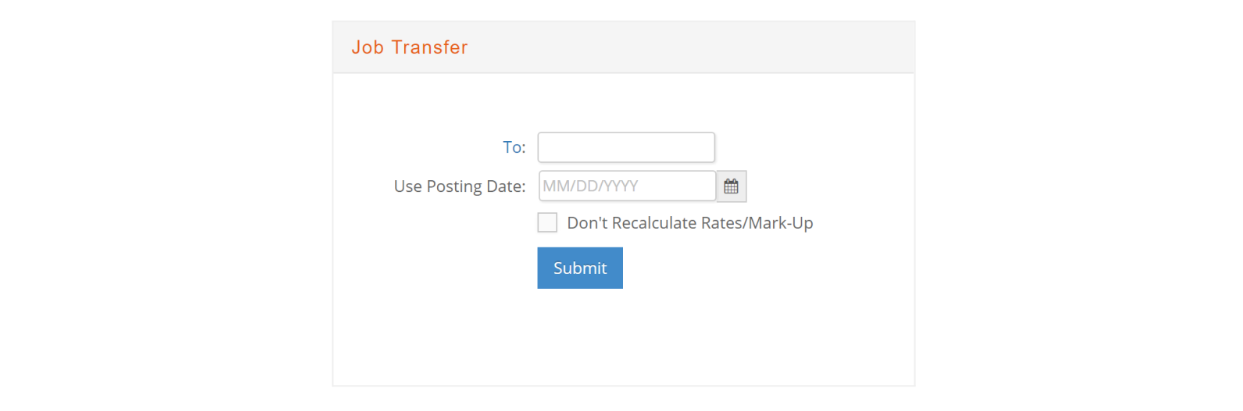
Transfer a charge to a different Job
Simply click the check box to the left of the charge. Select Job Transfer from the ACTION menu. Enter the Job number to transfer the charge to (or click the underlined To field to get a pop-up of open Jobs), the date and click Submit. Check the box to “Don’t Recalculate Rates/Mark-up” if you do not want the rate recalculated.
Transfer the charge to a different item
Simply click the check box to the left of the charge. Select Item Transfer from the ACTION menu. Enter the item code to transfer the charge to (or click the underlined To field to get a pop-up of item codes), the date and click Submit. Check the box to “Don’t Recalculate Rates/Mark-up” if you do not want the rate recalculated.

Write off a charge
Simply click the check box to the left of the charge, select Write-off from the ACTION menu, and click OK in the charge posting window.

You will be asked to confirm that you wish to write off all the selected charges. Answer accordingly.

You will then be prompted to enter a posting date and reason for the write-off. These reasons should have been previously set up under Jobs > Setup > Unbillable Codes discussed in more detail in that section. Charges are written-off based on the net account on the item.

Change the status of a charge to NOBILL
Click the check box to the left of the charge, select NOBILL from the ACTION menu, and click OK in the charge posting window.
Note, though, that you cannot transfer an external charge to NOBILL. If you are not going to bill the external charge, you must write it off to remove it from WIP and recognize the cost of sale/direct expense for the charge.
You can also print a report of the Job’s charges by clicking print while in the charges window.