Setup
Setup for Billing allows you to put all charges, after a specified date, on Hold so they are not billed in the batch bill process. Invoked from Jobs > Billing > Setup for Billing... select the check box to the left of the Job, enter a Billing Cut off Date, and make any adjustments to the type of charges to be considered before clicking Submit.
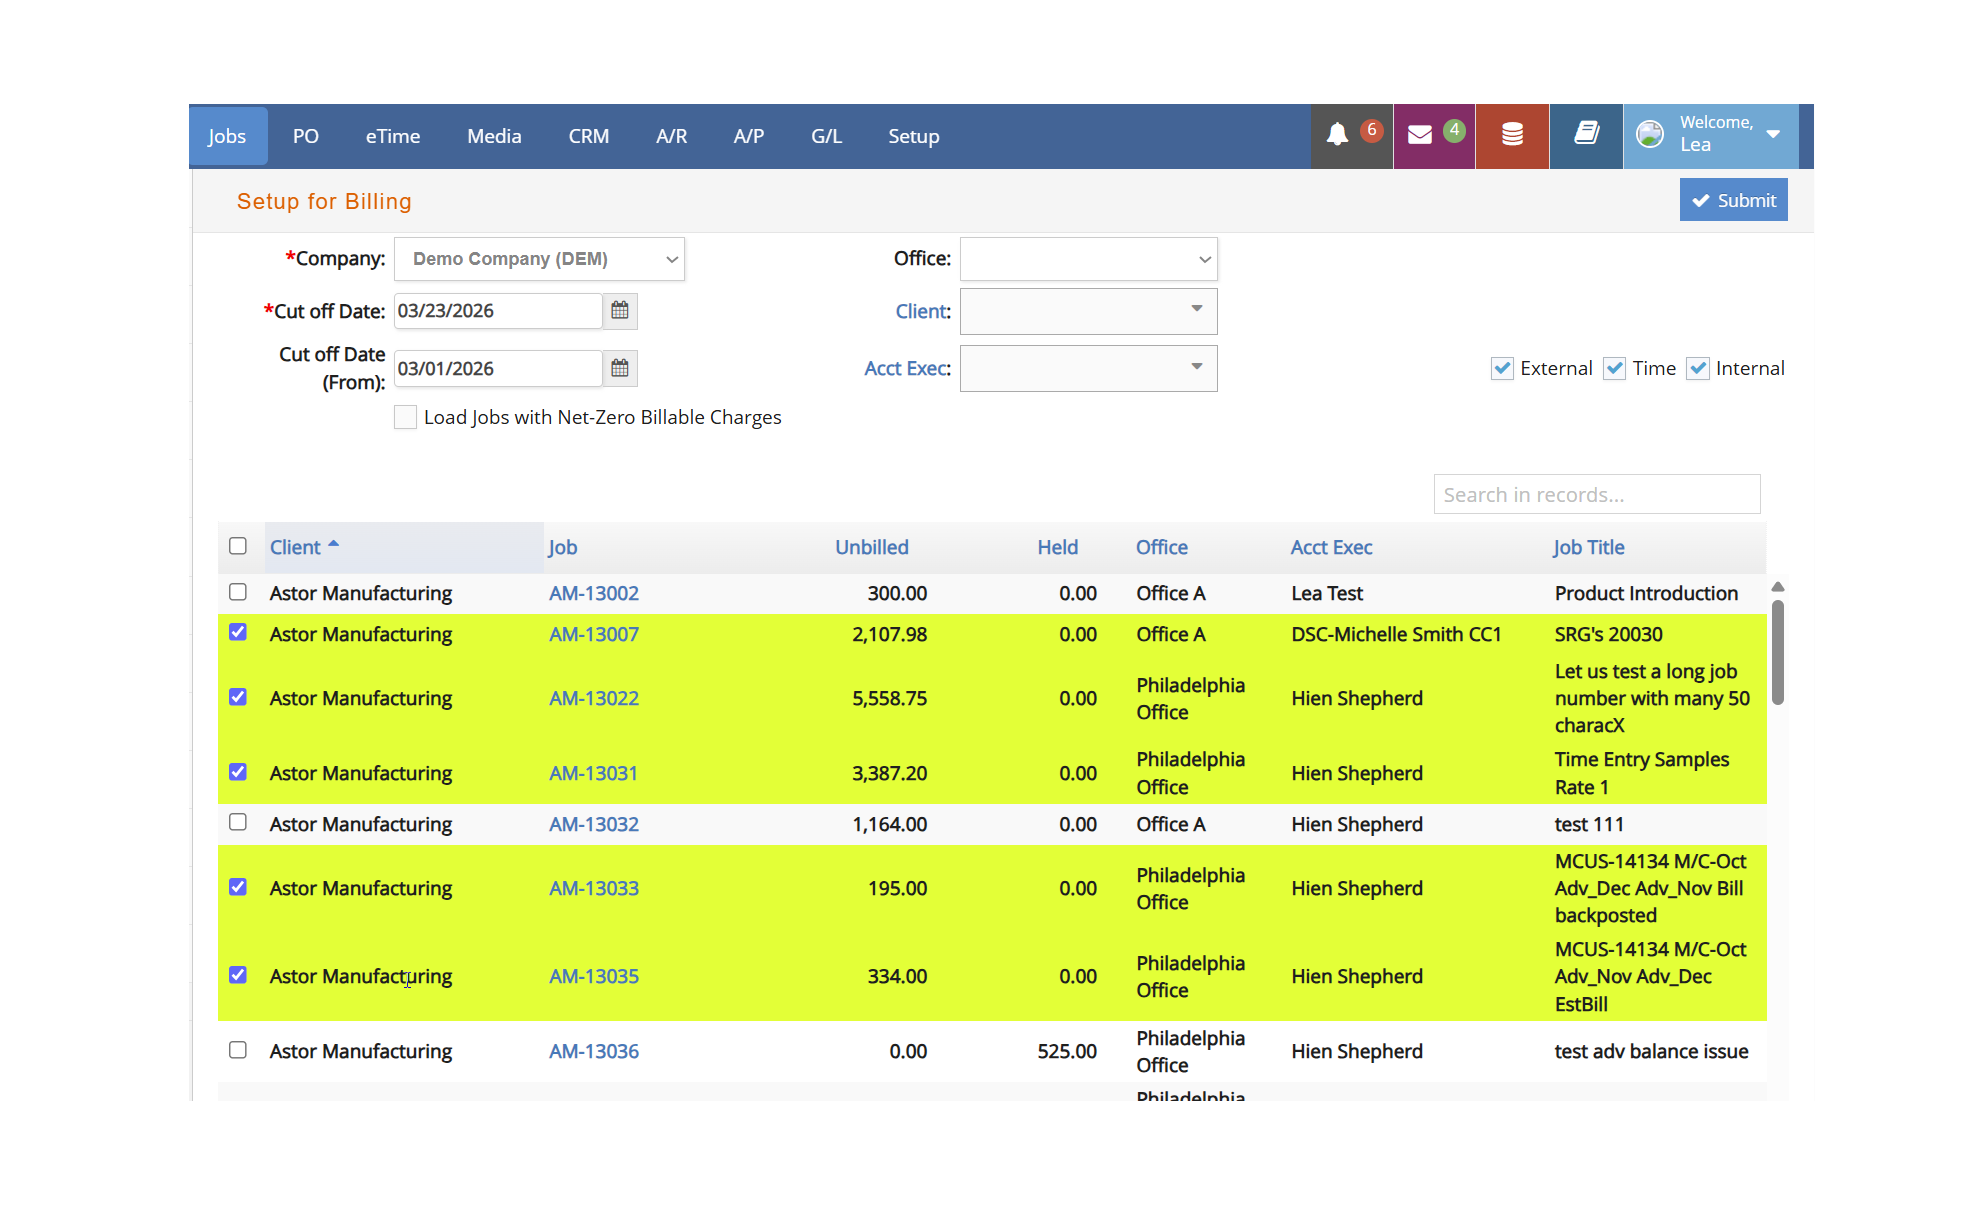
Processing will put all charges after the Billing Cut off Date on hold so that you are able to Batch Bill charges up to March 23rd, for example, and all charges with a March 24th or later date will be put on hold.
Bill Charges
There are times when you want to generate invoices for any or all Jobs listed. e·silentpartner will automatically generate an invoice for each Job selected. Furthermore, you can elect to print the invoice now or later. Many of our clients use Bill Charges (Batch Billing) so that they can quickly generate invoices for their Account Executives to approve.
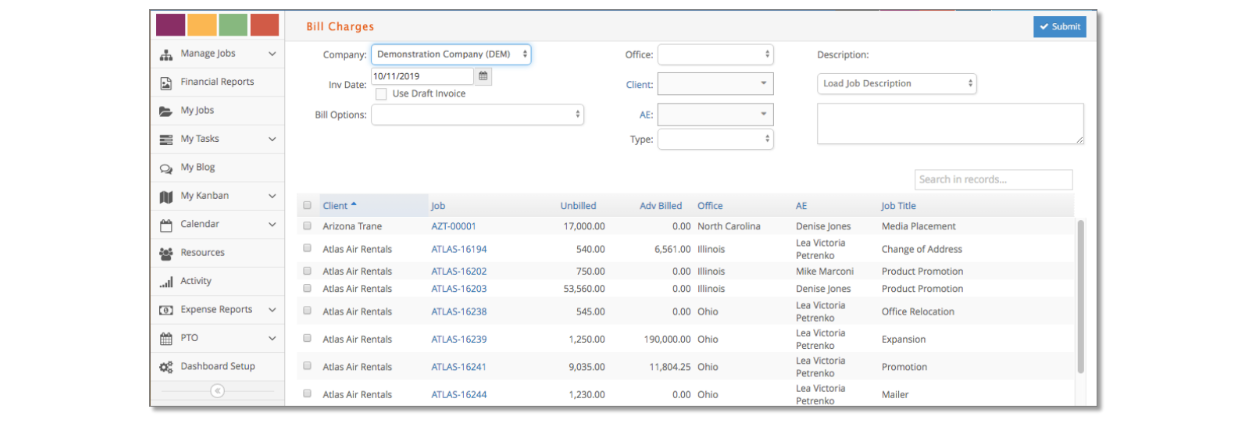
When Bill Charges is selected, e·silentpartner quickly scans your database and identifies all Jobs which have unbilled charges against them and presents a summarized list of those Jobs for your review. Invoked from Jobs > Billing > Bill Charges...this screen enables you to bill multiple Jobs in a single batch process.
The window displays all the Jobs which have unbilled charges.
Activate the check box to the left of any Jobs you want to bill. The invoice date defaults to the current date and can be changed if needed. Click Submit to generate the invoices.
When the process has completed, you will receive a Process Complete message.

Billing Schedule
You can create a billing schedule that gives you the ability to schedule how much and when to bill for a particular project, as well as set specific amounts from the estimate. This way you have the option to bill from a Billing Schedule.
To set up the billing schedule for a particular job go to Job# > Financials > Billing Schedule. The warning message displayed in this window saying the billing schedule does not match the estimate amounts is just a check and balance. You can actually bill more or less than the estimate if you wish.
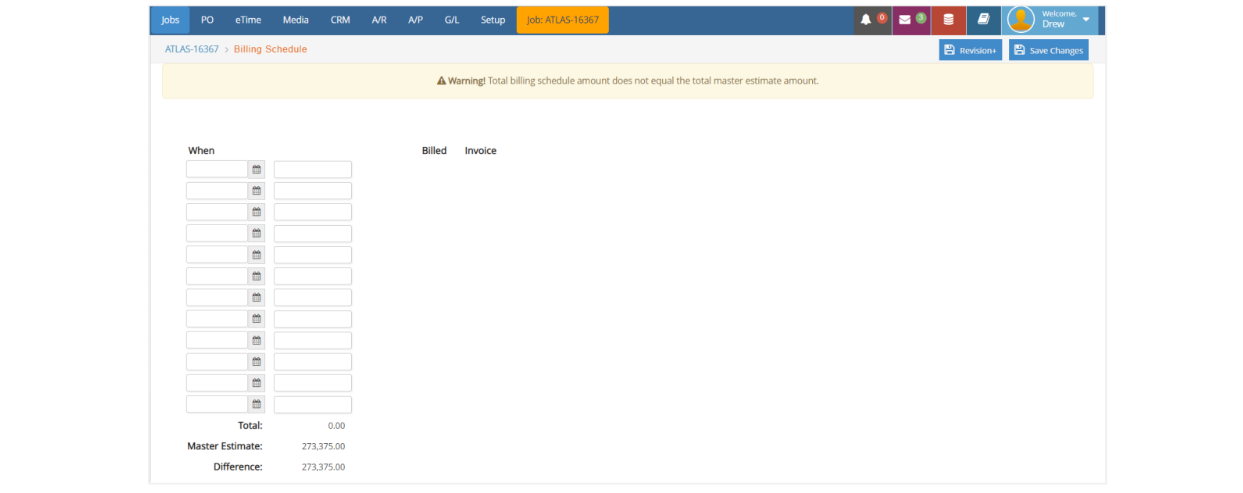
In this window you can set the dates and amounts you wish to schedule for this job. Enter the date on the ‘When’ column and enter the amount on the next column. After you finish setting up all the dates and amounts, click on ‘Save Changes’.
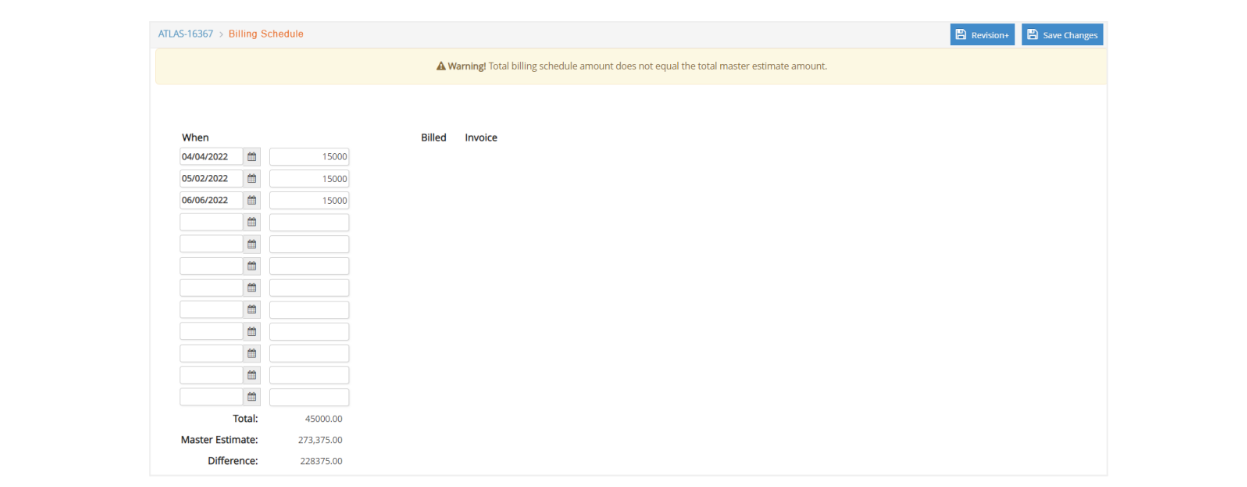
Next you will see two icons show up for each billing date/amount:

Click the  icon to enter an Invoice Description and notes, if necessary. Then click on the
  to add the items and amounts per item to be billed with that invoice:
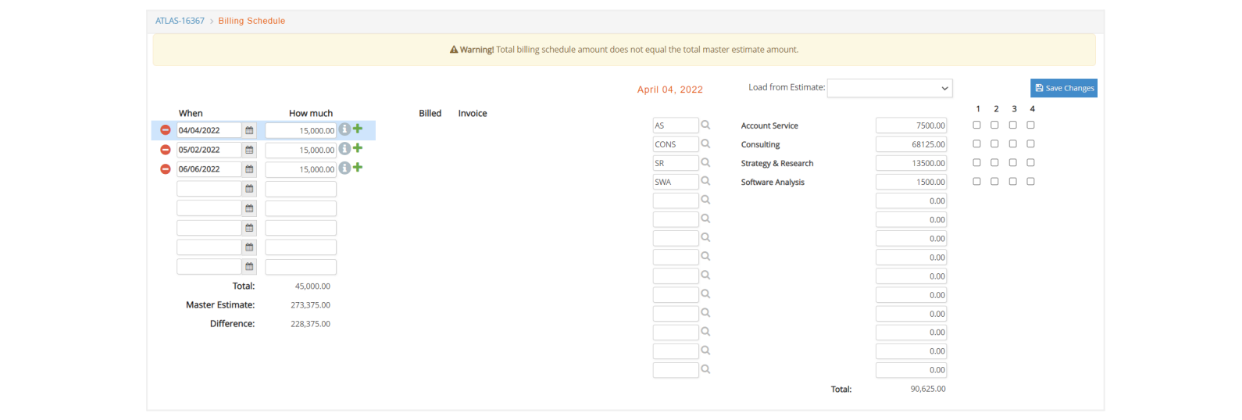
You can either load the items and amounts from your job’s estimate or enter them manually. Select taxes if applicable. When you have finished entering all the items and amounts click on ‘Save Changes’. You can modify the billing schedule detail for each line as long as it has not been billed. Repeat the steps for all lines of your billing schedule or you can come and add to it at a later time.
To create an invoice from a billing schedule, where you can create invoices for different jobs with a billing schedule, go to Jobs > Billing > Billing Schedule.
In the following window select a date range of scheduled billing dates and tab out to get a list of jobs with those characteristics. Select a date for the invoice, choose if you want to do draft invoices, and also select from the ‘Bill Type’ dropdown if you want to estimate bill or advance bill. You can also add a Description for the invoices you are about to create.
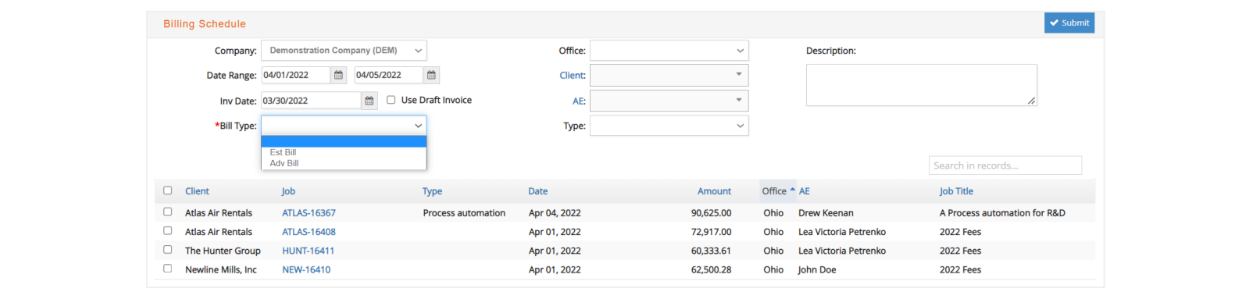
Before selecting what you want to bill, you can click on the link with the job number to see the details of items and amounts that will be billed for that job.
Select all jobs you want to bill and click ‘Submit’. You will get a message asking if you are sure you want to create the invoices. Select accordingly.

After this you will get a confirmation with the invoices generated. You can click on the job link to go to the invoices window and look at the invoice created. After this you can follow the regular posting process.
Clear Advance Bills
Go to Jobs > Billing > Clear Advance Bills.
You can use this window if you want to see a working list of jobs that have advance bill balances. From here you can then go to a particular job to manage the billing.
Run PRR
Go to Jobs > Billing > Run PRR. Note: Please see our Projected Revenue Recognition (PRR) Guide for more details.
Close PRR
Go to Jobs > Billing > Close PRR.
Retainers
From this specific menu you can batch bill any jobs that are set as type RETAINER. Retainer jobs will be billed periodically, using the master estimate (approved estimate) amount as the amount to be billed every billing period.
When Retainers is selected, e·silentpartner quickly scans your database and identifies all Jobs with type Retainer and displays all Jobs in that category.
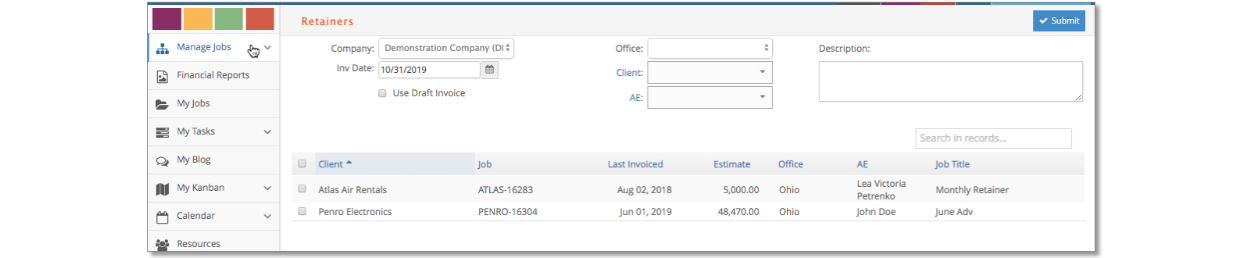
The window will bring the Client and Job number, Last Inv(oice) Date, Estimate (amount to be billed in every period), Office, Account Executive and Job Title.
You can select an option to create draft invoices, the date for the invoices to be created and use the description box to assign a description to all retainer invoices created in the process.
Approve Draft Invoices
Whenever you generated invoices within e·silentpartner, you had the option of indicating whether or not the invoice(s) should be generated with a draft invoice number. Several organizations use this option so that they can review the invoice first – and then delete it if they don't like the look or want to add more charges.
Draft invoices use a separate invoice number counter. Therefore, if a draft invoice is deleted, a real invoice number will not be used in vain. This keeps your auditors happy. You won't have to explain why you deleted the invoice. After you have reviewed your draft invoices and are ready to approve them, that is, have a real invoice number assigned, simply use the Approve Draft Invoices option under the Jobs > Billing > Approve Draft Inv’s menu.
When you invoke this option, e·silentpartner will scan your database and present you with a list of invoices that have a draft invoice number.
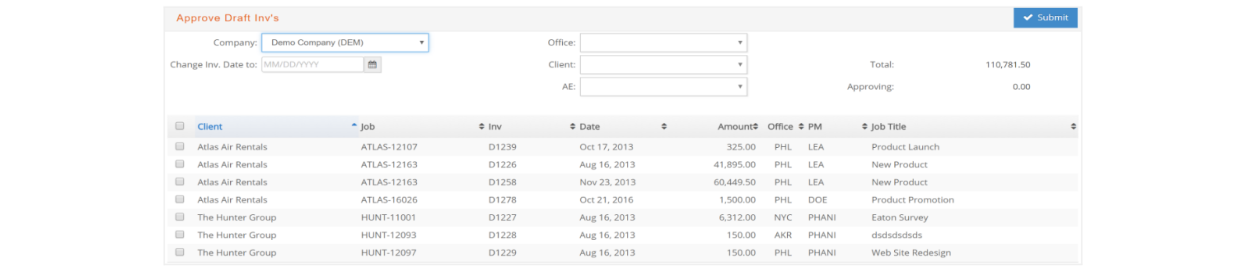
The approval process is straightforward.
Select the invoices that you want to approve.
You can also change the invoice date.
Click Submit when completed.
During the approval process, e·silentpartner will replace the invoice number that was associated with the draft invoice – the invoice will now be assigned with a real invoice number.
Print Invoices
Within e·silentpartner, there are two methods available to print a client invoice. The first is on an individual basis directly from the Job Summary Invoices window for each Job; the second is a batch printing process – printing all client invoices that have not been printed previously.
Whenever e·silentpartner generates a client invoice, it marks it ("behind the scenes") as not printed. This feature allows you to create several client invoices and then print them all in one session. Invoked from Jobs > Billing > Print Invoices, a window displays all the invoices that have not been marked as printed.

Activate the check box to the left of the invoice(s) you would like to print. Click Submit.
You will be presented with the printing selection window.
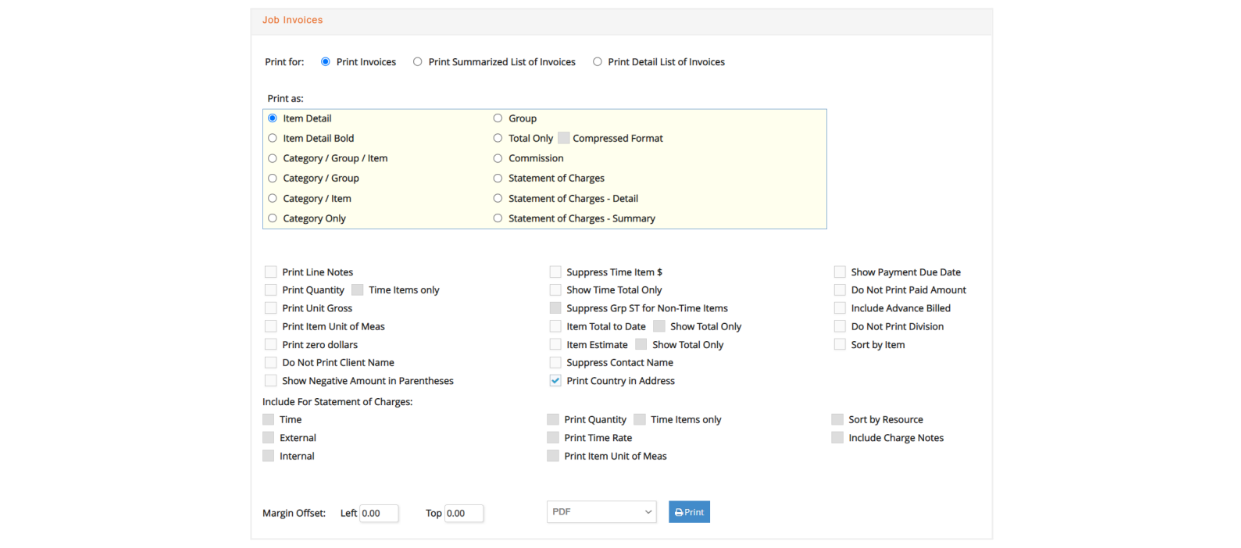
Print Invoices: Prints the invoices.
Print Summarized List of Invoices: Prints one line per Job by client.
Print Detailed List of Invoices: Prints the detail of the invoices by client.
There is a tremendous amount of flexibility built into the invoice printing format options as discussed in the Jobs Summary section. We encourage you to print in various formats to experiment with the options. Different formats can be used for different clients as well.
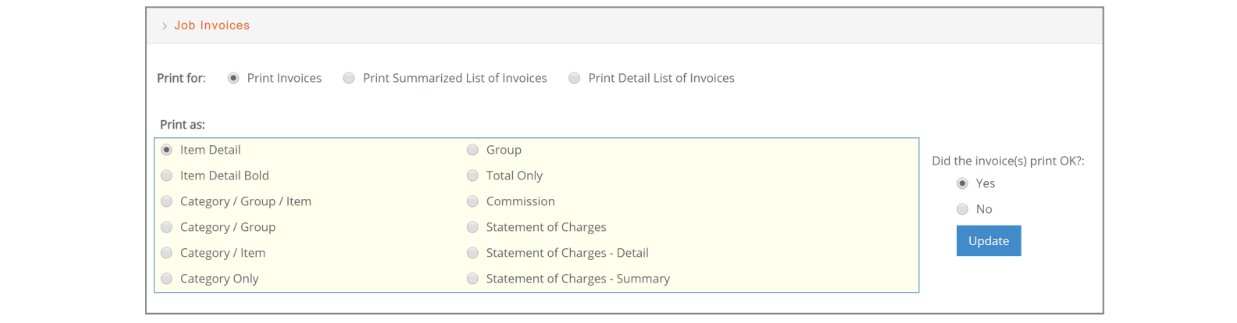
After the invoice is printed, the printing selection window refreshes with a question, “Did the invoice(s) print OK?” If you answer NO, you can go back to the Batch Print window and print again. If you say YES, they printed correctly, the invoice records will be marked as ISPRINTED and will be removed from the Batch Print window.
Post Client Invoices
Throughout e·silentpartner, any transaction that impacts the general ledger is automatically posted in real time – as it occurs. But there are exceptions to every rule, and client invoices is one.
At some point, you'll want to post those invoices that have never been posted to the general ledger.
Select Billing from the Jobs menu and select Post Client Invoices.
e·silentpartner will scan your database and display a list of all invoices which have not been posted to the general ledger.

Select the invoices you want to post.
Check or leave unchecked the ‘Reset Held Charges on these Jobs to BILL’ option appropriately and enter a posting date.
When your selection is complete, click Submit.
e·silentpartner will post the invoices.
When the process has completed you will get a message with the JE # that was created by the posting.
