To allow for the proper use of expense reports, there are several setup procedures that will need to be enabled by both the Admin/accounting user and the individual employee entering their expenses.
Expense Items and GL Accounts
First, you must set up expense ‘Items’ and their corresponding GL accounts. Expense items are necessary so that you can track and distribute expenditures to billable, non-billable or internal Jobs, and for reimbursing the employee who purchased the expense item. Item examples may include Travel Related Expenses, Employee Meals, Office Items, etc. To set up new expense Items go to Setup > Items +. If you are unfamiliar with Items, please review the Setup guide located in the documentation section of e·silentpartner.
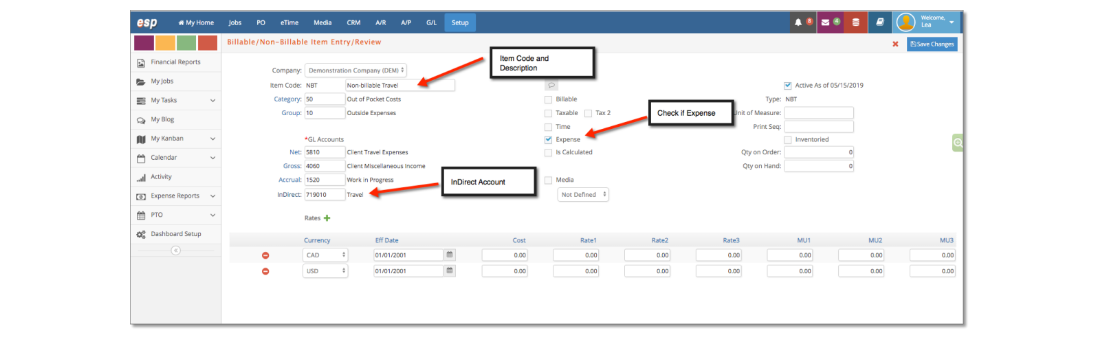
Make sure to select the correct GL accounts associated with the item or set up new GL accounts if needed. Also, remember to select the ‘Expense’ check box so that the Item will appear in the Expense Reports entry window.
Employee Security Setup
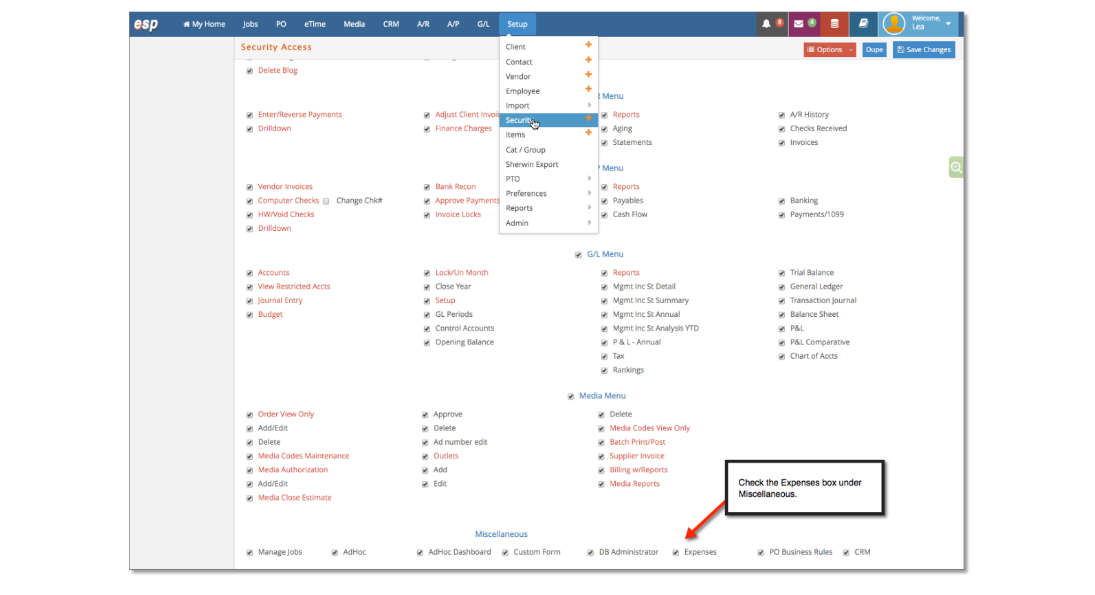
Your system Admin must provide users with access to expense reports via their employee security panel. Go to Setup > Security, find the employee, and check
the ‘Expenses’ box under the Miscellaneous heading.
Employee Record Setup
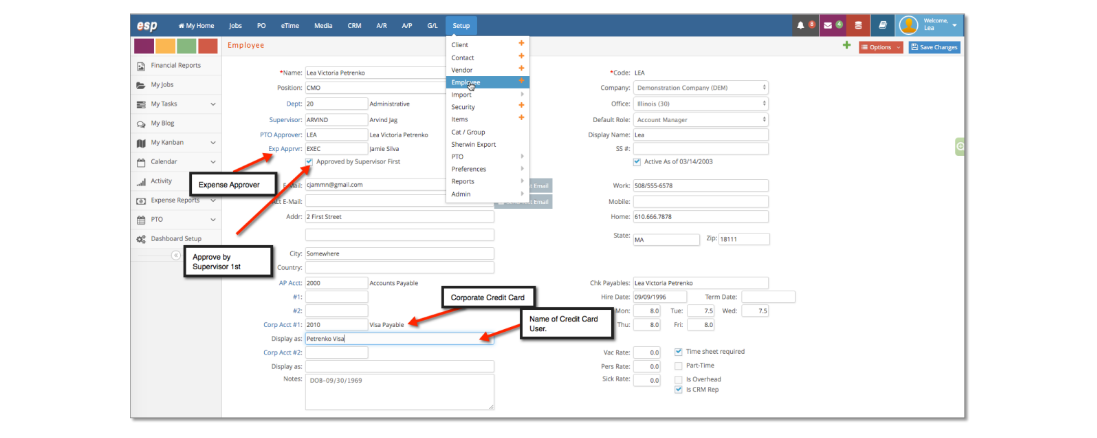
There are several areas in the Employee record that you will want to set up including Expense Approvers and Credit Card Accounts. First, if you require expenses to be reviewed and approved, prior to reimbursement, you will need to set up expense approvers in the employee’s record. Go to Setup > Employee, find the employee and enter the expense approver in the designated ‘Exp Approver’ field. In some cases, you may also want a Supervisor to approve expenses prior to the designated expense approver. In that case, check the box ‘Approve by Supervisor First’ and make sure the correct Supervisor is assigned.
Next, in the Corp Acct # 1 field enter the GL Account associated with the company’s credit card expense account. Then, enter the name of the authorized credit card user in the ‘Display As’ field.
You can designate up to two company credit cards to every employee.
Individual User Settings
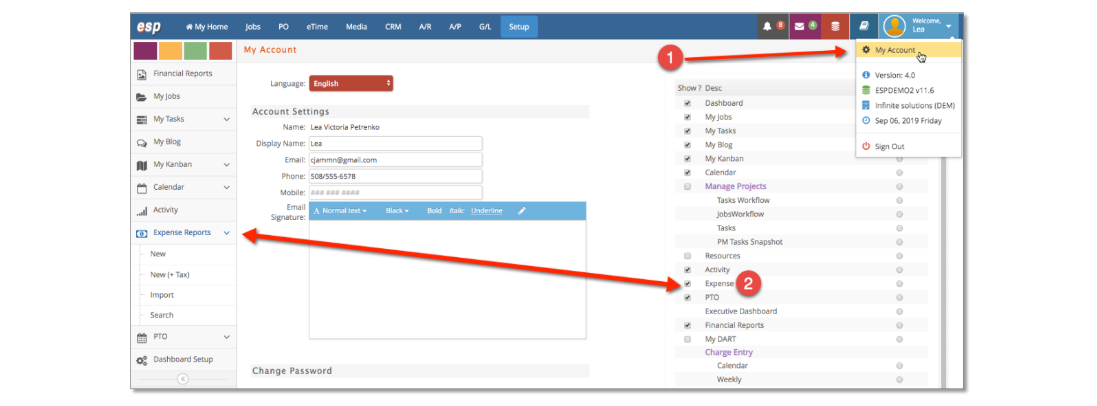
Although expense reports will be available under the eTime module, each user can optionally enable access to the Expense Reports via the sidebar on their dashboard. First, navigate to your ‘My Account’ section and check the show ‘Expenses’ box. The Expense Reports sidebar will now appear on your interface.
You are now ready to enter your expenses.