In this section, we’ll show you how to enter and submit expenses and search for the status of your expense reports. Under the eTime header, hover over Expense Reports and choose from the four options which we’ve detailed below.

Expense Reports > New
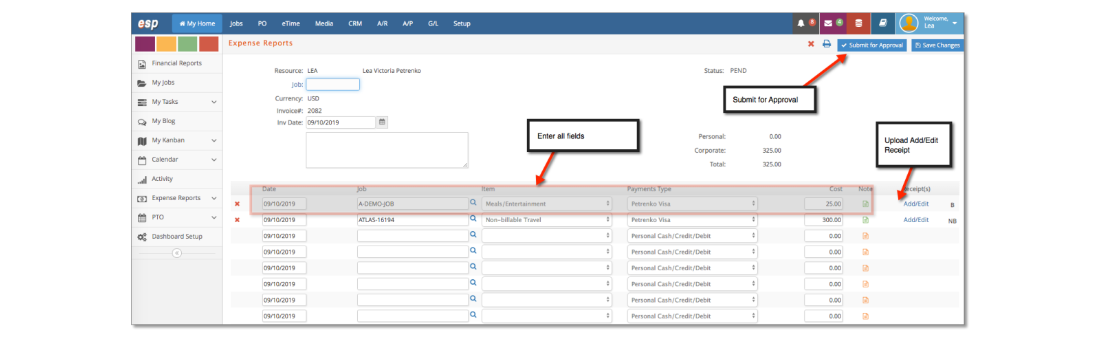
This expense entry window is used if expenses are not subject to taxes. Enter all fields including date, job, item, payment type - if an employee has company credit cards in her/his setup it will show up as an option-, cost, note (if required). Click Insert.
The system will assign at this moment a status of PEND to the expense -it still can be edited- and a vendor invoice with a PEND status linked to the expense will also be created.
At this stage, you can also upload a receipt if necessary. Once you are done inputting expenses and uploading receipts, click the blue ‘Submit for Approval’ button. A dialog box will open asking if you want to submit the expenses for approval. Click OK to submit or Cancel to continue entering expenses.
Expense Reports > New + Taxes
Use this Expense entry window when you need to add taxes to expenses.

The process is the same as entering an expense report with no taxes, but you will have to specify the tax account for each expense. The system will automatically calculate the amount of tax - this amount is editable if adjustments are needed. You can enter up to two different tax accounts per expense.
Expense Reports > Import
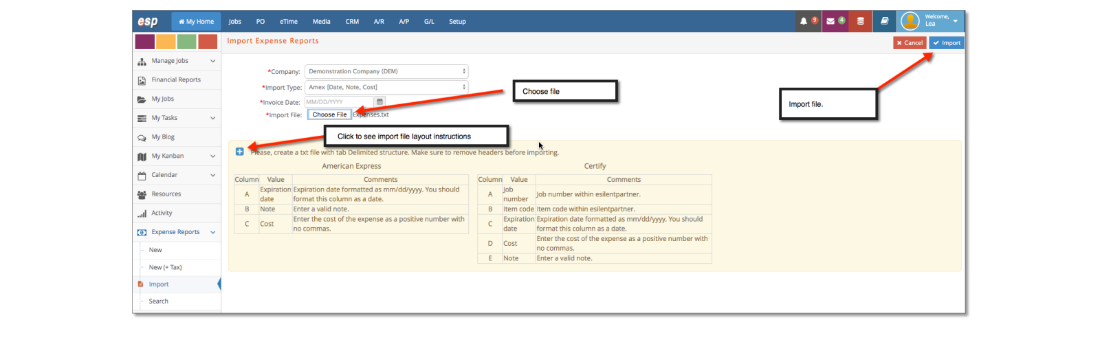
You can keep track of expenses, as you incur them, in an Excel sheet and then import them into e·silentpartner using a .txt file with a tab Delimited structure. Click the Blue  button for instructions on American Express or Certify file formats.
- American Express format: Includes Date, Note and Cost with Job & Item assigned once imported
- Certify format: Includes Employee, Job, Item, Date, Cost and Note
Fill out the  Required header fields, choose your file from your drive and click ‘Import’:
AMEX Process
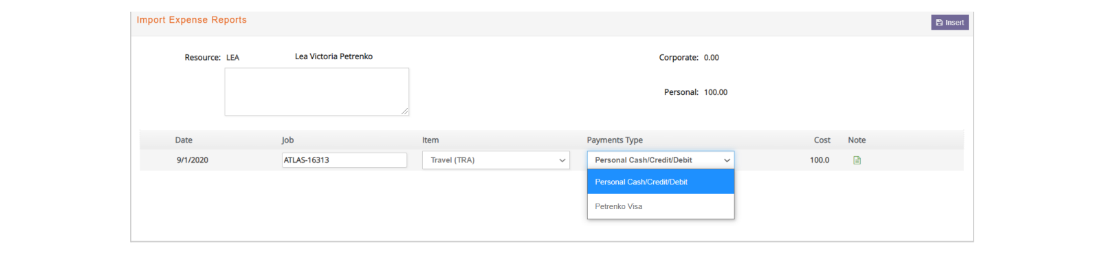
After clicking on ‘Import’, the system will then display the imported lines with the information provided and you will be asked to fill out the job for each expense and modify the item and payment type if necessary:
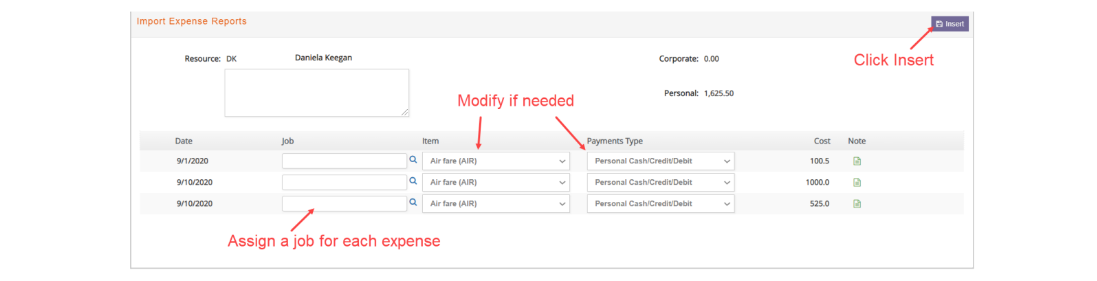
After you’ve made the necessary changes click on ‘Insert’. An Expense report will be created and you will have the option to add expenses and receipts or modify any part of the expenses:
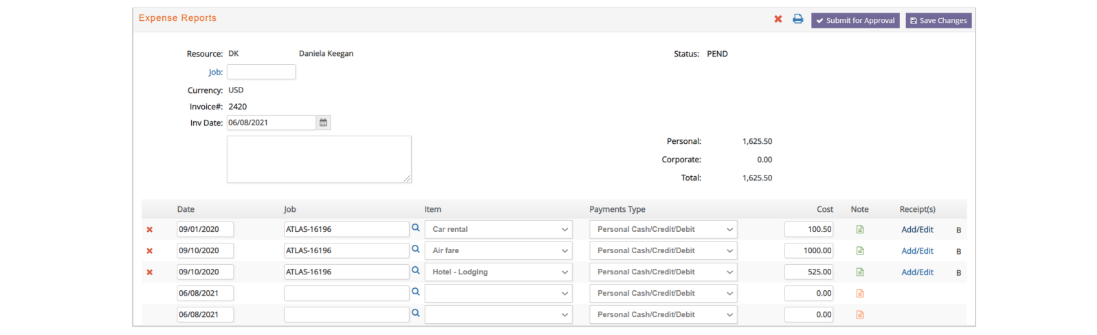
After your Expense report is ready click on ‘Save Changes’ and then ‘Submit for Approval’ if no more changes are needed and you want to send the expense report to the approver.
Certify Process
This is very similar to importing with the AMEX format, but after importing the document you will only have to modify the payment type if it’s different from the default:
Expense Reports > Search
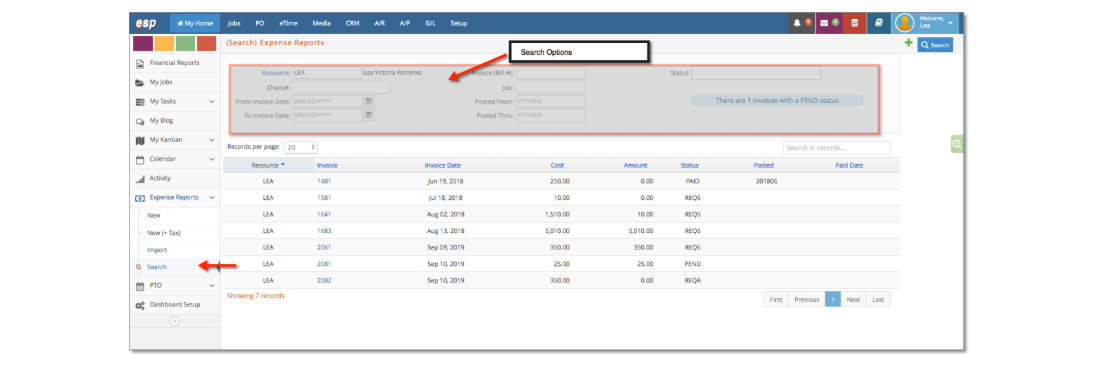
In this section, we review reporting options that will allow employees to see the reimbursement status of previously submitted expenses. Under Expense Reports, click on Search. Enter the search criteria in the header and click the blue ‘Search’ button to see the results of your search.
Status definitions
- PEND: Expense report has not been submitted for approval. Click the blue ‘Invoice’ link to continue adding expenses/receipts and then Submit for Approval.
- REQS: Expense report is being reviewed by a Supervisor. No changes can be made.
- REQA: Expense report is being reviewed by an expense Approver.
- VOUCHR: An approved Expense report/ Vendor invoice that has not been posted.
- OPEN: A posted Expense report/ Vendor invoice that has an outstanding balance.
- PAID: Expense report has been approved for payment. The Paid Date will appear when the payment or check run has been completed.