Set up Preferences for clients, jobs, time items & internal items
To use eTime effectively, every user must first set preferences related to Clients, Jobs, Time Items, and, if necessary, Internal Items. Once these preferences are established, the eTime drop-down lists will be populated based on the user’s preferences and the jobs to which the user is assigned.

💡
Time Entry security access is required. Some windows under Preferences may be unavailable depending on the setup defined by the company.
Client
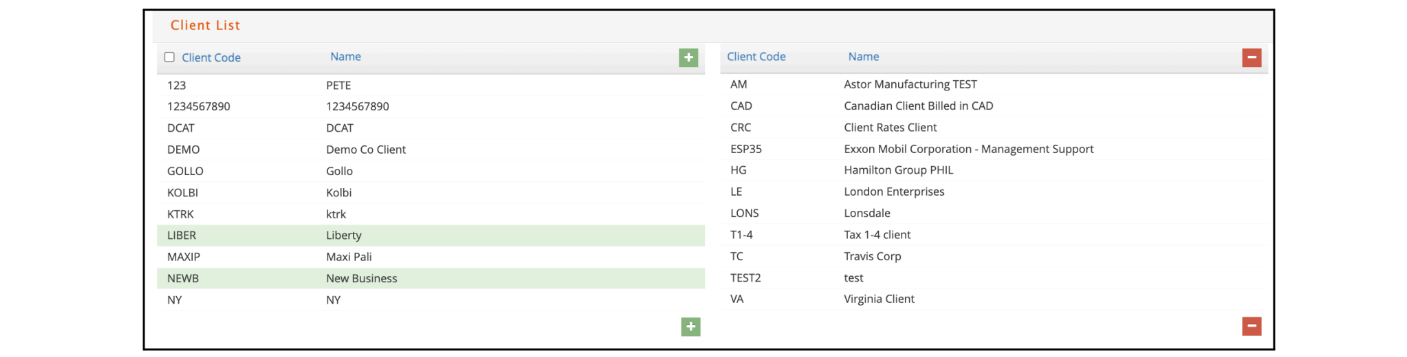
From the eTime menu, under Preferences, select Client.
- To add clients, select the Client from the left side and click the green plus sign.
- To remove clients, select the client on the right side and click the red minus sign.
- As clients are being selected, they will show highlighted in green but clicking on a client again will deselect it.
- The left side of the window includes a checkbox to select all clients to be added.
Job
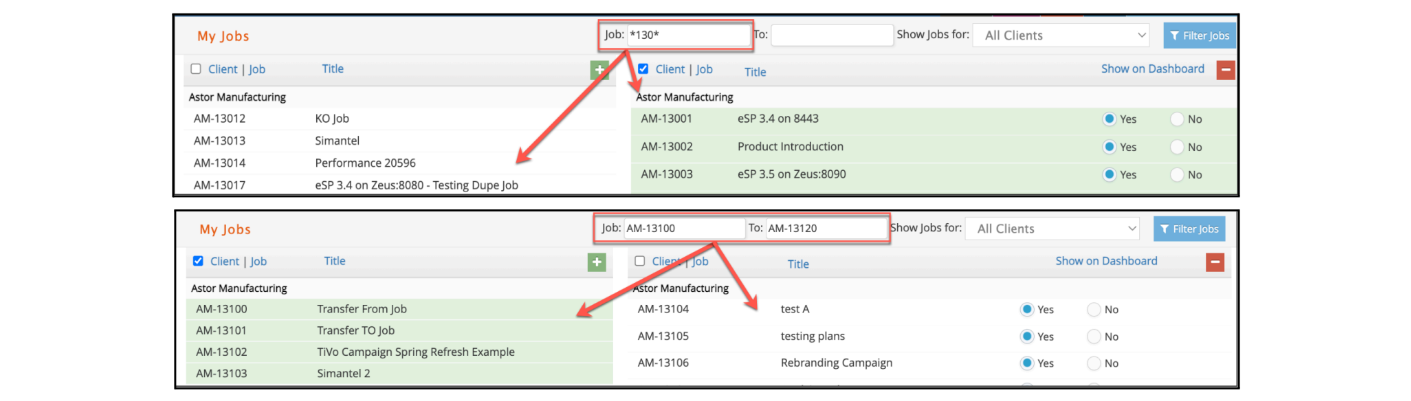
From the eTime menu, under Preferences, select Job.
- To add jobs, click on the jobs from the left side and click the green plus sign.
- To remove Jobs, click on the jobs on the right side and click the red minus sign.
- As jobs are selected, they will be highlighted in green, but clicking on a job again will
deselect it. - Both sides of the window include a checkbox to select or deselect all jobs to be added or
removed. - Use the Job and To fields to filter the lists based on a specified job# range. Otherwise, you can use the Job field to perform a wildcard search using the asterisk.
- Once a job is in your list, you can hide it on your My Jobs window by changing the Show on Dashboard setting to NO.
💡
Example, searching for a job# range of AM-13100 To AM-13120 or searching with the asterisk as 130, AM-130* or *13002.
Time
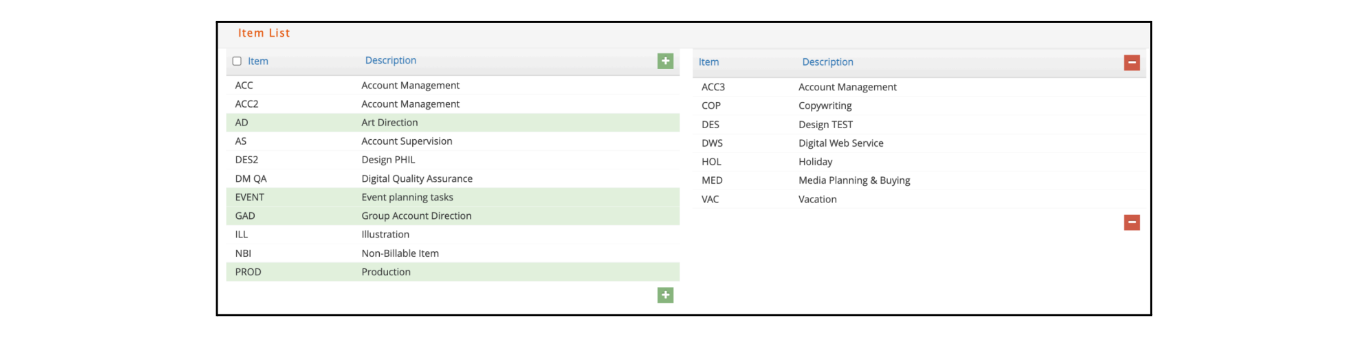
From the eTime menu, under Preferences, select Time.
- To add Items for time charges, click on the items from the left side and click the green plus sign.
- To remove items, click on the items on the right side and click the red minus sign.
- The left side of the window includes a checkbox to select all items to be added.
Internal
Select items from this window if you must enter non-time charges for internal fees or expense charges, such as color copies or CDs.
From the eTime menu, under Preferences, select Internal.
- To add internal items, click on the items from the left side and click the green plus sign.
- To remove internal items, click on the items on the right side and click the red minus sign.
- The left side of the window includes a checkbox to select all clients to be added.
