All jobs contain the ability to easily create estimates based on the items and rates you have initially setup (Please see separate ‘Setup’ user guide). After some preliminary job planning work is performed, you'll probably want to develop a formal estimate. That's simple – from the Orange project menu, select Estimate and then the Green  plus icon in the top right corner of the window.

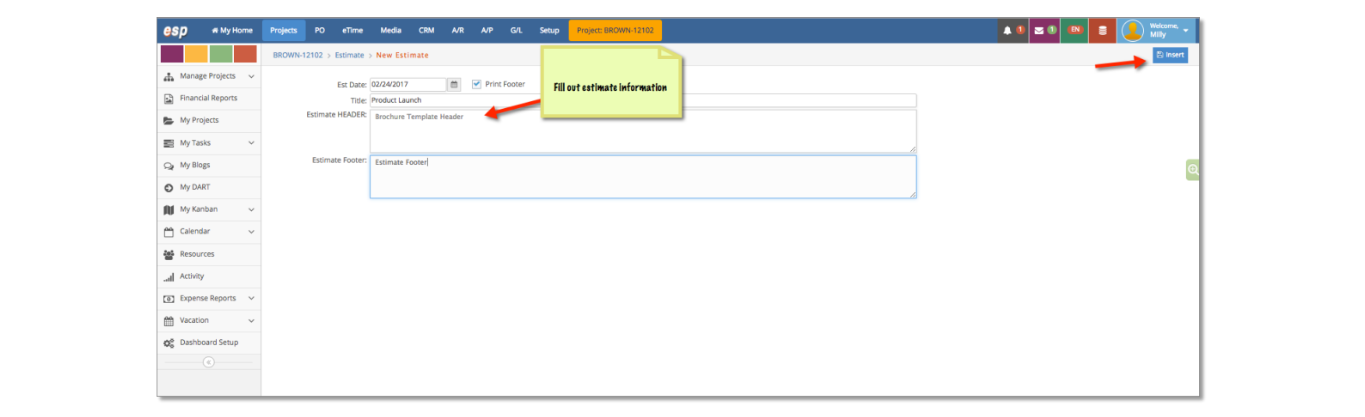
Simply fill in the details including Title, Estimate Header, Estimate Footer and click Insert.
The next window that populates enables you to enter the details of the estimate including items, quantity, amounts, line notes, etc.
Simply fill out the estimate form (L to R) using the guide below.
Line. The line number of this specific line. Line number is automatically populated based on the Print Sequence set on the item. Generally, e·silentpartner will print a detailed estimate in the order in which the line items are entered. However, if you want to change the printing order, use the Ln#.
Item. The item comes from your item list that you entered in the Setup Items section. When you enter an item code, e·silentpartner will automatically display the item's standard cost in the Net field and the appropriate rate in the Gross column, and the Tax flags (if the item is marked as taxable) based on the Job’s tax flags which default from the client setup unless you change the bill schedule tax flags for the Job.
Description. The first 11 characters of the item description for the item. This comes from the Items section of your database.
Unit(s).
- DAY. # of hours in a day x item’s rate.
- Hrs. # of hours x item’s rate
- OT. (Overtime) = 1.5 x item’s rate
- DOT. (Day Overtime) = 2 x the regular item’s rate
- Units Qty. The number of units of this item that you estimate will be needed on the Job.
- Qty/Hrs. The total of units or hour quantity.
- Cost. Extracted from the item's cost record. The Net cost per unit.
- MU. The mark up percentage set at the item. This can be added or overridden at the estimate level.
- Gross. Also extracted from the item's record. The specific value is dependent on the rate schedule you set for this Job. This value can be overridden. E.g., let's say the item rate is $100.00 but this client will not pay more than $80.00. Simply type $80.00 in the value field. This new price is specific to this Job only.
- Total Cost. The net cost of each item multiplied by the quantity.
- Total Gross. The gross cost of each item multiplied by the quantity.
- Tax. (T1, 2, 3, 4) The tax flags are extracted from the client record when a Job is added, i.e. YES, if a tax indicator for the client was YES; NO, if the tax flags for the client were NO and compared to the tax flag set up in the item record. Some rules apply.
If a client is tagged "taxable" and the item is tagged "non taxable", the tax flag set up in the Job Estimate window for this item is NO. If a client is tagged "non taxable" and the item is tagged "taxable", the tax flag set up in the Job Estimate window for this item is also NO. If the bill schedule for this specific Job has been changed from the defaults set at the client, the Job’s tax flags will be used.
- Notes for Line Item. An optional field that allows you to enter additional information about each line item. The information you enter here will print on the estimate and the client invoice if Print Line Notes is selected in the printing selection window.
- Title. The title of the estimate.
- Estimate Header. A field where you can enter descriptive information about the specific estimate. This description is printed on the client estimate and, optionally, on the client invoice.
- Estimate Footer. The estimate footer check box must be checked for an estimate footer to print. By default, when adding new estimates with e·silentpartner, we check the box. If there is an estimate footer set on the estimate, it will print on the version selected in the printing selection window. If there is no estimate footer set on the estimate, the system first looks to
Setup > Client > Preferences > Estimate Footer. If that is populated it will pull from there. If it is not populated, the system will look to GL > Setup > Company > Estimate Footer set for the Company and pull from there. - Estimate Icons:
Clicking the magnifying glass icon will display a popup list of items.
Clicking the red circle will delete the line.
Clicking the red X will delete the entire estimate.

After entering data, your estimate will look something like this.
Now, click the Blue ‘Save Changes’ button.