After completing the initial CSI account setup, we will review the necessary steps to set up CSI functionality in e·silentpartner, and properly perform vendor payments and reconciliation.
Step 1: Company Administrator Setup
For e·silentpartner to automatically transfer vendor payment files to CSI Paysystems via SFTP (secure file transfer protocol), you will need to set up some information for the user at your company that will act as the Company Administrator in CSI Paysystems. Administrator permissions allow the user to have full access to all features (upload/approve payment files, add/edit vendors, view reports, and add/edit/delete users).
To enter the appropriate information, follow these steps:
- Go to G/L > Setup > Company. (You will need to have security access to this section).
- From the Red Options button, click to select CSI.
- Click the gray Edit button and enter details in the appropriate fields.
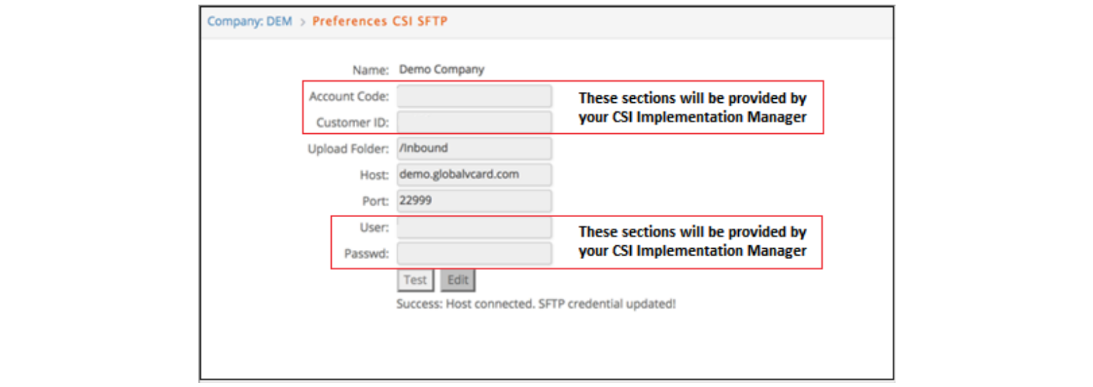
- Account Code will be provided by CSI and used as part of the credentials required for sending files.
- Customer ID will be provided by CSI and used as part of the credentials required for sending files.
- Upload Folder is provided by CSI. It is the location where files being sent to CSI are located. Each client will use a different location.
- Host and Port will be provided by CSI.
- User and Password will be provided by CSI. This information will be different for each client.
- Click the Test button to test the SFTP connection. If successful, you will receive a message, letting you know the host connected and the credentials are updated.
Step 2: G/L Account
You can use your current accounts payable (Current Liability) account just as you would for all of your vendors. Some clients may have one AP account for Media, and one for Production. No additional changes are needed.

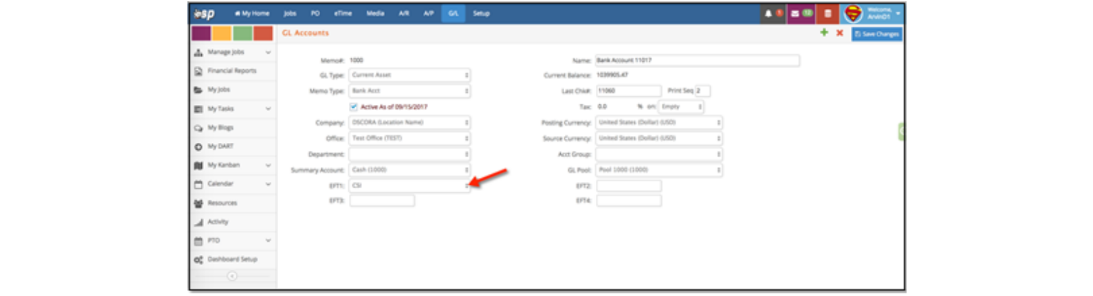
Step 3: Bank Account Setup
You will need to set up your bank account to associate it with and reconcile against all CSI payables. To do this, follow these steps:
- Set up a new account or search in your existing Chart of Accounts to find the account that will be associated to the CSI payments. Then, select CSI from the drop-down in the EFT1 field.
- Click Save Changes.