This section of the guide describes the workflow of paying vendors and reconciling bank accounts using both e·silentpartner and CSI Paysystems.
Step 1: Prepare and Submit Payment File via e·silentpartner
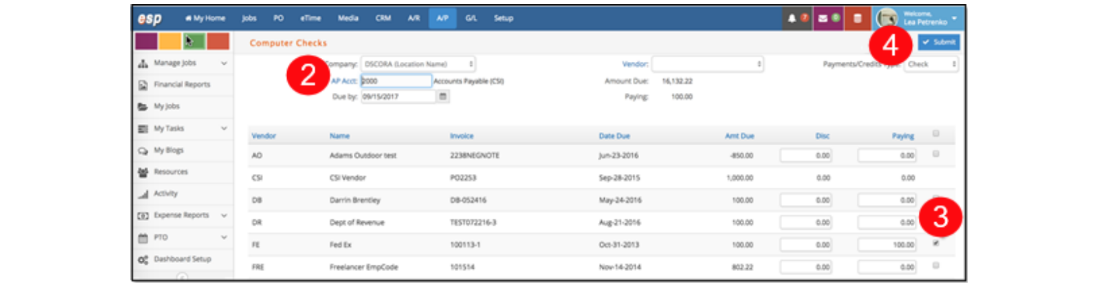
Once all your vendors are set up in CSI Paysystems, you will pay vendors in same manner you use to perform normal check runs. However, instead of checks being printed, a file is sent to CSI electronically. To prepare and submit a payment file, follow these steps:
- Go to A/P > Computer Checks.
- Select the AP Acct.
- Click to check the vendors you are paying using the checkbox(es) in the far right column.
- Click Submit.
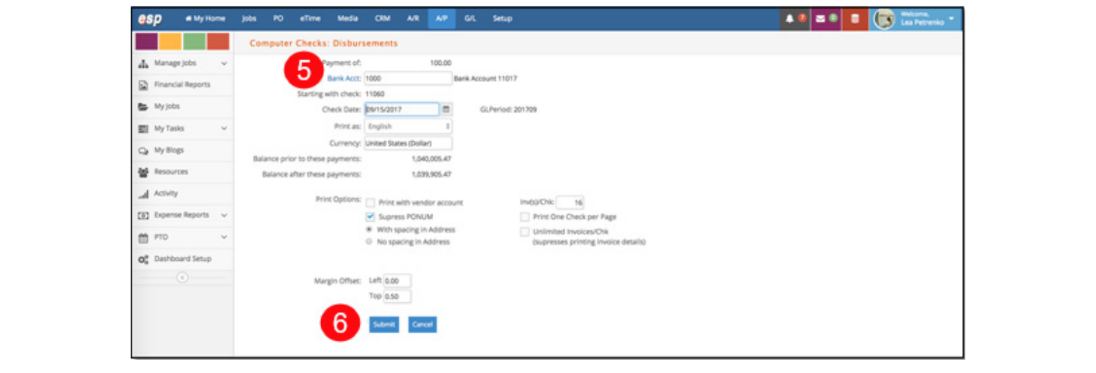
- The Computer Checks: Disbursements screen opens. Select the Bank Acct from which the funds will come from (the bank account set up with CSI), the Starting with check number, and Check Date.
- Click Submit. For your records, e·silentpartner will print a check register in a new window.
- If the check information is correct, navigate back to the current window and click Yes, Post Check(s).
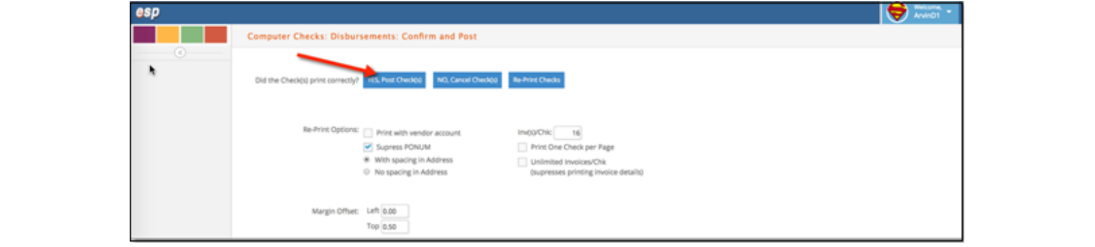
- On the next screen, you will see a JE#.

- In approximately 15 minutes, you can go to https://globalvcard.com/login/auth in your web browser to sign in to CSI Paysystems and verify that information was transferred correctly.
Step 2: Pre-fund Your Account via CSI Paysystems
You are required to fund your CSI Paysystems account for all virtual card payments prior to payments being sent to the vendor. If you will be funding payments after submitting a payment file to CSI Paysystems, then the SFTP
credentials used to send the file to CSI must be that of a user with uploader permissions only.
Most CSI customers pre-fund their payments by doing a bank transfer to deposit money into a CSI account specifically earmarked for CSI Paysystems payments. You can also use the CSI’s account funding feature, which allows you to associate your business's bank account with CSI Paysystems so that as you upload payment files, you can rely on CSI Paysystems to "pull" the funds from your bank account automatically. This saves you the step of having to call your bank or log in to CSI Paysystems to initiate a bank transfer.
Step 3: Review and Approve Payments via CSI Paysystems
To review and approve payments in CSI Paysystems, follow these steps:
- Go to https://globalvcard.com/login/auth in your web browser and sign in to your CSI Paysystems account.
- CSI Paysystems will begin processing the payment file, and if its formatting is accurate and the data complete, it will submit the file to your approval workflow (if one has been created for you).
- CSI Paysystems will send an email alert to anyone responsible for reviewing or approving the file. Those users will be required to sign in to CSI Paysystems and approve the payments.
Step 4: Decision and Release Payments via CSI Paysystems
When the payments have been reviewed and approved, CSI Paysystems will decision the payments based on the payment method that each vendor has agreed to accept and create the payments. CSI Paysystems will also send email notifications to vendors for their payments.
Step 5: Receive Reconciliation Report from CSI
CSI compiles and emails you a periodic reconciliation file of all virtual card transactions.
Step 6: Reconcile Payments via e·silentpartner
The reconciliation process for CSI-related transactions is similar to the regular AP reconciliation process. (Please refer to our e·silentpartner Accounts Payable documentation for more information.)
To upload your file and perform reconciliation, follow these steps:
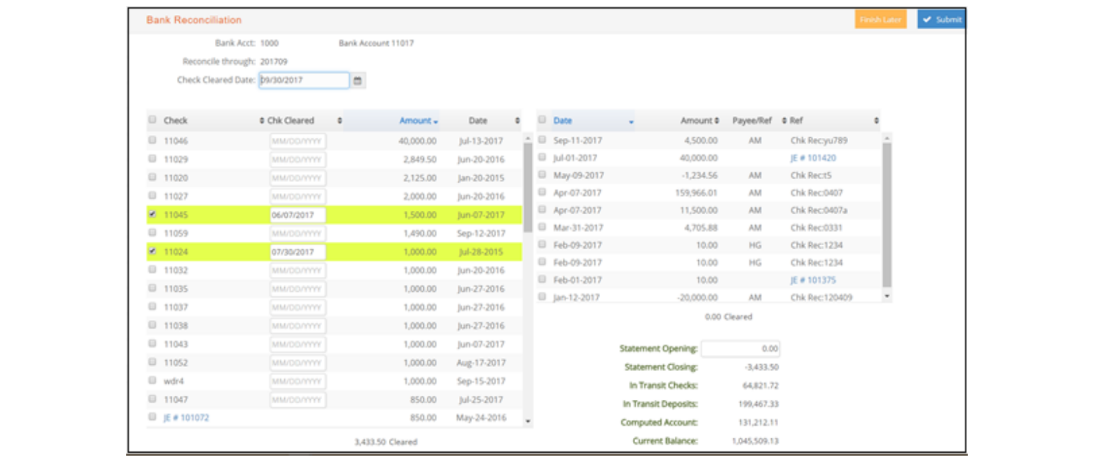
- Go to Accounts Payable > Reconciliation.
- Click to select the company, bank account, and fiscal period.
- The system will prompt you if you have a CSI file to upload. Click OK to continue.

- Once uploaded, CSI-processed transactions will be automatically checked to be cleared and will show a Cleared date (as per the CSI file).