
As mentioned earlier, you will need to add a new job to the database to set up the estimate template you will use for future Social Media Jobs.
Go to Jobs > Jobs and click on the Orange plus button. Fill out all * required fields,
Including your Client ‘Template’ and your contact Tem Plate. Set the job status to ‘Filed’ and select the appropriate ‘Bill At:’ rate (i.e.: Rate 1,2,3 or Client Rates). If you select Rate 1, the Rate 1 costs, items, and markups will flow into your estimate template. If you set up a subsequent job as a Rate 2 job, the rate 2 costs, item rates, and markups will be automatically replaced in your starting template.
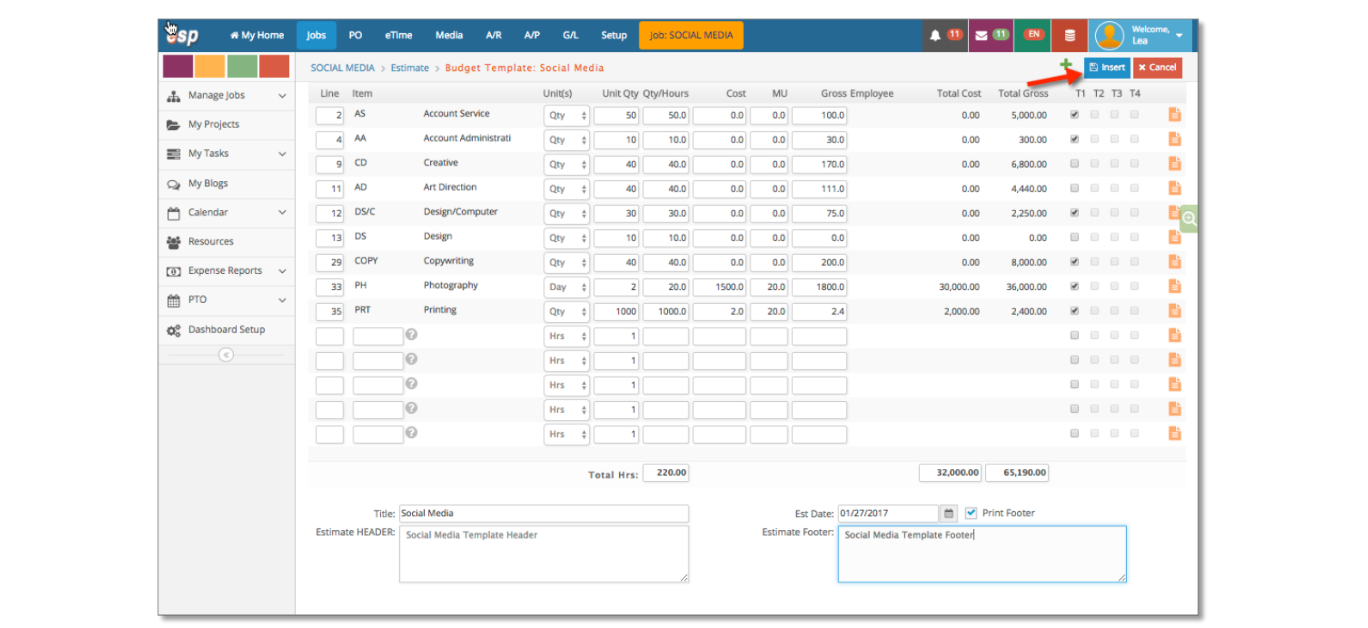
From the Orange Job menu, select estimate and a blank estimate window will appear. Click the Blue Insert button to add the estimate.
Select all the items, quantities, and markups associated with an estimate for this type of job. You may also enter default copy into the line notes by clicking on the orange notes icon. You may also want to enter default copy for the estimate Header and Footer.
Using the Template for Live Jobs

First, add a new Job to the database and fill out the required fields. Make sure you select the Job Type field in order to use the estimate template you have previously set up.
From the Orange project menu, select Estimate.
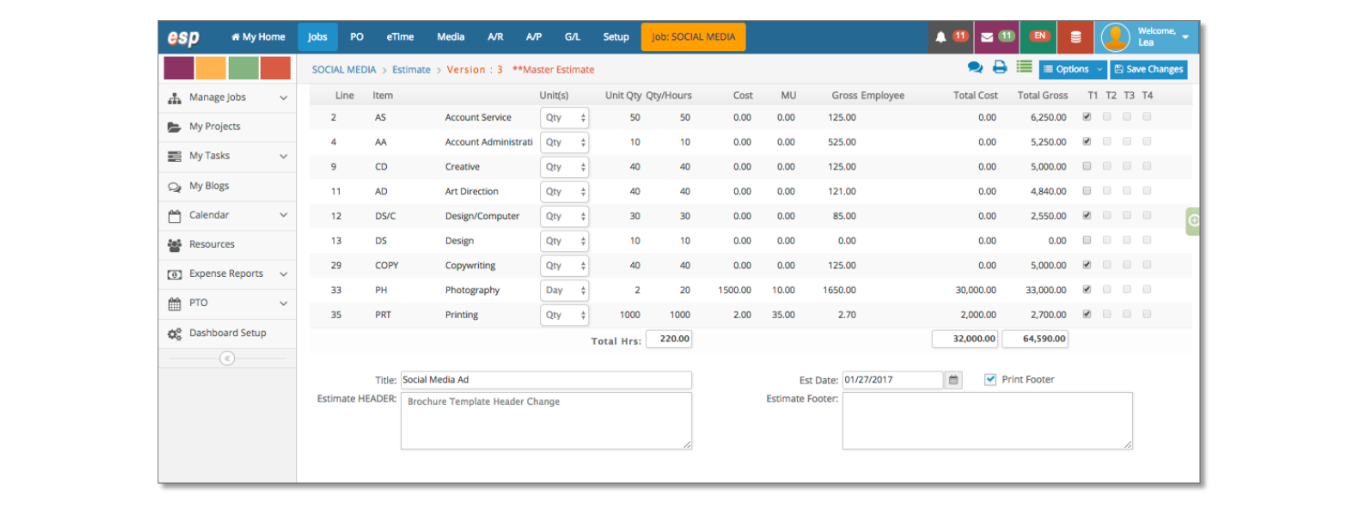
The template you set up originally will flow into the job and you can edit line items according to the specifics of a job.