Vendor setup for ACH payments, Employee setup for ACH payments, GL Account setup as a source for ACH payments, Creating ACH file, Create NACHA File
You can decide to pay vendors through ACH by downloading a payment file from e·silentpartner and then uploading the file to your bank to electronically issue the payments.
Here are the details for setting up ACH and creating the NACHA File:
Vendor setup for ACH payments
Go to Setup > Vendor. You can either edit an existing vendor or add a new vendor, if applicable, to add the ACH disbursement information.
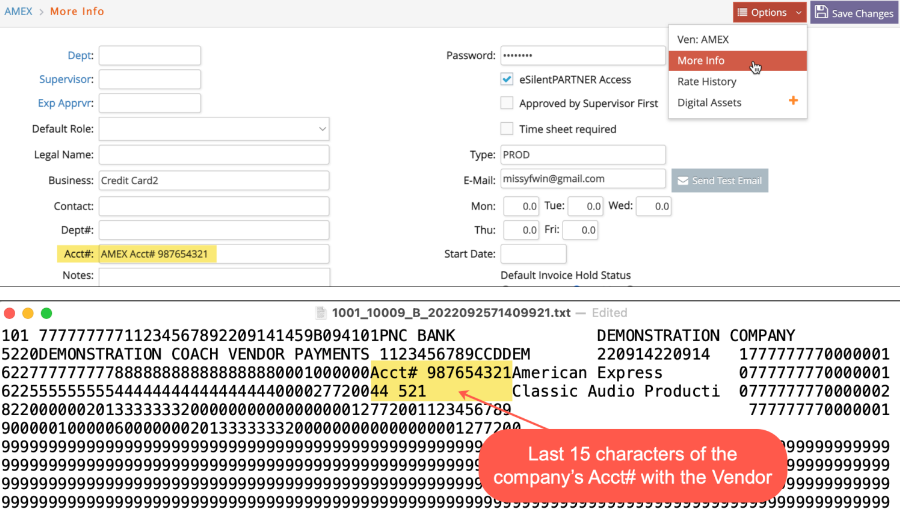
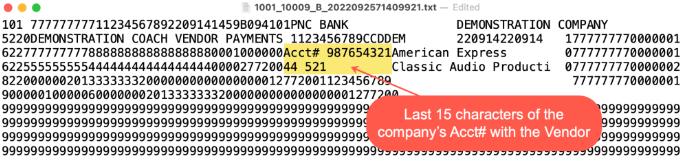
In the main Vendor window for each vendor, you can optionally assign your account# with the vendor to export to the ACH file. This # will often show up on bank statements for ACH transactions depending on the bank. Only the last 15 characters of the account number will export to the file since that is the maximum allowed on a NACHA file.
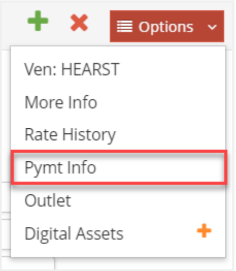
Next click on  the menu on the upper right and select ‘Pymt Info’:
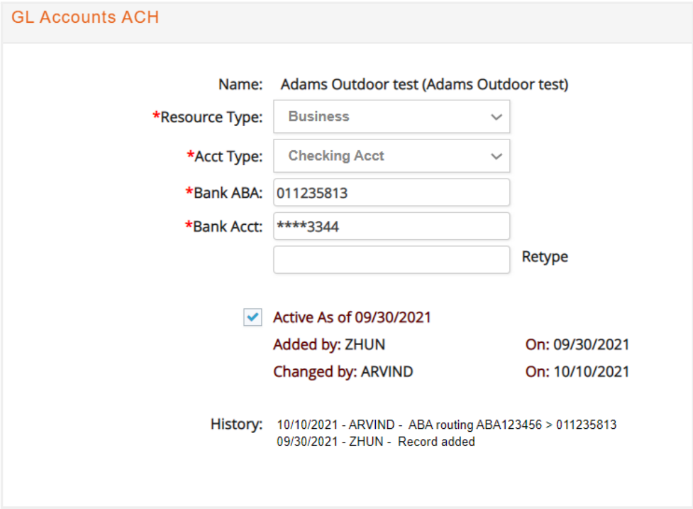
In this window, you will have to enter all the required information the banks require for a payment transmittal:
- Resource Type: You can select either Individual or Business. This is very important as the
bank will need to know which type of account your vendor has. - Acct Type: You can select between Checking or Savings account.
- Bank ABA: The standard 9-digit bank routing number.
- Bank Acct: The number of your vendor’s bank account. In the field ‘Retype’ the system will require you to retype the bank account number (not copy-paste), to confirm the number is correct.
You will then have to activate the checkbox next to ‘Active As of’ to make this payment information available when running the ACH file.
e·silentpartner will keep records of who added the information as well as who modified any data and make it visible at the bottom of the Payment Info window:
Employee setup for ACH payments
The same process applies to set up payment information for employees, except you go to Setup > Employee:
In the Employee window, click on the  menu on the upper right and select ‘Pymt Info’ to enter the required information and click on the checkbox next to ‘Activate As of’ to activate the employee’s payment information.

GL Account setup as a source for ACH payments
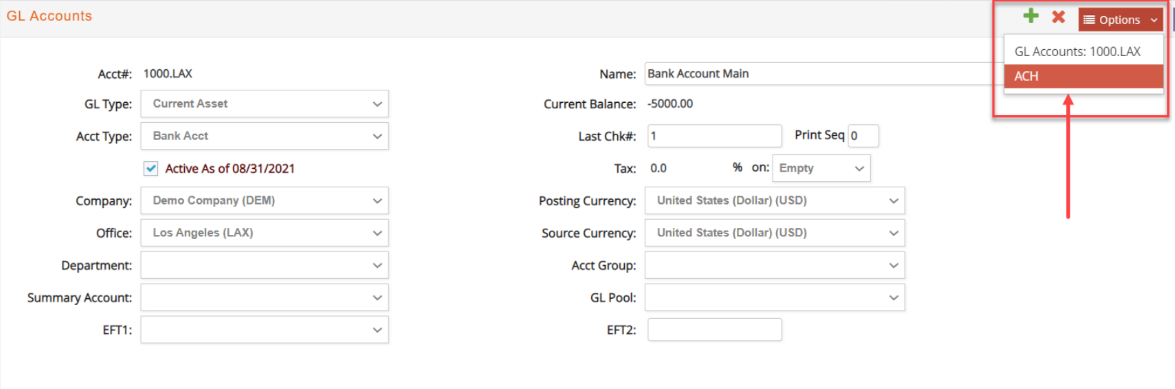
Under G/L > Setup > GL Accounts, find the bank account you want to use as the source of your payment transmittal, or add a new one if needed.
In the GL Account window for a particular bank account, click on the  menu on the upper right and select ‘ACH’:
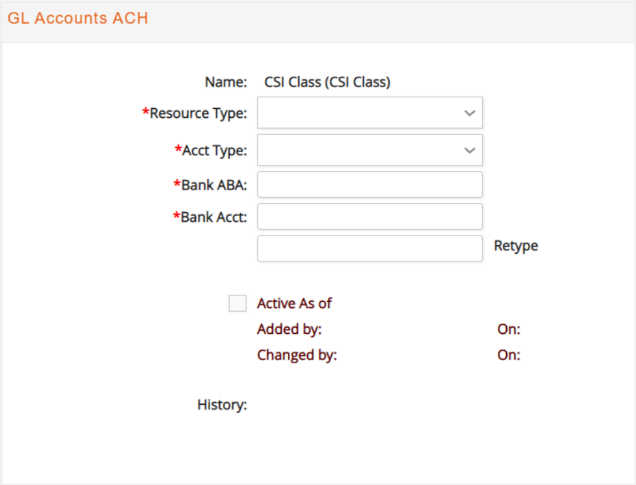
In this window, you will have to enter all the required information needed to process ACH payments from your bank account:
- Bank ABA: The standard 9-digit bank routing number.
- Bank Name: You can select between Checking or Savings account.
- Last Check#: Set the last check number for that bank account.
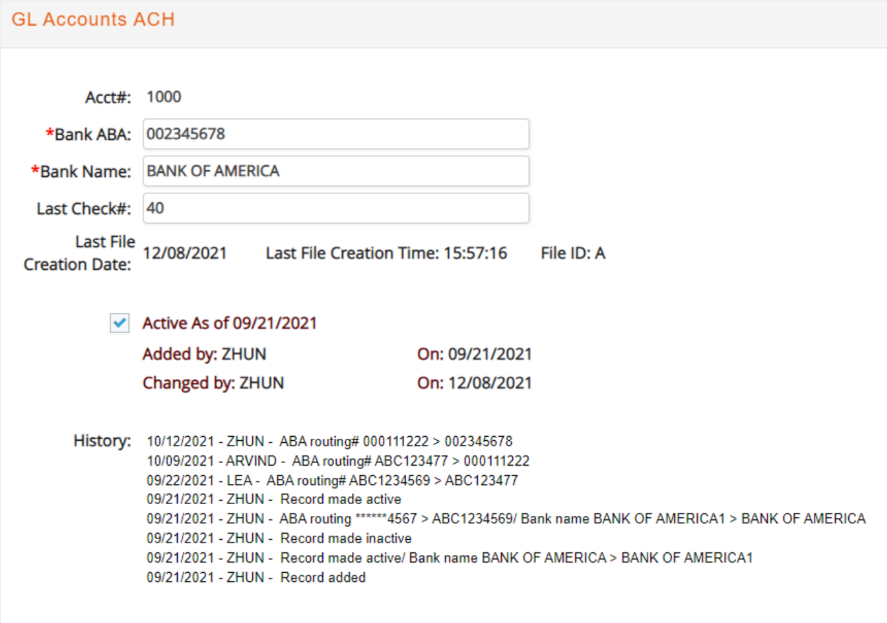
The system will also keep record of the date and time in which the last ACH file was created, as well as the File ID. This File ID will tell you how many files have been created on that same day.
The ACH process allows only 36 transactions per day: the first transaction will be named ‘A’, going through ‘Z’ and then from 0 to 9.
Creating ACH file
Once you have all the payees and GL bank accounts set up for ACH, you can create your transaction file.
Go to A/P > Computer Checks. The process is the same as with regular computer checks, except that in the ‘Payments Type’ field you should select ‘ACH eCheck’. Additionally you can activate the option ‘Do not show non-ACH vendor/employee’ to make sure you are only selecting vendors that have ACH payment information.
When running ACH eChecks, only invoices whose vendors have all the necessary ACH information properly updated will show a checkbox to be selected. If there is no checkbox, please review the vendor as there may be missing information needed to process the payment
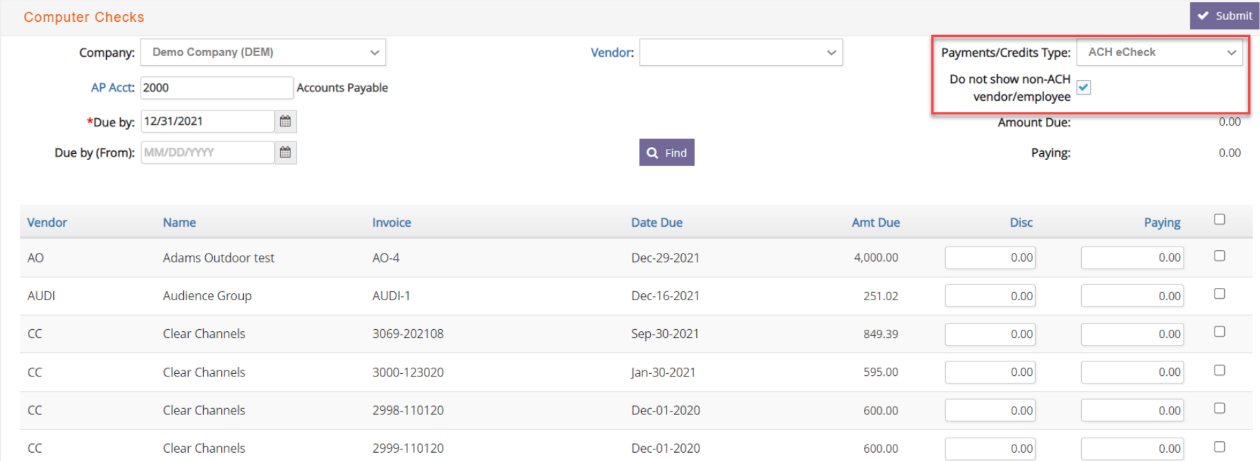
Select the invoices you want to include in your NACHA file and click ‘Submit’.
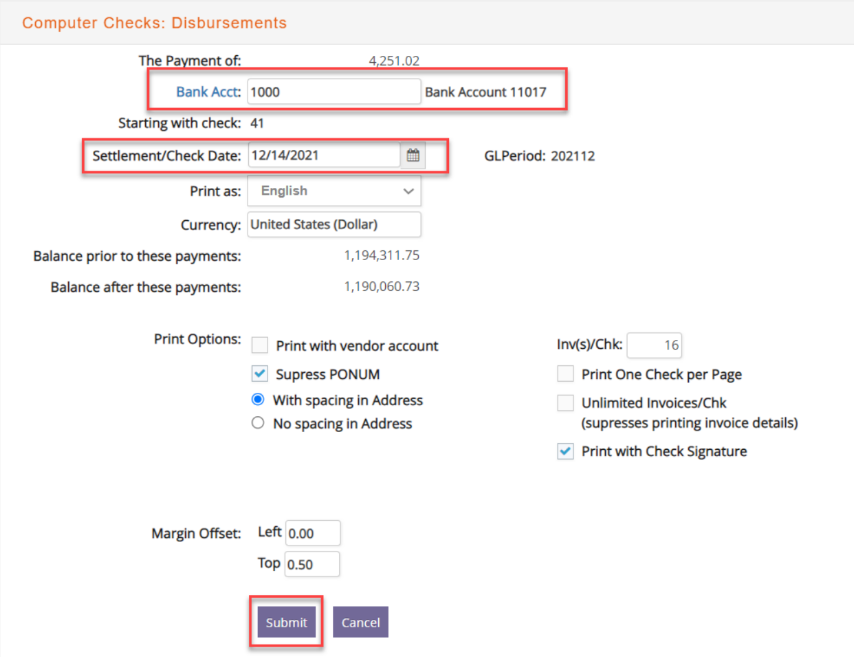
In the following window, select the bank account you will use for the ACH payment. Only Bank Accounts with ACH information set up will show up for selection.
Also select the Settlement Date. This date is the day in which you will upload the NACHA file into the bank portal. If these dates do not match, you will not be able to upload the file.
The rest of the options are the same as for the regular check payments. Select as needed and then click ‘Submit’ to post the checks and generate the NACHA file.
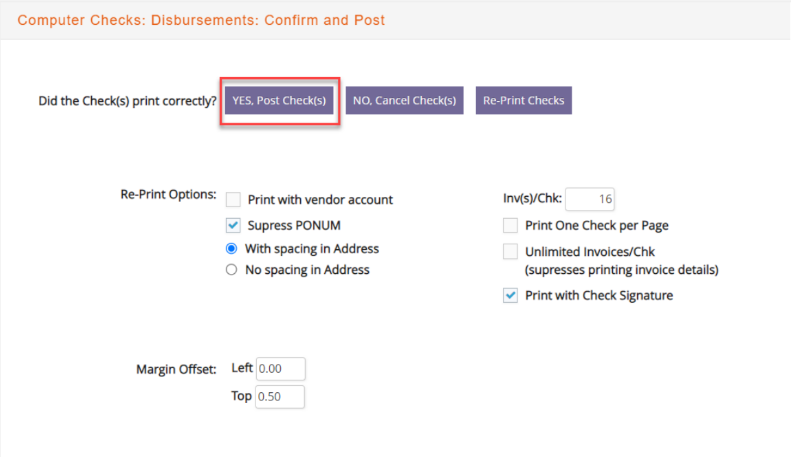
After you click ‘Submit’ the checks will print in PDF format and be displayed in a different tab on your browser. Also, the new window displayed will ask if you want to post the checks. If you want to continue click on ‘YES, Post Check(s)’:
When posting the checks, the system will automatically download the EFT File (in xls format) and the ACH File (in Text format). The ACH File is what you will upload into your bank portal.
Additionally in the following window you will have the option to download the files again, print the check transmittal, print the check register, print the JE or Notify vendors.
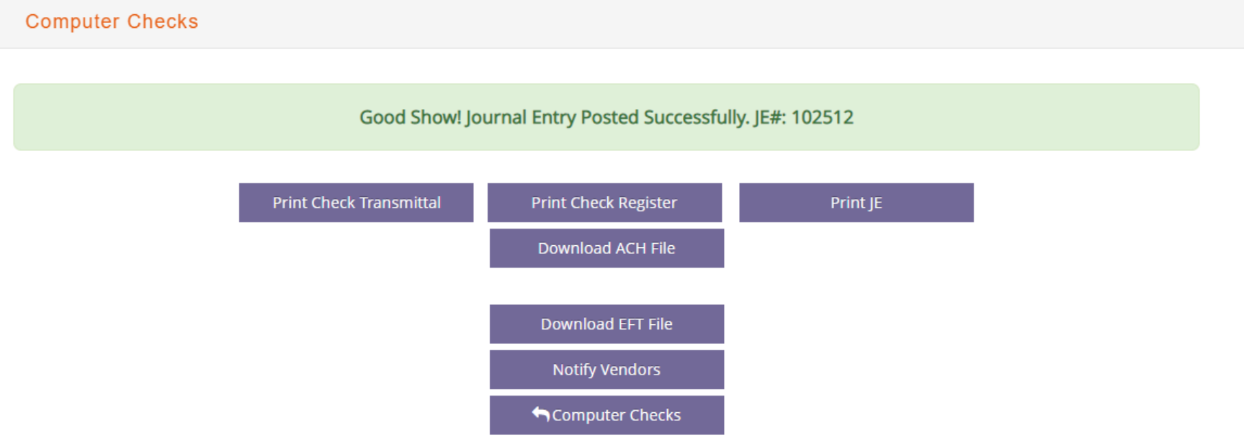
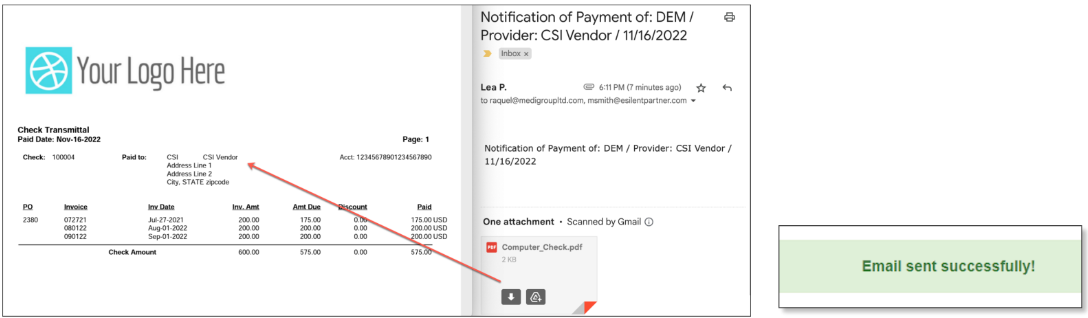
If you select the option to notify vendors, a notification of payment will be sent to the email address set up in the system for each one of the vendors in the ACH File.