Set up and print 1099 and 1096 information, on IRS approved forms, using e·silentpartner.
ON THIS PAGE
- Overview
- Company Tax ID Set up
- Vendor 1099 Setup
- Printing 1099 reports
- 1099 and 1096 Alignment Issues
- Printing Tips
- Summary
Overview
- Annual 1099 and 1096 reports generated by e·silentpartner are formatted for printing on inkjet and laser printers using IRS-approved 1099 and/or 1096 forms. These forms may be purchased at most office supply stores or ordered through the Internal Revenue Service per the instructions at this link.
- Do not print the 1099 or 1096 report directly from your browser as the alignment will not be correct. For correct printing, please follow the instructions within this guide.
Company Tax ID Setup
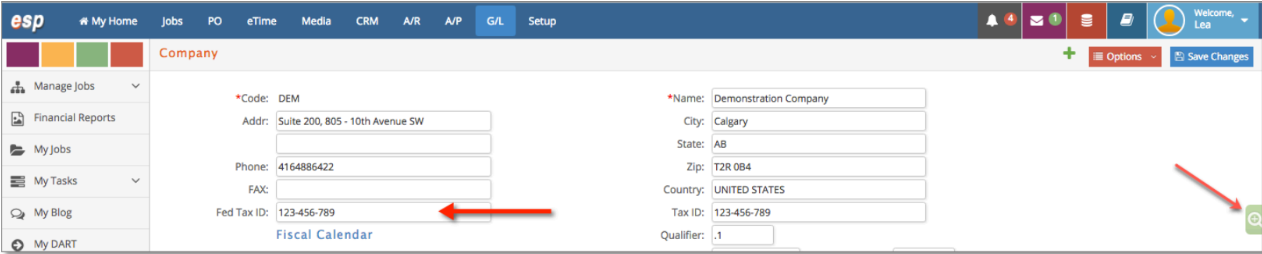
- To enter your company's Federal Tax ID # so it prints on the 1099s, go to GL > Setup > Company, then find the company by choosing from the green icon on the right side of your browser page (
 ). Then enter your Federal Tax ID# and save changes (
 ).
).
Vendor 1099 Setup
● When creating a new vendor at Setup > Vendor > +, we will be creating two vendor addresses concurrently. After the new vendor is inserted, each address can then be edited separately. The left-hand column is where checks are sent. The 1099 report pulls data, including the vendor’s mailing address, based on the right-hand column (1099/ Alternate Address) if 1099 is checked.
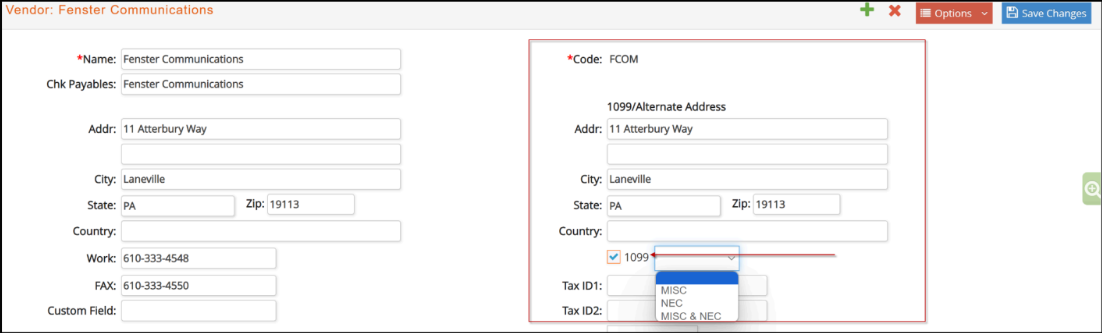
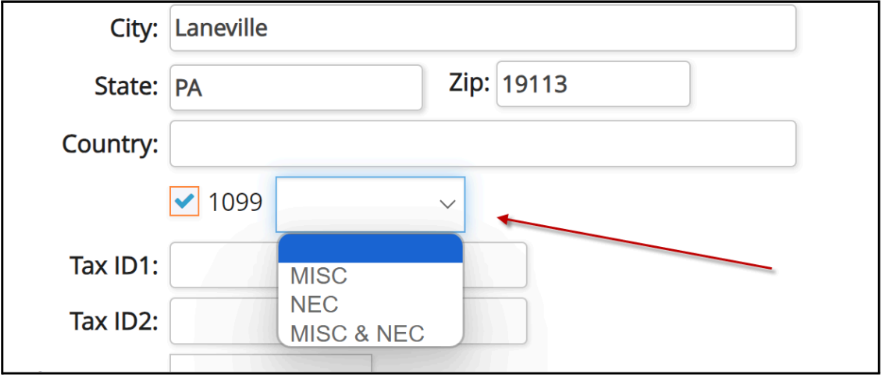
- If 1099 is selected, a vendor can be further defined as NEC (Non-employee
Compensation), MISC (Miscellaneous Compensation) or BOTH. This information will be later used when generating 1099 reports.
Printing 1099 Reports
- You can print 1099s within e·silentpartner from:
AP > Reports > Print 1099 (1096).
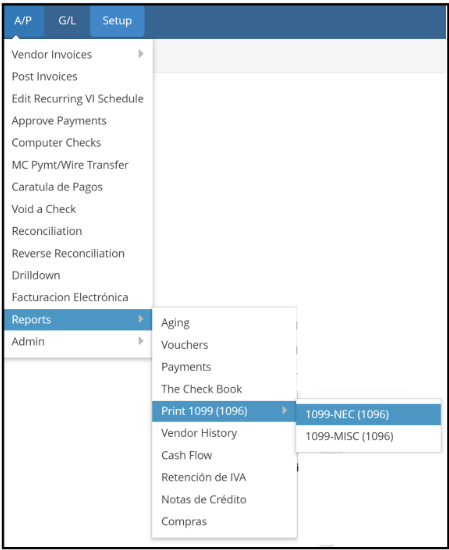
- Upon selecting this Report (NEC or MISC options), you will be presented with a data entry screen:
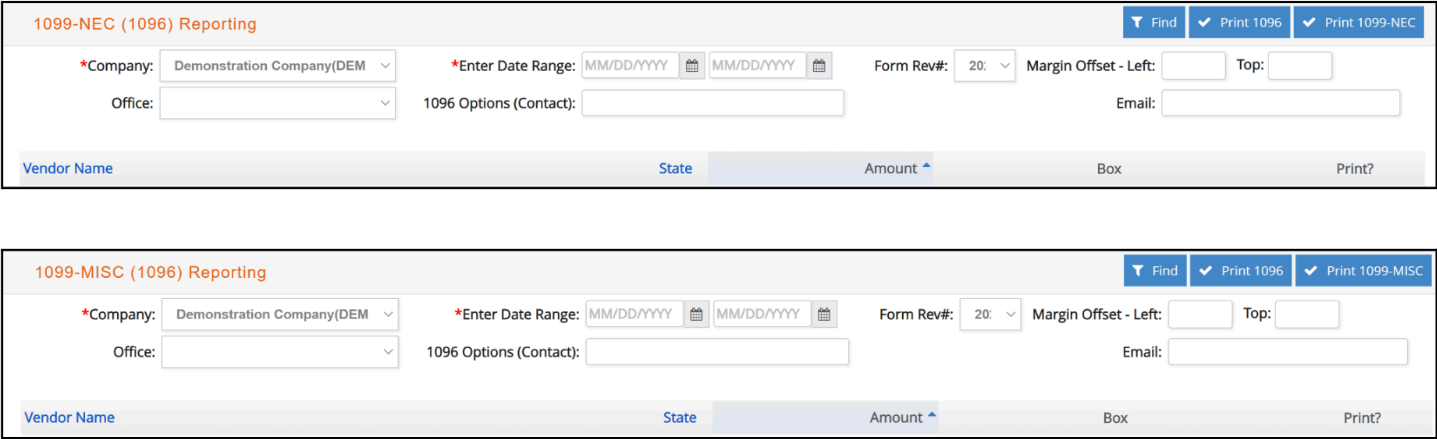
- To obtain a listing of vendors, enter the date range such as ‘January 1, 2023’ to‘December 31, 2023’.
- Before printing this report, regardless of the year you are printing for, make sure to select the right Form Revision # from the dropdown list, to print on the 2022 IRS 1099 forms or 2024 IRS 1099 forms (Form Revision #2024 will pre-populate the dropdown by default).

The system will prompt you to make sure you have selected the right Form Revision: click OK to continue, Cancel to stop the process.

- These reports have also been enhanced to only bring those vendors that are either NEC (1099-NEC), MISC (1099-MISC) or BOTH (1099-NEC and 1099-MISC). Those 1099 vendors that are NOT set up as NEC, MISC or BOTH, will continue to show up in both reports.
- Once your selection criteria is complete, click ‘Filter’: 1099 Vendors that were paid $600 or more will be displayed.

- For 1099-NEC, the report window drop-down defaults as 1 Non-Employee Comp; 1099-MISC defaults to 3 Other Income, but you can choose the income type to print from the Box dropdown.
- The Amount field defaults to the amount paid for the date range for the Vendor but can be overridden if necessary.
- For any Vendor that you do not want to print, uncheck the ‘Print?’ checkbox.
- Once you have the list of vendors selected that you want to print a 1099 report, select (Print 1099-NEC) or (Print 1099-MISC). Your .pdf report will be generated in a new browser tab from which you then save this report to your computer for further use.
- Additionally, if the database is set up to Use Office Accounting, then the 1099-NEC, 1099-MISC and corresponding 1096 formats will be printed with the Office Tax information.
- Please also note that two user fields, Contact and Email, are also in the reporting window for the printing of the 1096 report.

- The 1099-MISC and 1099-NEC reports are enhanced to print with the updated 2022 IRS 1099 forms and 2024 IRS 1099 forms. Make sure to select the correct Form Revision # that matches the form which you are using.

- From e·silentpartner, save each of the generated 1099 and 1096 reports to your
computer. - Open the reports using Adobe Reader.
- From within Adobe Reader, and before printing, ensure that the printing option ‘Size Option: Actual Size’ radio button is selected. This is an important selection as the default reports prepared by e·silentpartner are designed to print correctly using this option. Any other option may need manual adjustments to align the fields correctly.
- We still recommend all forms be printed at Scaling 100% without any options to “shrink” or “fit to page”.
- Here is a screenshot for this option:

1099 and 1096 Alignment Issues
- If you are printing 1099s for both MISC and NEC, then please note that e·silentpartner will check the appropriate box indicating the type of form being filed, such as Box 96 for MISC or Box 71 for NEC. Additionally, Form 1096 requires a signature, title, and date before mailing to the IRS.
- Some printer drivers may cause the 1099 or 1096 form to be printed slightly out of alignment. Should the printing of the 1099 and 1096 reports require some minor alignment adjustments, you can do so by entering left and top margin offsets from the initial 1099 report window:

- To make alignment adjustments left or right, enter a positive or negative value in the ‘Left’ box in inches, i.e. 0.1 will shift the printing 0.1” to the left and -0.1 will shift the printing 0.1” to the right.
- To make alignment adjustments up or down, enter a positive or negative value in the ‘Top’ box in inches, i.e. 0.1 will move the printing 0.1” down the page and -0.1 will move the printing 0.1” up the page.
- These settings may require some trial and error to get correct but once they are set it should work properly for your specific printer.
Printing Tips
- You may print the 1099s as many times as necessary or desired.
- It is recommended to print some sample 1099s on approved IRS forms early in January and well before the January 31 deadline to ensure they all print properly.
- After following the steps within this guide, should you have any printing issues please submit an eForum support ticket and include a sample or screenshot of the report to assist in troubleshooting.
Summary
Should you have any questions, please post an issue at your eForum account at
https://support.esilentpartner.com/